Rubbermaid 1800384 User Manual
Page 5
13
Green
Green
White
White
Black
Black
14
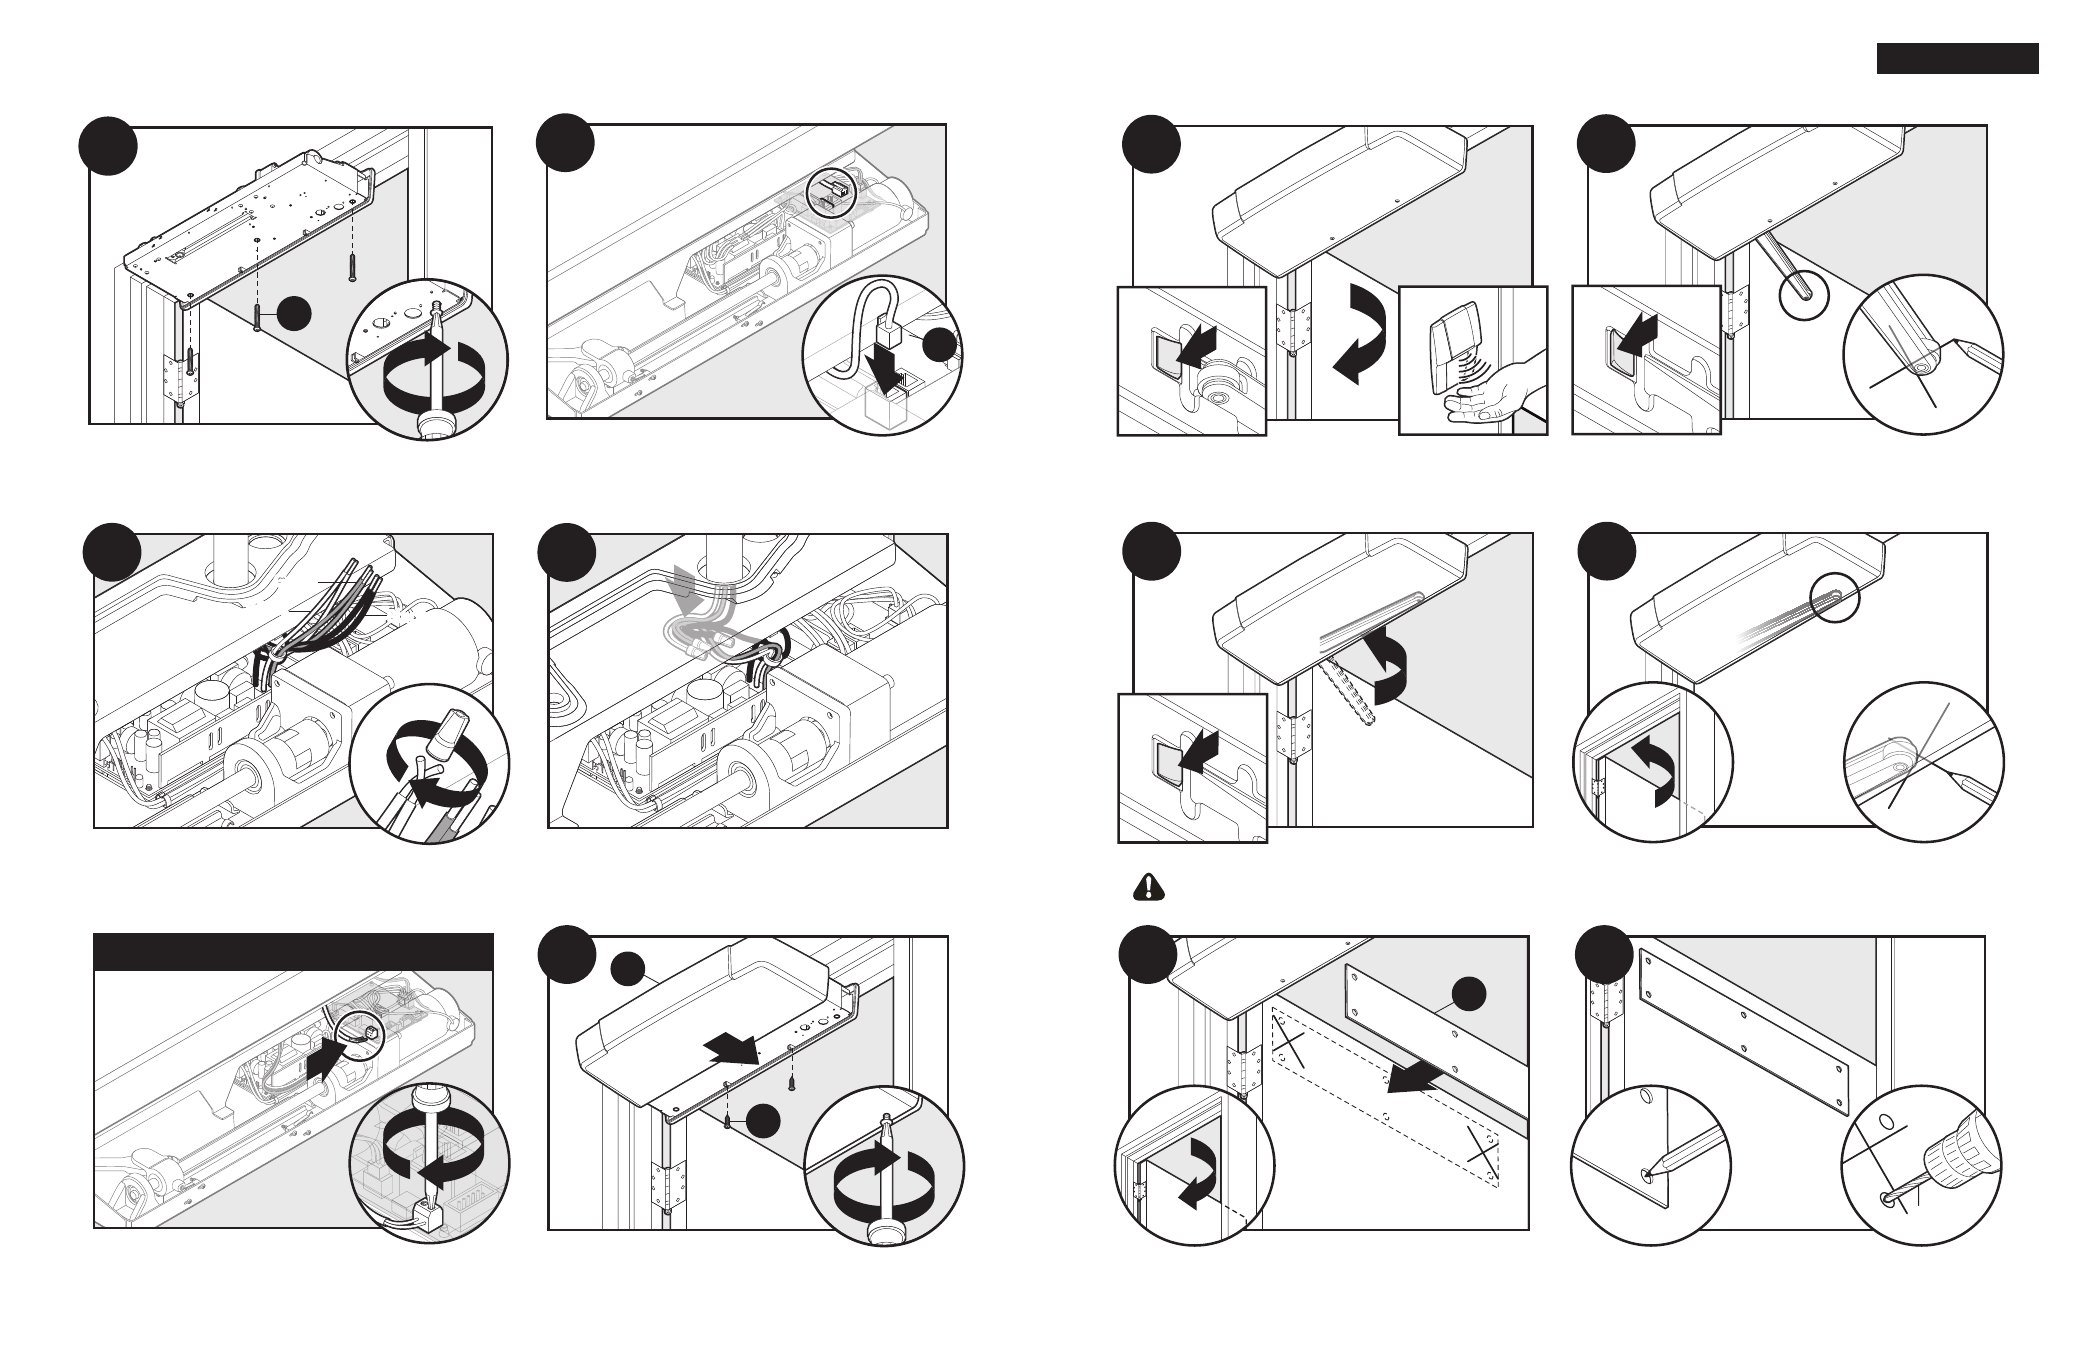
1
Electric strike plate wiring option
2
1
15
2
L
D
Insert electric strike wires into screw terminals on control
board and tighten.
1
16
3
2
7
17
2
1
19
2
1
2
20
1
F
When the arm reaches the extended position, turn the unit
off. Mark an X where the roller arm contacts the door.
Close the door. Mark another X where the roller end of the arm
contacts the door in the closed position.
Open door. Center roller plate over X marks vertically and
horizontally.
8
ENGLISH
Slide main cover over main unit. Attach main cover to main
unit with two screws. CONNECT POWER.
11
I
2
18
1
Turn the unit on and the arm will retract.
Keep hands and tools clear of retracting arm.
21
1/8
”
Mark holes. Drill pilot holes with (1/8”) drill bit.
Hold door in 90˚ position. Turn the unit on using switch in
front of main unit. Wave hand under front of sensor.
12
E
Plug sensor wire into one of the ports on control board.
Installation
Connect in-coming power wires to pigtail wires in unit.
Hold unit up to door jamb and install 3 mounting screws into
frame.
Store the connected wires back in the unit away from moving
parts. Avoid excessive extra wiring inside the unit.