Installing the unit, Removing the transport screws – Audiovox PAV-6CDP User Manual
Page 6
5
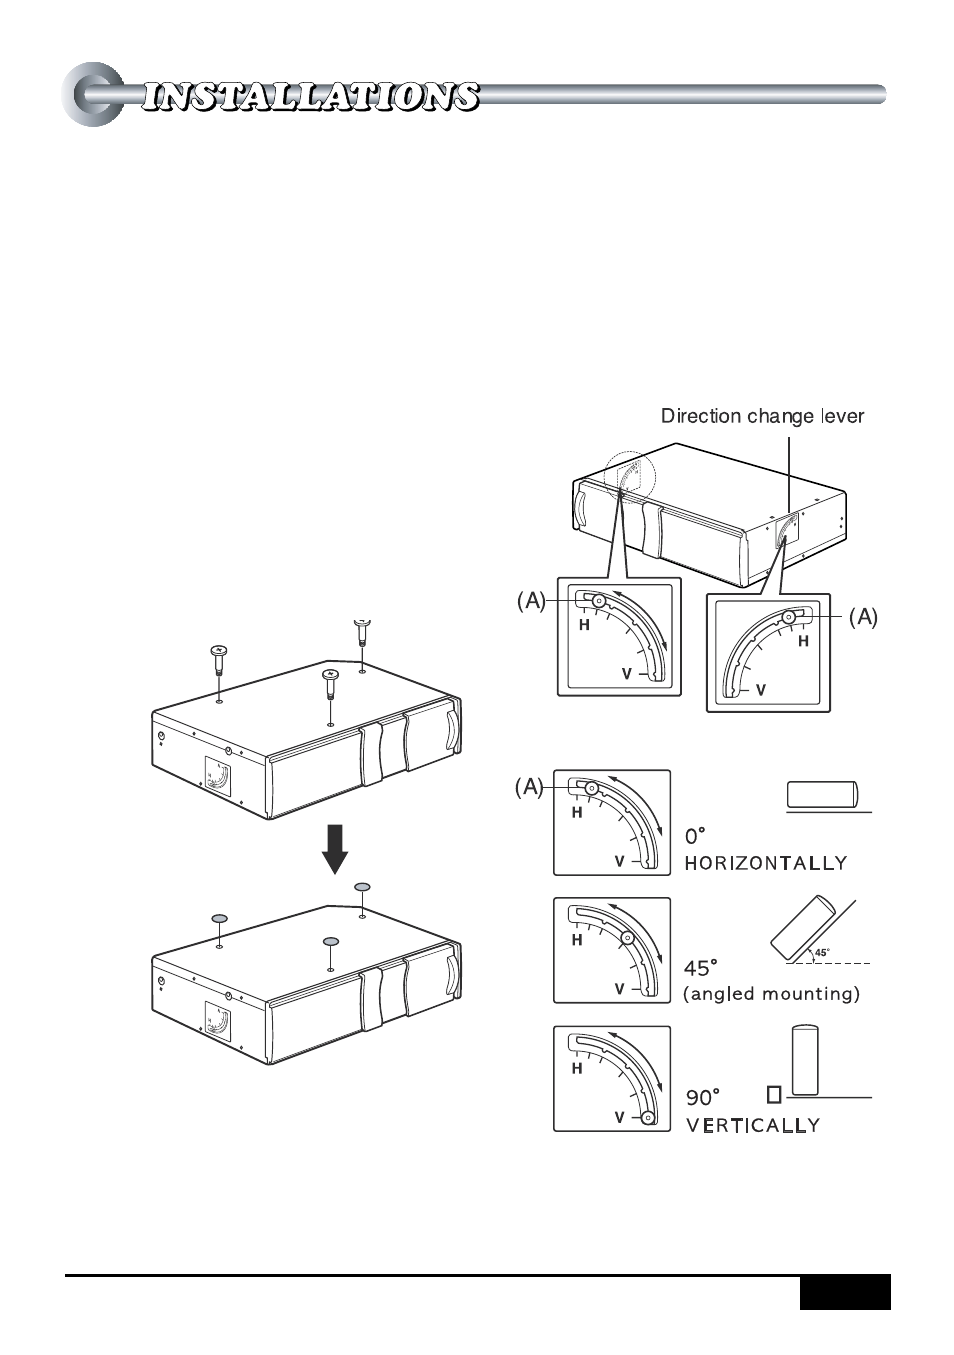
Installing the unit
Mounting angle setting lever
Be sure to adjust Mounting Angle
Setting Lever(A) to appropriate
angle; 0
for horizontal, 22.5
angle, 45 angle, 67.5 angle, 80
angle, or 90 for vertical.
Removing the transport
screws
Find the 3 transport screws at the
bottom of the unit, which lock the
unit s mechanism during transport.
Remove these screws before
installation and attach the supplied
adhesive labels
over the holes.
Retain these screws and replace
them in the original positions if the
unit is transported for service or
maintenance.
See also other documents in the category Audiovox CD-players:
- PROV715P (31 pages)
- SP-11CD (8 pages)
- ACC-52 (20 pages)
- DM8100_9H_wRW (2 pages)
- CE148 (6 pages)
- ACD-21 (16 pages)
- ACD-28A (20 pages)
- Rampage AV-455 (12 pages)
- PCD-5R (12 pages)
- CE147 (2 pages)
- ACD-25 (40 pages)
- SP-6CD (7 pages)
- AWM930W (10 pages)
- MP5610 (25 pages)
- CDC-FDN (2 pages)
- ACC-56 (20 pages)
- CDC-MCR2 (8 pages)
- Rampage ACC31 (9 pages)
- Prestige P953ESP (20 pages)
- Prestige P-105 (8 pages)
- ALARM CLOCK AM/FM WITH CD PLAYER (2 pages)
- Prestige P-MC3 (8 pages)
- SP-10CD (8 pages)
- P-48 (13 pages)
- CDC-825 (12 pages)
- Portable CD System (2 pages)
- XCH10RF (23 pages)
- PAV-CD (8 pages)
- CD3210 (15 pages)
- CE1000X (7 pages)
- 811-870091-170 (2 pages)
- SP-11CDS (8 pages)
- Rampage ACC56 (20 pages)
- P-105 (16 pages)
- P-942W (5 pages)
- SP11CDP (8 pages)