Fantasea Line S Series-F67 EyeDaptor User Manual
Page 5
5
Canon S90 & S95 Lens Accessories Instruction Manual 2011017
2. Assembling the RedEye/PinkEye Filter S90/S95
a. Install the EyeDaptor S90/S95-G Series inside the EyeDaptor G Series and replace the bungee cords
on the EyeDaptor G Series by following the steps described in section 1, paragraphs e-i.
b. Peel the transparent protective films off both sides of the color insert.
c. Attach the longer end of the snap cord to the color insert. The shorter end of the snap cord can be
attached either to the housing, arm or to any of the secure line loops featured on the EyeDaptor G
Series.
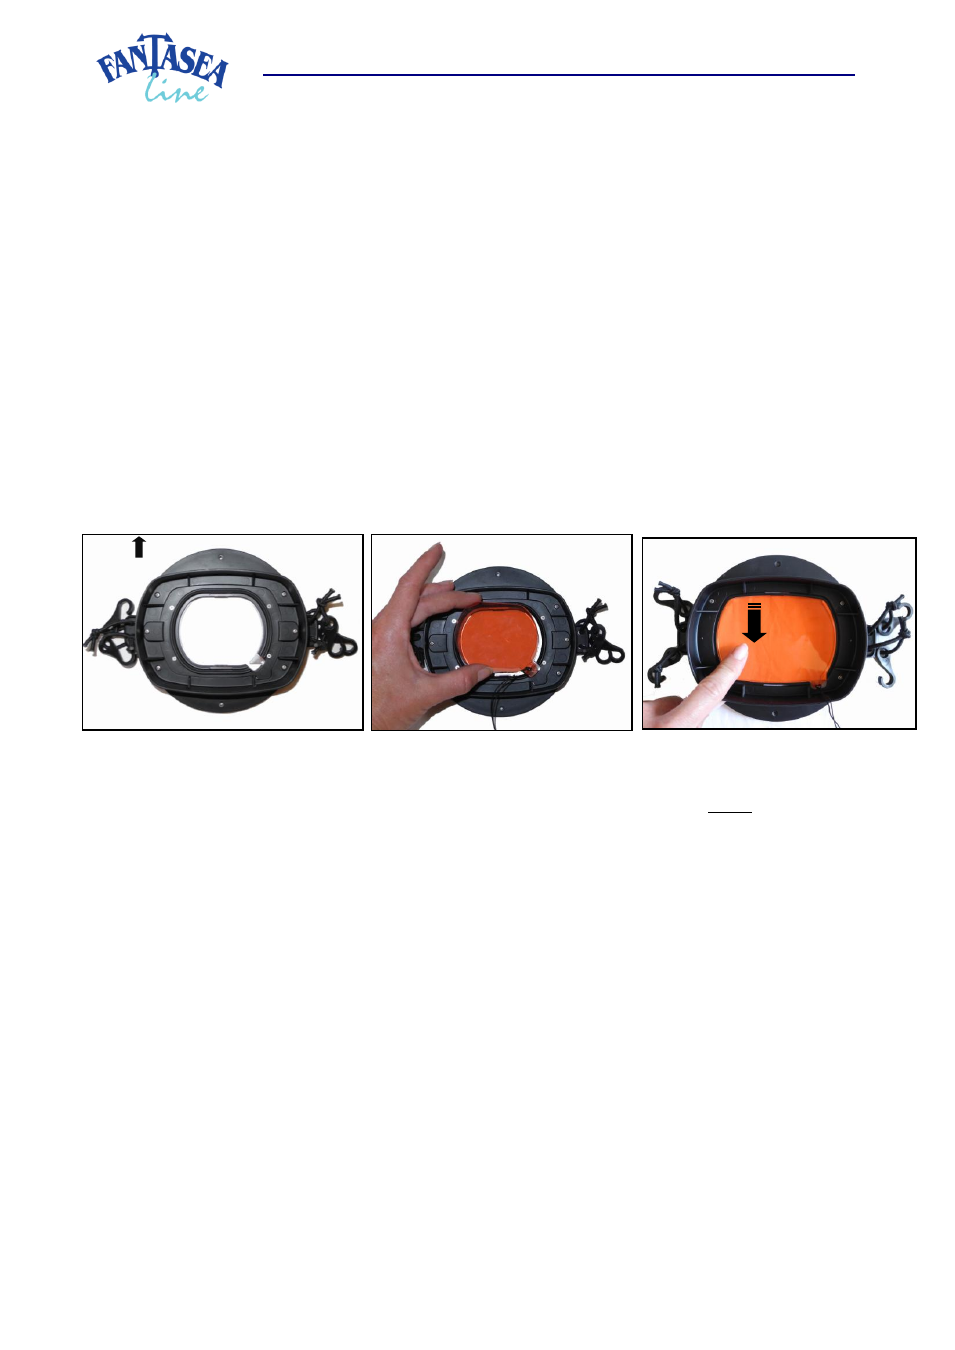
d. Hold the EyeDaptor G Series with EyeDaptor S90/S95-G Series installed inside so that the flat side of
the adaptor with the two stoppers is facing down, the adaptor configuration is facing up and the
“TOP” marking is pointed away from your body (image #11).
e. Hold the color insert above the EyeDaptor G Series so that the color insert is aligned with the
dedicated slot inside the EyeDaptor S90/S95-G Series and the secure string of the color insert is
positioned on the bottom right corner (image #12).
f. Gently push the color insert into the dedicated slot inside the EyeDaptor S90/S9-G Series (image
#13).
g. Removing the color insert from the RedEye/PinkEye Filter is carried out by gently pulling the secure
string of the color insert until the insert pops out of the adaptor.
3. Assembling the BigEye Lens S90/S95
a. Remove the two stoppers off the EyeDaptor S90/S95-G Series by following the steps described on
section 1, paragraphs a-c.
b. Install the EyeDaptor S90/S95-G Series inside the BigEye Lens G Series and replace the bungee cords
on the BigEye Lens G Series by following the steps described on section 1, paragraphs e-i.
4. Mounting the BigEye, EyeDaptor or Color Correction Filter on the Housing Lens Port
a. Hold the lens accessory in front of the housing lens port, so that the “TOP” marking printed on the
lens configuration is pointed upwards and the adaptor is aligned with the housing lens port (image
#14 on the following page).
b. Place the lens accessory over the housing lens port and follow by securing the four bungee cords to
the four corresponding housing secure line loops (image #15 on the following page).
* When mounting any of these lens accessories on the WP-DC38 housing, please refer to section 4-i below for
special instructions.
Image #11
Image #13
Image #12
TOP