Fantasea Line S Series-F67 EyeDaptor User Manual
Page 3
3
Canon S90 & S95 Lens Accessories Instruction Manual 2011017
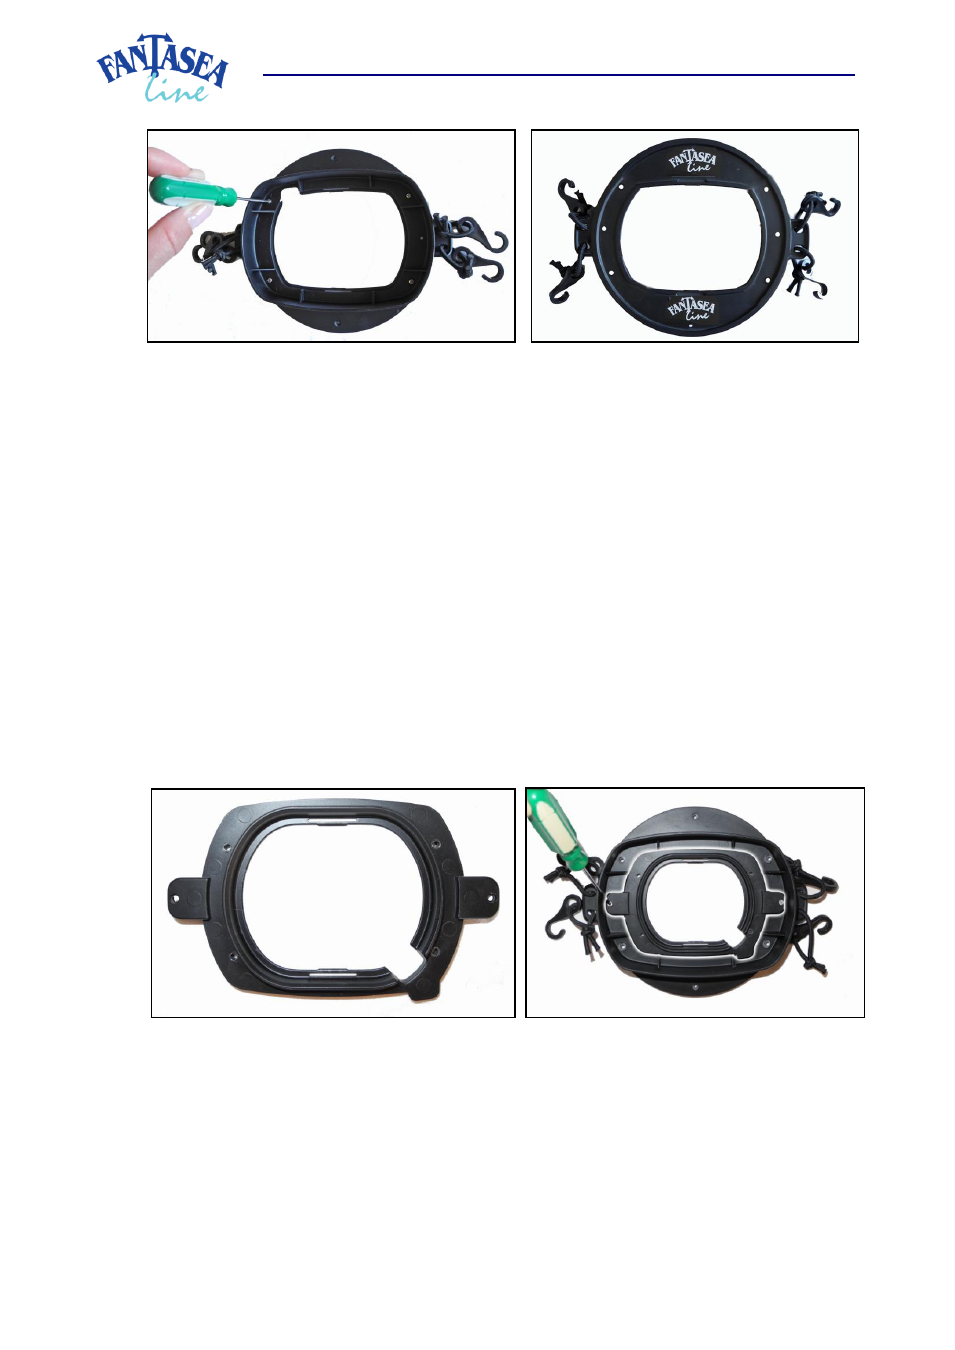
d. Remove the 2 stoppers off the EyeDaptor S90/S95-G Series as well, following the same method
described above for removing the stoppers off the EyeDaptor G Series.
e. Place the EyeDaptor G Series on a flat and protected surface, so that the adaptor configuration (the
side that attaches to the housing lens port) is facing up and the “TOP” marking is pointed away from
your body.
f. Hold the EyeDaptor S90/S95-G Series so that the two adaptor wings and the concaved part of the
adaptor are facing up and the adaptor niche is positioned at the bottom right (image #4).
g. Insert the EyeDaptor S90/S95-G Series into the dedicated groove of the EyeDaptor G Series. Note
that the two screw holes on the wings of the EyeDaptor S90/S95-G Series should be perfectly aligned
with the two small screw holes on the EyeDaptor G Series.
h. Insert the screws included into the dedicated screw holes on the two adaptor wings and use the
screwdriver included in order to tighten the screws into the EyeDaptor S90/S95-G Series and the
EyeDaptor G Series (image #5). Tighten the screws enough in order to keep the EyeDaptor S90/S95-
G Series fixed inside the EyeDaptor G Series, but don’t tighten them too strongly, as this might cause
damage to the products.
i. Replace the bungee cords originally attached to the EyeDaptor G Series with the 4 shorter bungee
cords included with the EyeDaptor S90/S95-G Series. First, remove the 4 bungee cords tied to the
EyeDaptor G Series by untying them and then pulling them out of the slot they were attached to.
Proceed by attaching the shorter bungee cords included with the EyeDaptor S90/S95-G Series to the
dedicated slots featured on the EyeDaptor G Series. Please note that there is no need to untie
shorter bungee cords in order to attach them to the EyeDaptor G Series. Simply insert the tied
Image #4
Image #5
Image #2
Image #3