Fantasea Line S Series-F67 EyeDaptor User Manual
Page 4
4
Canon S90 & S95 Lens Accessories Instruction Manual 2011017
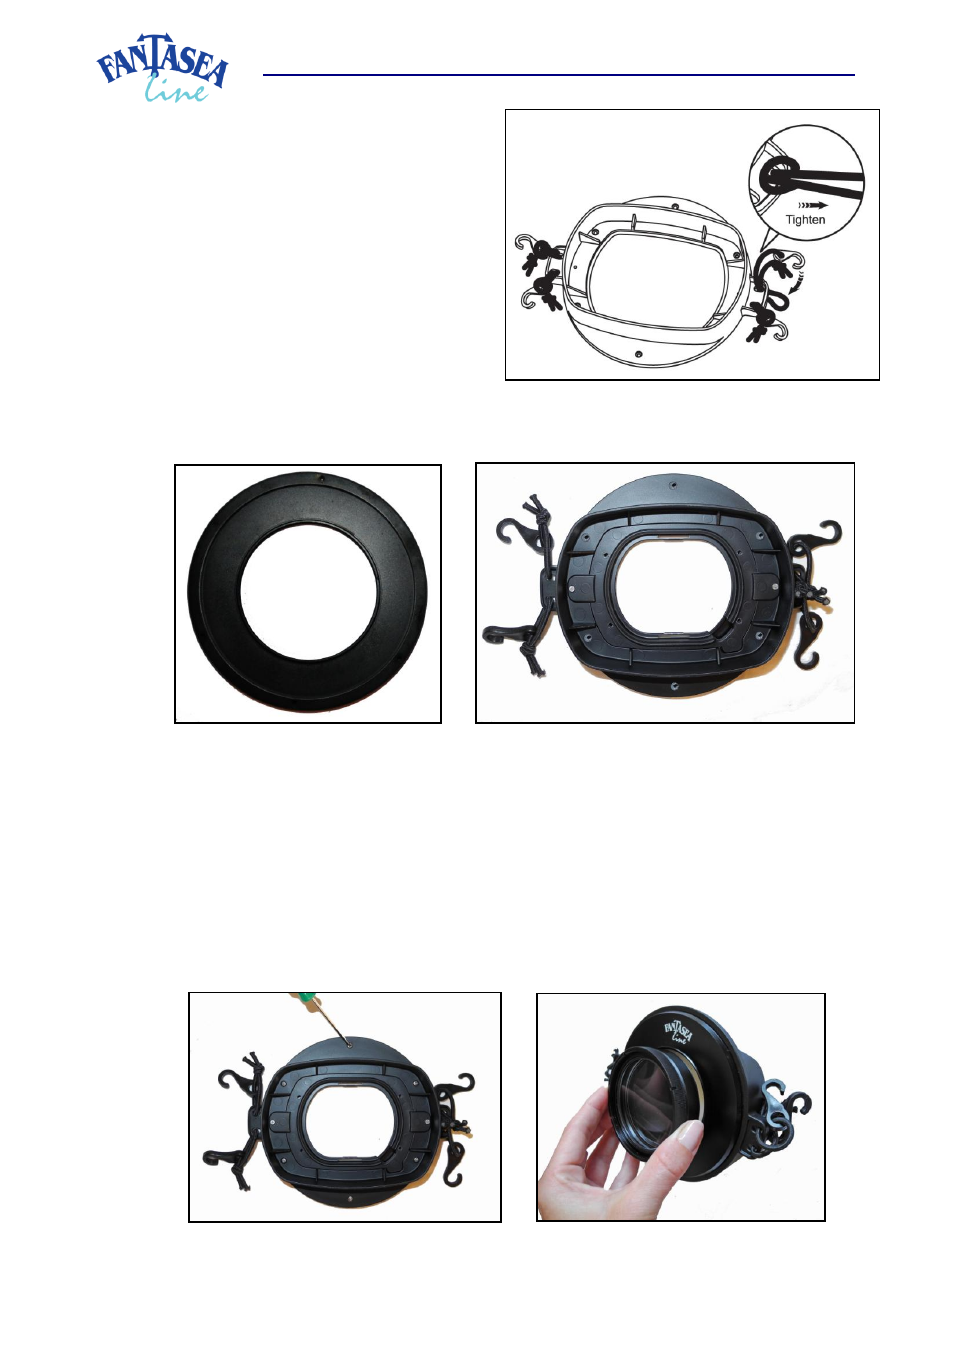
bungee cord to the dedicated slot, double
back the bungee cord through itself and
pull it in order to tighten it around the slot
(image #6).
j. Place the 67mm Add-On Plate on a flat and
protected surface, so that the thread is
facing down and the concaved side of the
plate is facing up (image #7).
k. Place the EyeDaptor G Series with the
EyeDaptor S90/S95-G Series installed inside
over the 67mm Add-On Plate, so that the
adaptor configuration is facing up and the
flat side of the adaptor is facing the 67mm
Add-On Plate (image #8).
l. Gently turn the EyeDaptor G Series around, till the screw holes on the EyeDaptor G Series are
aligned with the screw holes on the 67mm Add-On Plate.
m. Insert the 6 screws included into the aligned screw holes of the EyeDaptor G Series and 67mm Add-
On Plate. Use the screwdriver included in order to tighten the screws (image #9). Tighten the screws
enough in order to keep them from falling out, but don’t tighten them too strongly, as this might
cause damage to the products.
n. Once the EyeDaptor S90/S95-F67 is assembled, lens accessories featuring a 67mm male thread can
be mounted on the adaptor by gently screwing them into the female thread (image #10).
Image #7
Image #8
Image #9
Image #10
Image #6