Demon Fuel Systems 1563010VE User Manual
Page 16
16
3. Rotating the black pod cover controls the choke timing. To rotate the cover, loosen the three Allen
screws that secure the cover to the pod. (See Fig. 23) Rotating the cover clockwise will decrease
the amount of time it takes the choke to pull off, while counter-clockwise will increase the time it
takes. This adjustment will depend on your climate and the vehicle it is installed on.
4. One final note, dependent on which air cleaner / air cleaner gasket is used, it may be necessary to
put a slight dimple into the air cleaner to allow the full range of motion of the choke shaft and
butterfly. Failure to do so could result in an engine that is stuck with a high idle, which could make
the vehicle hard to control and stop.
CAUTION: Due to the choke horn's increased airflow design, and dependent on what air
cleaner/air cleaner gasket combination is used, a slight dimple in the air cleaner
may be necessary to allow for the butterfly to have a complete range of motion.
Failure to do so could result in a vehicle with an increased idle that could make the
vehicle hard to stop or control.
CAUTION: As with any modification, inspection of the part after completion is a must. Before use,
check the linkage for freeness of operation. Your safety depends on it.
Tuning the Vacuum Pod
Tuning the vacuum pod mainly involves spring changes to vary the opening rpm and rate. This is
achieved by using a tuning kit such as Demon Carburetion
™ part number 120083, which includes
springs that vary in the amount of pre-load and spring rate in order to fine-tune the carburetor for
every application.
The Quick-Change Pod allows for tuning with different springs without the need to remove the pod
body from the carburetor main body.
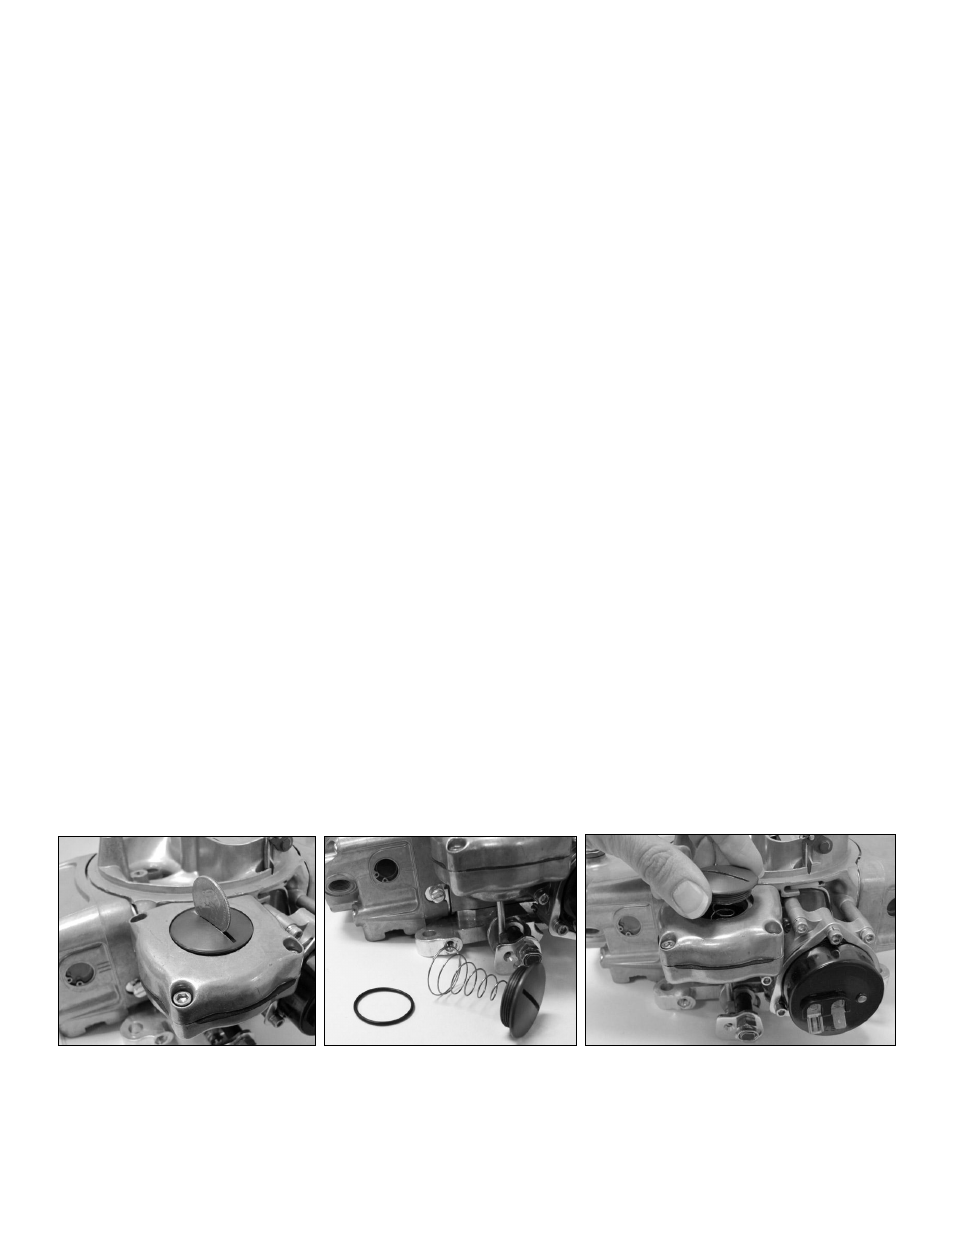
1. Using a wide bladed screwdriver or a coin (Fig. 24), remove the billet disk from the center of the
pod lid. Once the disk is loose, lift the disk from the pod lid and remove the spring.
2. Please note the O-ring that seals the disk to the pod top (Fig. 25).
3. Replace with a spring selected from the chart below and reinstall the disk (Fig. 26).
Figure 24
Figure 25
Figure 26