Control panel layout, Lcd control panel – HP LaserJet Pro 200 color Printer M251nw User Manual
Page 16
Control panel layout
LCD control panel
NOTE:
This section applies to the HP LaserJet Pro 200 color M251n Printer model only.
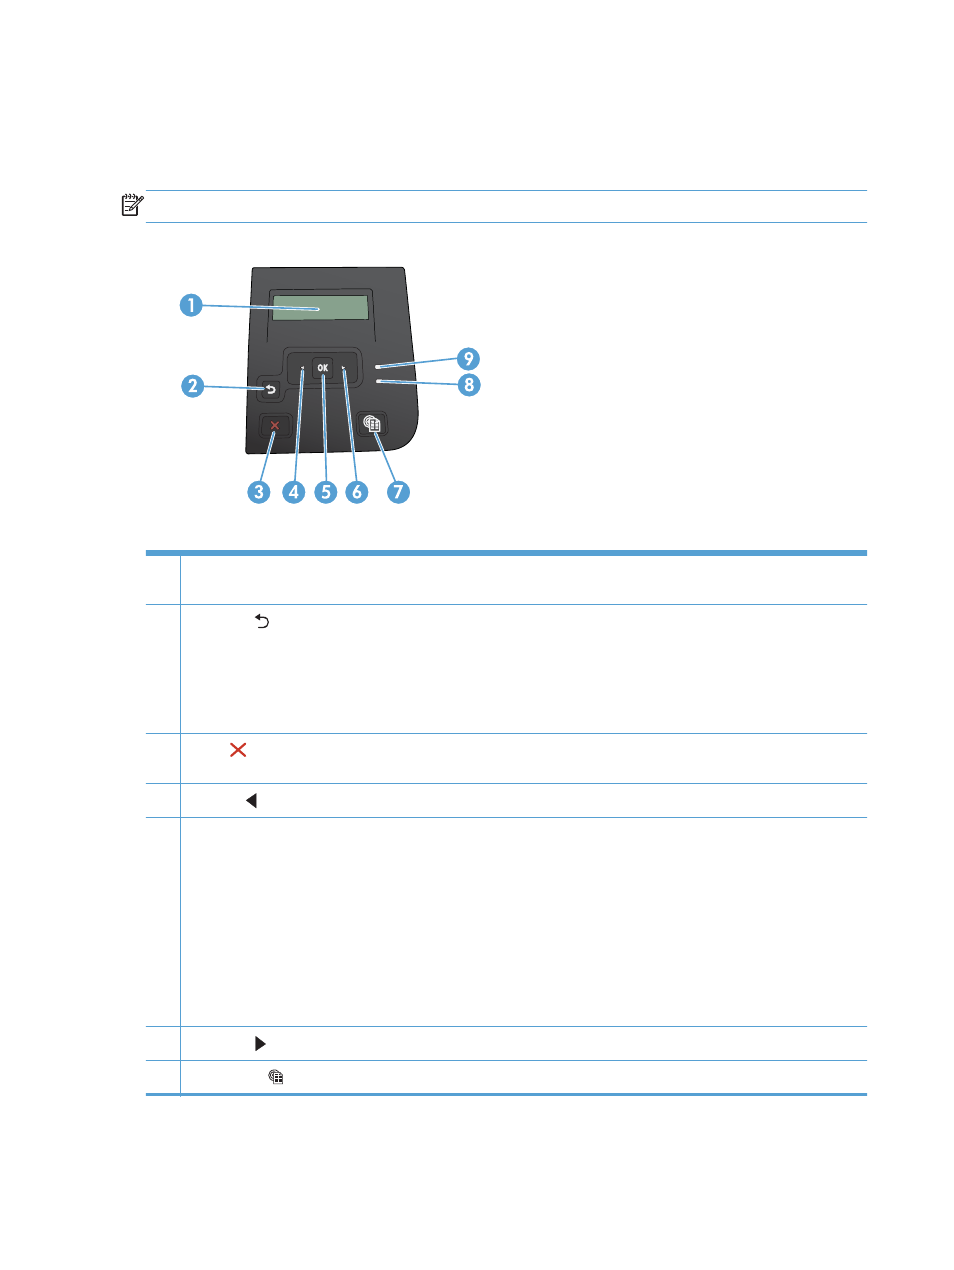
1
Control-panel display: The display provides information about the product. Use the menus on the display to establish
product settings.
2
Back arrow button: Use this button for the following actions:
●
Exit the control-panel menus.
●
Scroll back to a previous menu in a submenu list.
●
Scroll back to a previous menu item in a submenu list (without saving changes to the menu item).
3
Cancel button: Press this button to cancel a print job whenever the attention light is blinking or to exit the control-
panel menus.
4
Left arrow button: Use this button to navigate through the menus or to decrease a value that appears on the display.
5
OK
button: Press the
OK
button for the following actions:
●
Open the control-panel menus.
●
Open a submenu displayed on the control-panel display.
●
Select a menu item.
●
Clear some errors.
●
Begin a print job in response to a control-panel prompt (for example, when the message Press [OK] to continue
appears on the control-panel display).
6
Right arrow button: Use this button to navigate through the menus or to increase a value that appears on the display.
7
Web Services button: This button provides quick access to HP Web Services features, including HP ePrint.
4
Chapter 1 Product introduction
ENWW