Advanced ecc memory, Dimm installation guidelines, Installing dimms – HP ProLiant DL385 G5 Server User Manual
Page 43: Dimm population order
Hardware options installation 43
Advanced ECC memory
This server uses Advanced ECC for memory protection. In Advanced ECC, the server is protected against
correctable memory errors. The server provides notification if the level of correctable errors exceeds a pre-
defined threshold rate. The server does not fail because of correctable memory errors. Advanced ECC
provides additional protection over Standard ECC because it is possible to correct certain memory errors
that would otherwise be uncorrectable and result in a server failure.
Whereas standard ECC can correct single-bit memory errors, Advanced ECC can correct single-bit
memory errors and multi-bit memory errors if all failed bits are on the same DRAM device on the DIMM.
DIMM installation guidelines
Observe the following guidelines when installing additional memory:
•
Always install memory in pairs of two identical DIMMs.
•
Install only ECC PC2-5300 Registered DDR2 SDRAM DIMMs that meet the following specifications:
o
Supply voltage: 1.8 V
o
Bus width: 72 bits
•
Install DIMMs with the same speed.
•
Install memory in pairs (banks) beginning with banks farthest away from each populated processor
(banks A and C).
•
Observe the following special conditions when installing memory with a second processor:
o
Processor 2 can be installed without memory.
o
Any memory installed into banks for processor 2 can be used only if processor 2 is installed.
CAUTION:
Always wear an antistatic wrist strap when working inside the server.
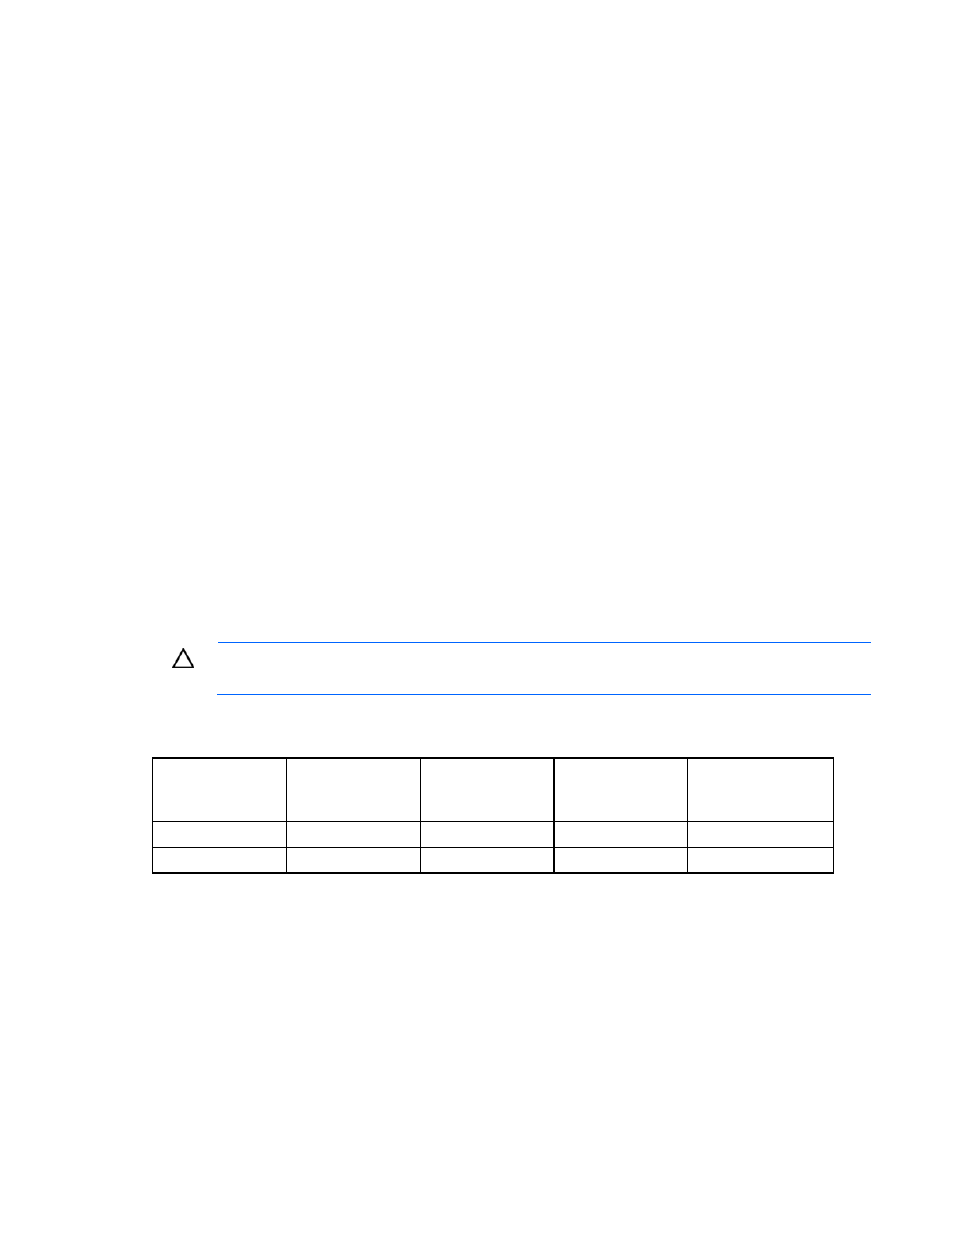
DIMM population order
Configuration Bank
A
1A and 2A
Bank B
3B and 4B
Bank C
5C and 6C
Bank D
7D and 8D
Single processor
1st
2nd
—
—
Dual processor
1st
3rd
2nd
4th
Installing DIMMs
1.
Power down the server (on page
2.
Extend the server from the rack (on page
3.
Remove the access panel (on page
4.
Remove the air baffle (on page
5.
Open the DIMM slot latches.