HP Netserver L Server series User Manual
Page 7
Chapter 13
Alternative Rack Mounting (4–Post)
7
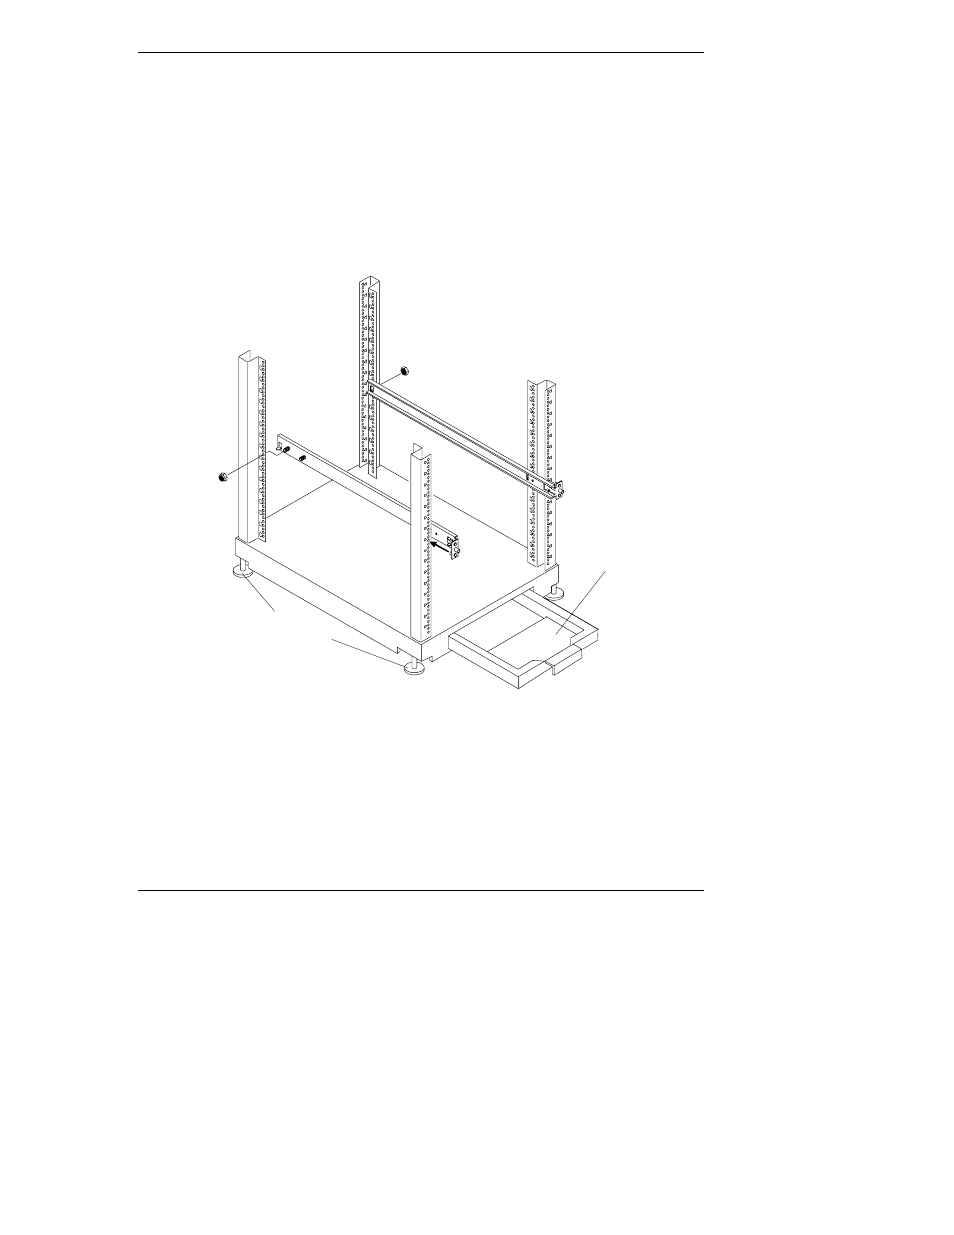
2. Lower the leveler screws on the rack's lower four corners to make firm
contact with the floor. See Figure 13-4.
3. Align the left outer-rail assembly to the left front and rear columns as
shown in Figure 13-4.
4. Insert the front outer-rail pins into the column holes (1st & 3rd) just below
the marking tape on the front column. See Figure 13-3.
The front mounting pins of the outer-rail should go into the front face of
the front column.
Leveler
Screws (4)
Anti-tip Foot
Extended
Figure 13-4. Mounting Outer-Rails to Columns
5. Insert the last screw stud on the outer rail into the center hole of the three
holes in the EIA unit just below the marking tape on the rear column. See
Figure 13-4.
6. Repeat Steps 3 through 5 for the outer-rail assembly on the right front and
rear columns.
- xt1500 (58 pages)
- LaserJet 4700 (68 pages)
- ProLiant DL360 Server (16 pages)
- ProLiant BL460c Gen8 Server Blade (65 pages)
- ProLiant DL388p Gen8 Server (128 pages)
- ProLiant BL460c Gen8 Server Blade (67 pages)
- ProLiant BL40p Server series (73 pages)
- ProLiant BL465c Server Blade (87 pages)
- ProLiant DL388p Gen8 Server (47 pages)
- ProLiant ML115 Server (63 pages)
- ProLiant DL140 G2 Server (81 pages)
- Servidor HP ProLiant ML370 G4 (20 pages)
- Servidor HP ProLiant ML370 G4 (30 pages)
- Servidor HP ProLiant DL160 G5p (84 pages)
- Servidor HP ProLiant DL980 G7 (143 pages)
- Servidor HP ProLiant DL380 G5 (137 pages)
- Integrity rx2620 Servers (37 pages)
- Integrity rx2620 Servers (58 pages)
- Integrity rx2620 Servers (77 pages)
- Integrity rx2620 Servers (107 pages)
- Integrity rx2620 Servers (55 pages)
- 9000 rp3440 Servers (36 pages)
- Integrity rx2620 Servers (42 pages)
- Integrity rx2620 Servers (48 pages)
- Integrity rx2620 Servers (53 pages)
- Integrity rx2620 Servers (24 pages)
- Integrity rx2620 Servers (33 pages)
- Integrity rx2620 Servers (100 pages)
- Integrity rx2620 Servers (37 pages)
- Integrity Superdome sx1000 Server (53 pages)
- Servidor HP ProLiant DL360p Gen8 (129 pages)
- Servidor HP ProLiant DL120 G6 (133 pages)
- ProLiant DL580 Gen8 Server (91 pages)
- ProLiant MicroServer Gen8 (95 pages)
- ProLiant MicroServer (94 pages)
- ProLiant Firmware Maintenance CD (87 pages)
- ProLiant BL685c G5 Server Blade (99 pages)
- ProLiant BL10e Server Blade (232 pages)
- ProLiant BL40p Server series (30 pages)
- Serveur lame HP ProLiant BL680c G5 (90 pages)
- Serveur lame HP ProLiant BL465c Gen8 (578 pages)
- ProLiant DL320e Gen8 Server (96 pages)
- ProLiant ML110 G7 Server (113 pages)
- 9000 rp8420 Servers (38 pages)
- Integrity Superdome sx1000 Server (19 pages)