Assembly instructions – Agri-Fab 45-02931 User Manual
Page 4
4
ASSEMBLY INSTRUCTIONS
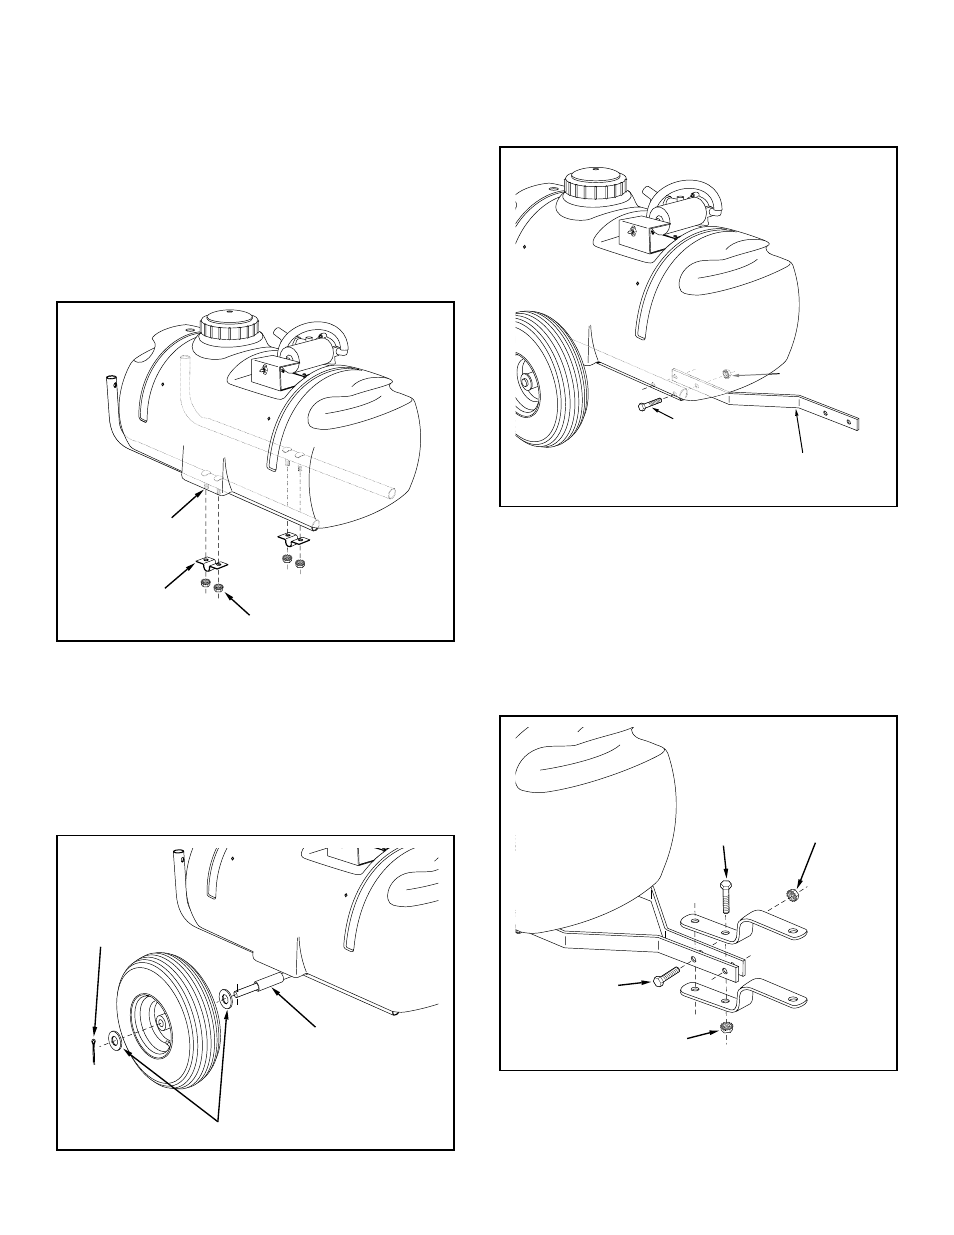
FIGURE 2
6. Assemble a hitch arm to the inside of a frame tube
underneath the tank. Use two 5/16" x 2" hex bolts and
5/16" hex nuts as shown in figure 3.
Do not tighten
yet.
Repeat for other side.
TOOLS REQUIRED FOR ASSEMBLY
(2) 1/2" Wrenches
(1) Screwdriver
(1) Pliers
(1) Hammer
FIGURE 1
1.
Remove all items from carton and lay out as shown on
pages 2 and 3.
2. Assemble the axle clamps and four 5/16" hex nuts
to the factory installed bolts in the frame tubes.
Do
not tighten yet.
See figure 1.
FIGURE 3
7.
Fasten the ends of the hitch arms together using two
5/16" x 1-1/4" hex bolts and 5/16" hex nuts.
Do not
tighten yet.
See figure 4.
8.
Assemble the hitch brackets to the hitch arms using
two 5/16" x 2" hex bolts and 5/16" hex nuts. Position
each bolt behind a cross bolt in the hitch arms.
Do
not tighten yet.
See figure 4.
FIGURE 4
on
ng
6"
3/4" WASHER
SPACER
1/8" x 1-1/2"
COTTER PIN
3. Slide the axle through the two axle brackets. See
figure 2.
4. Assemble a spacer, a 3/4" washer, a wheel (valve
stem facing out) and another 3/4" washer onto the
axle. Assemble a cotter pin through the end of the
axle. Repeat on other end. See figure 2.
5.
Tighten
the four nuts which fasten the axle clamps
to the frame tubes. Refer back to figure 1.
5/16" x 2"
HEX BOLT
5/16" HEX NUT
5/16" x 1-1/4"
HEX BOLT
5/16" HEX NUT
9.
At this time
tighten all bolts
starting with the bolts in
figure 3, then the bolts in figure 4.
FACTORY
INSTALLED
BOLT
AXLE
CLAMP
5/16" HEX NUT
5/16" x 2"
HEX BOLT
5/16" HEX NUT
HITCH ARM