Englishenglishenglishenglishenglish – Asus Star Ice User Manual
Page 13
EnglishEnglishEnglishEnglishEnglish
1 3
1 3
1 3
1 3
1 3
I n s t a l l a t i o n g u i d e
I n s t a l l a t i o n g u i d e
I n s t a l l a t i o n g u i d e
I n s t a l l a t i o n g u i d e
I n s t a l l a t i o n g u i d e
4 . 4 . 2
4 . 4 . 2
4 . 4 . 2
4 . 4 . 2
4 . 4 . 2
Installing the cooler
Installing the cooler
Installing the cooler
Installing the cooler
Installing the cooler
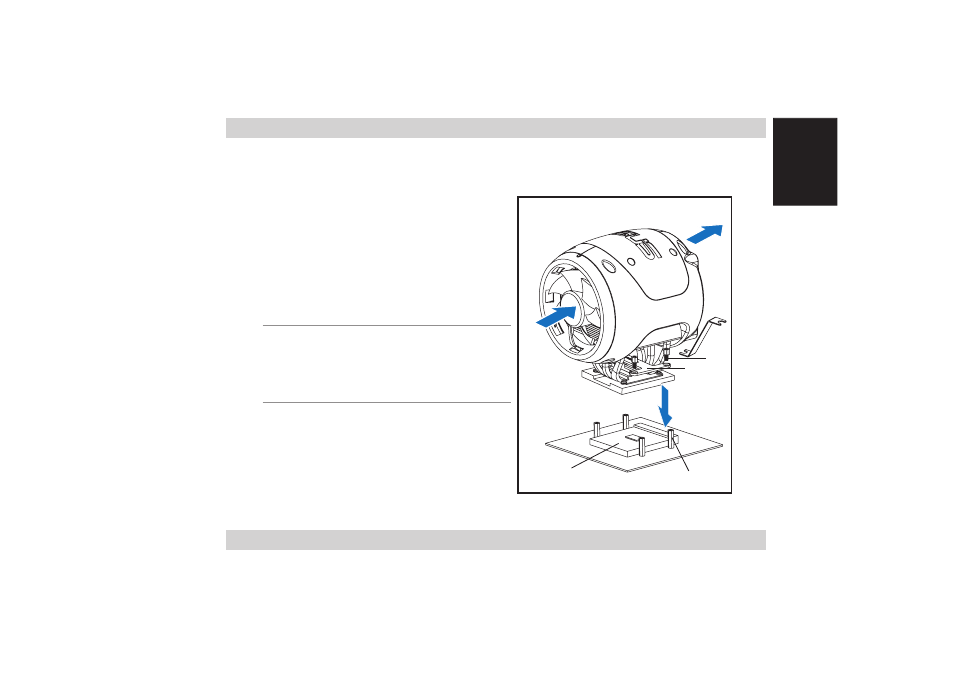
1.
Determine the CPU socket orientation and
the location of the chassis rear panel air
vents.
2.
Place the H-bar on the heatsink rail.
3.
Place the cooler on top of the CPU. Make
sure that the airflow is directed towards
the chassis rear panel air vents.
N O T E .
N O T E .
N O T E .
N O T E .
N O T E . Make sure that you position the
CPU cooler with the heatsink surface
matching the elevated side of the CPU
socket. Refer to the illustration.
4.
Use a screw driver to drive in four screws
(#3) to the stand-offs, then tighten in a
diagonal sequence (two opposite corners
at a time) until the CPU cooler is firmly in
place.
S t a n d - o f f
S t a n d - o f f
S t a n d - o f f
S t a n d - o f f
S t a n d - o f f
C P U
C P U
C P U
C P U
C P U
# 3
# 3
# 3
# 3
# 3
H o t a i r
H o t a i r
H o t a i r
H o t a i r
H o t a i r
C o o l
C o o l
C o o l
C o o l
C o o l
a i r
a i r
a i r
a i r
a i r
H - b a r
H - b a r
H - b a r
H - b a r
H - b a r