Filter cartridge replacement instructions – Water Inc BG 1000 User Manual
Page 6
FILTER CARTRIDGE REPLACEMENT INSTRUCTIONS
To maximize effectiveness and to help reduce the possibility of service related issues, the disposable,
environmentally friendly & recyclable filter cartridge must be replaced every twelve months. Water, Inc values
your choice in the highest quality water treatment. Failure to follow these instructions may void your warranty and
increase the risk of incidental water or property damage.
To reduce the risk associated with property damage due to water leakage:
• Do not use pliers or a pipe wrench to tighten when installing replacement cartridge.
• The disposable filter cartridge MUST be replaced every twelve months, at the rated capacity or if there is a
noticeable reduction in flow rate, whichever occurs first.
IMPORTANT NOTE
• BG-12000 Model Only: Change filter cartridge at 12 months or 1,000 gallons, as indicated by DIGI Flow 8800T
PID, whichever occurs first.
1. Place towel under filter to collect any residual water during cartridge change-out.
2. Grasp cartridge and turn to the left (counterclockwise) until cartridge comes to a complete stop (water automatically
turns off). Water may leak momentarily from vent tube. This is normal. Gently pull cartridge downward to remove.
3. Remove RED sanitary protective cap from new cartridge.
4. Ensure that o-rings are present on the cartridge and are seated into grooves; moisten o-rings with water. DO NOT
use any petroleum products to lubricate the o-rings.
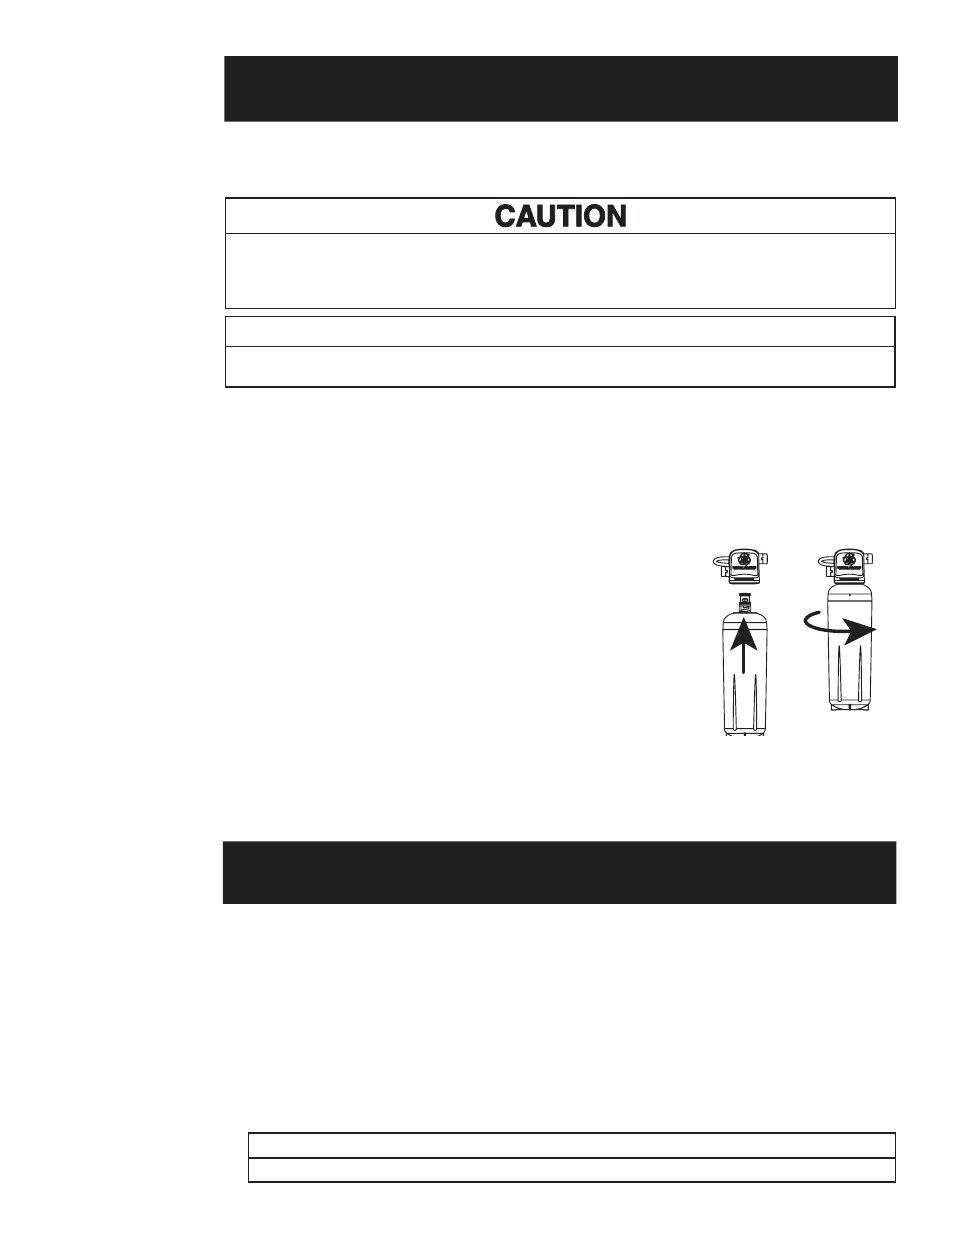
5. Insert filter into filter head assembly by aligning arrow printed on top of
cartridge label with arrow on filter head bracket. (Note: arrow is located under the
shroud on the filter head bracket on the inlet water side). Turn filter cartridge one
quarter turn to the right until it stops. When fully engaged, the top surface of the
filter will be flush with the bottom of the filter head assembly.
6. Open faucet and run water for a minimum of 4 gallons (approximately 5
minutes) to flush system of carbon fines and release trapped air. Flush
water into a bucket or pail and reuse the water for garden or landscape
watering. While system is flushing, check for leaks. Repair any leaks as
needed before continuing.
Close filter system faucet. System is now under pressure and can be inspected for leaks. Repair any leaks
as needed before continuing. The system is now ready for use.
7. Please review section “Water Filter Replacement Indicator” for instructions on how to activate and/or test this
device.
WATER FILTER REPLACEMENT INDICATOR
ACTIVATION AND USE INSTRUCTIONS (All Models):
1. Remove filter replacement indicator from plastic bag
2. To activate, press and hold “START” button for 3 seconds. LED light will flash 3 times and the alarm will beep 3
times confirming countdown has begun.
Test Mode:
1. To test indicator at any time during the countdown period, press and hold the “START” button for 1 second. The
LED light will flash once and the alarm will beep once indicating the timer is in active countdown mode.
IMPORTANT NOTE
This filter replacement indicator is designed for one-time only use.
— 6 —
3. Mount the indicator in a convenient location using the attached magnet or double sided tape provided
4. Replace filter when LED light begins to flash once every minute or alarm beeps once every hour
5. Dispose of filter replacement indicator after the old filter has been changed. A new indicator will be included with
the replacement filter.