Install faucet adapter fitting, Installation instructions (continued) – Water Inc BG 1000 User Manual
Page 5
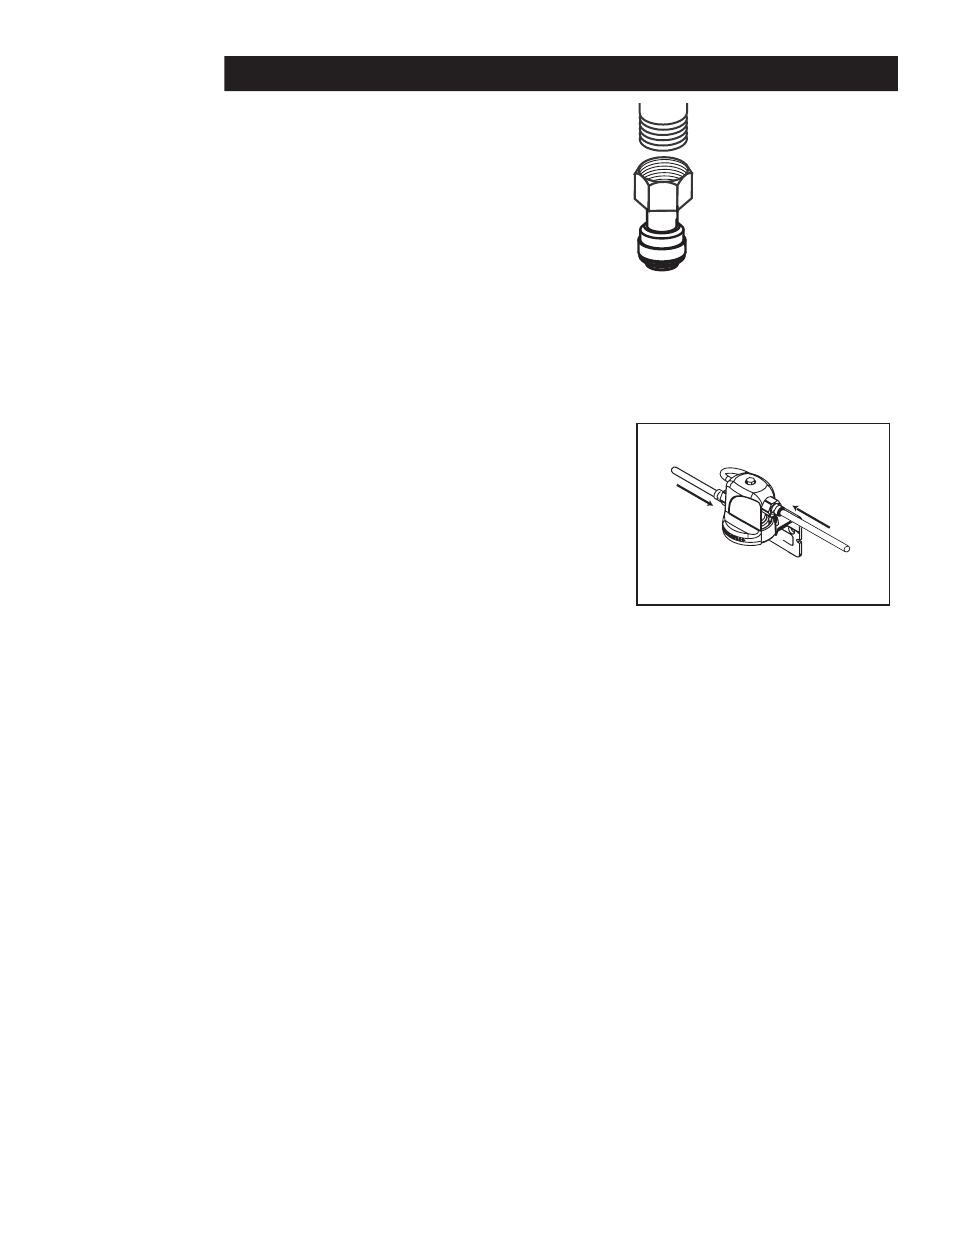
6. Install faucet adapter fitting to drinking water faucet (drinking
water faucet not included). This should be a snug fit. Do not
overtighten. (See Figure 3)
7. Referring to the “Using Push-In Fittings” section, insert the
NSF approved tubing into the faucet adapter fitting, making
sure the end of tubing is firmly seated.
Hold the filter head assembly away from the wall, press other
end of tubing into outlet side as indicated by arrow on filter
head assembly. (see Figure 4)
8. Place filter head assembly holes over mounting screws and press down to lock into place. Tighten the screws for a
secure fit.
9. Insert filter into filter head assembly by aligning arrow printed on the top of cartridge label with arrow on filter head.
(Note: arrow is located under the shroud on the filter head body on the inlet water side). Turn filter one quarter
turn to the right until it stops. When fully engaged, the top surface of the filter will be flush with the bottom of the
filter head assembly.
10. Turn on water and open filter system faucet to flush air from the
system. Run water for a minimum of 4
gallons (approximately 5 minutes) to flush system of carbon
fines and release trapped air. Flush water into a bucket or
pail and reuse the water for garden or landscape watering.
While system is flushing, check for leaks. Repair any leaks
as needed before continuing.
Close filter system faucet. The system is now ready for use.
System is now under pressure and can be inspected for leaks.
Repair any leaks as needed before continuing.
Note: White tube from head is a filter vent tube outlet. DO NOT remove, kink or obstruct white tube.
Push In
Push In
Figure 4
INSTALLATION INSTRUCTIONS (CONTINUED)
— 5 —
Install Faucet
Adapter Fitting
Typical connection shown.
Refer to installation
instructions for your
particular fixture.
Figure 3