Features, Installing oven rack supports, Oven rack positions – Electrolux EI30EW45KB User Manual
Page 5: Oven vents location, Wall oven features
5
Features
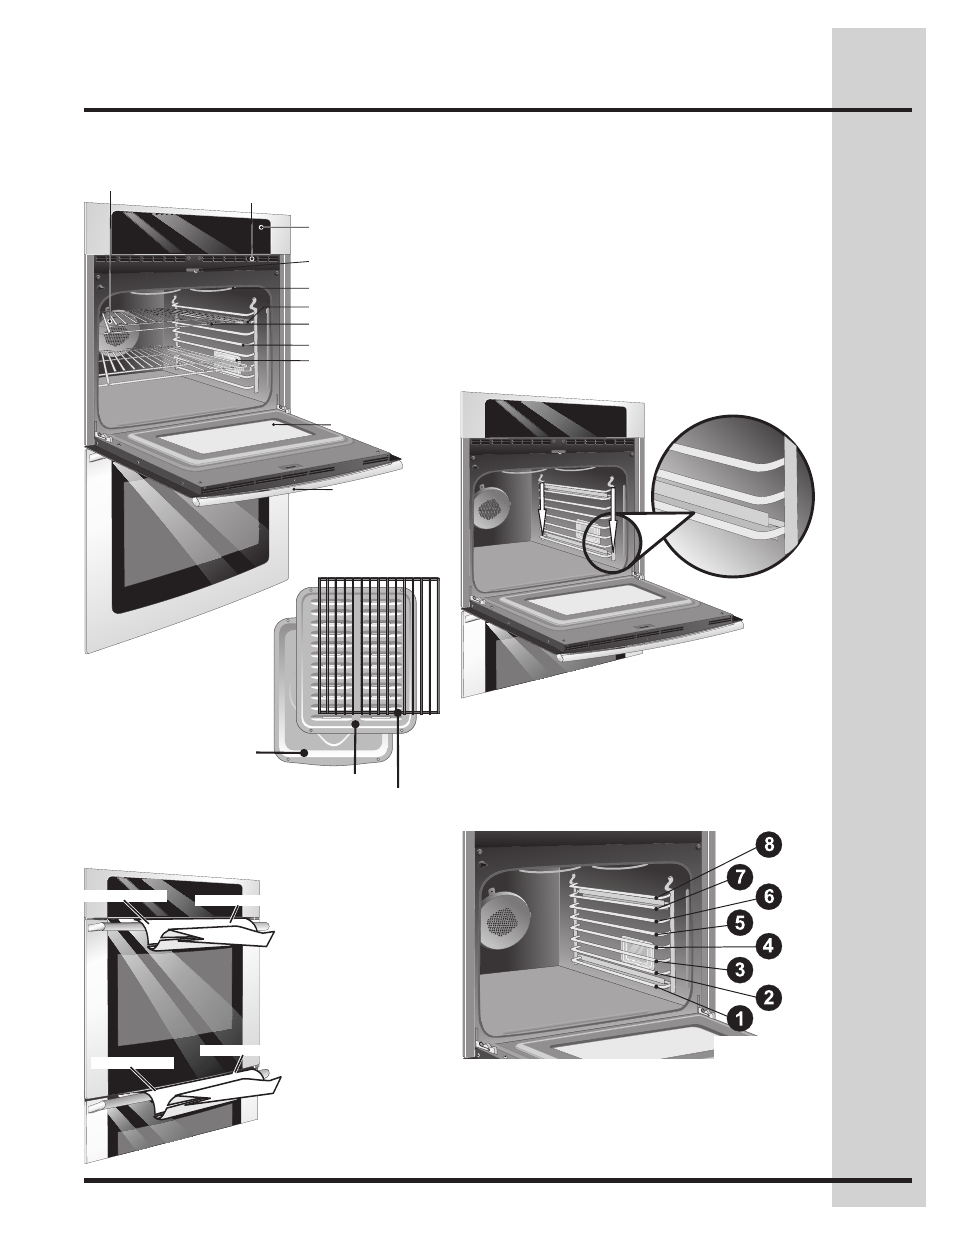
Installing Oven Rack Supports
AlwAys instAll oven rACk sUpport before
tUrninG on the oven (when the oven is
Cool).
To install oven rack support, insert the supports
by pushing them downward into the two brackets on
each side of the oven interior, as shown below.
To remove the oven rack support for a self-clean
cycle, pull up the support to disengage them from the
brackets. If the rack supports are not removed, the
self-clean cycle won’t start.
Oven Rack Positions
This oven is equipped with ladder rack supports with
8 positions to accommodate precisely every mode of
cooking.
Rack positions
Position 1
(Non-SLIDING
rack only)
Broiler pan
Broiler pan grid
Convection
roasting rack
Control panel
Broiling element
Oven rack support
Oven light
Glass oven
door
Door handle
Convection fan
Oven door latch
Oven racks
Oven rack sliders
Oven vent
Oven Vents Location
Oven Vent
Oven Vent
Warm Air
Warm Air
The oven is vented
above each door.
When the oven
is on, warm air is
released through the
vents. This venting
is necessary for
proper air circulation
in the oven and good
baking results.
Wall Oven Features