Canon PIXMA PRO-1 User Manual
Page 18
3
7
8
D
6
E
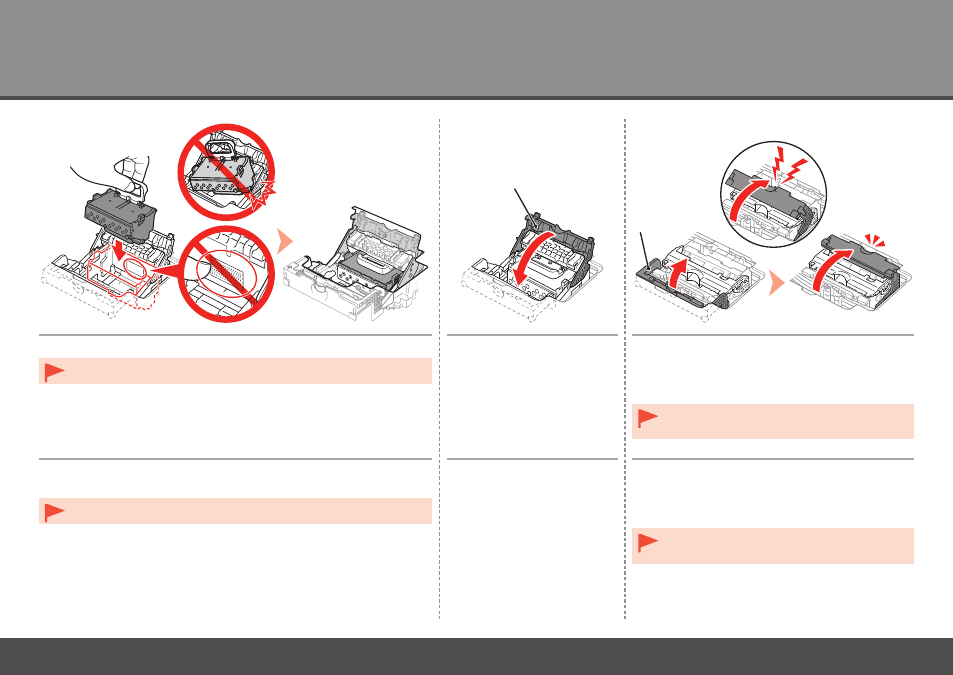
Inserte el cabezal de impresión directamente desde arriba, como
se muestra, para colocarlo en su lugar.
No golpee el cabezal de impresión contra los laterales del soporte.
•
Baje la palanca de bloqueo
del cabezal de impresión (3)
(E).
Cierre completamente la palanca de unión (4)
(D) hasta que encaje en su lugar.
Es posible que la palanca de unión (4) ofrezca
resistencia y haga un ruido mientras se cierra.
Una vez instalado el cabezal de impresión,
no lo retire si no es necesario.
•
Lower the Print Head Lock
Lever (3) (E).
Insert the Print Head from straight above as shown to set it in place.
Do not knock the Print Head against the sides of the holder.
•
Close the Joint Lever (4) (D) completely until it
clicks.
The Joint Lever (4) may be tight and make a noise
while being closed.
Once you have installed the Print Head, do
not remove it unnecessarily.
•
- mx860 (997 pages)
- mp620 (815 pages)
- mp495 (759 pages)
- PIXMA iP2600 (72 pages)
- Pixma MP 190 (396 pages)
- PIXMA iX6520 (300 pages)
- PIXMA iX6540 (339 pages)
- PIXMA iX6540 (335 pages)
- BJC-3000 (350 pages)
- BJC-3000 (80 pages)
- BJC-50 (141 pages)
- BJC-55 (181 pages)
- BJC-6200 (281 pages)
- BJC-8200 (85 pages)
- BJC-8500 (159 pages)
- BJC-8500 (13 pages)
- i475D (2 pages)
- i80 (1 page)
- i850 (2 pages)
- CP-100 (110 pages)
- SELPHY CP750 (50 pages)
- CP 300 (53 pages)
- CP100 (62 pages)
- C70 (421 pages)
- W8200 (196 pages)
- H12157 (359 pages)
- ImageCLASS MF4570dw (61 pages)
- i 350 (9 pages)
- C560 (2 pages)
- Color imageRUNNER C3080 (4 pages)
- C2880 Series (16 pages)
- BJ-30 (183 pages)
- CDI-M113-010 (154 pages)
- imagerunner 7095 (14 pages)
- C3200 (563 pages)
- Direct Print (109 pages)
- IMAGERUNNER ADVANCE C5030 (12 pages)
- IMAGERUNNER 3530 (352 pages)
- IMAGERUNNER 3530 (6 pages)
- IMAGERUNNER ADVANCE C7065 (12 pages)
- BJC-4400 (106 pages)
- IMAGERUNNER 2525 (3 pages)
- ImageCLASS 2300 (104 pages)
- IMAGECLASS D440 (177 pages)
- ImageCLASS MF7280 (4 pages)