Transmission, 1 transmission removal, 2 transmission installation – Ariens 939 SNO-THRO 939001 User Manual
Page 26
8 - 26
The transmission has no dealer-serviceable parts. If
defective, it must be replaced as a unit.
8.1 TRANSMISSION REMOVAL
1. Shut off engine, remove key, disconnect spark plug
wire, and allow unit to cool completely.
2. Drain gasoline.
3. Place machine on a level surface, and tip up into
service position (see Figure 4 on page 12).
4. Remove both wheels.
5. Remove nut and bolt holding axle gear in place.
6. Remove axle bushings. Discard if worn.
7. Remove axle
8. Remove drive belt from transmission pulley
9. Remove bolts securing transmission to frame
10.Remove transmission.
8.2 TRANSMISSION INSTALLATION
IMPORTANT: Before beginning installation, make sure
that:
• Key is removed from switch.
• Spark plug is disconnected.
• Machine is cool.
• Gasoline has been drained from tank.
1. If necessary, place machine on a level surface, and
tip up into service position (see Figure 4 on page
12).
2. Bolt transmission to frame.
3. Attach drive belt to transmission pulley.
IMPORTANT: Make sure drive belt is properly aligned
with transmission pulley and engine pulley.
4. Install axle gear on axle. Do not tighten nut onto
bolt.
5. If necessary, install new axle bushings.
6. Install axle.
7. Align axle gear with transmission sprocket as
required.
8. Tighten nut onto bolt holding gear to axle.
9. Install wheels.
SECTION 8 - TRANSMISSION
CAUTION: Remove fuel from fuel tank before
placing unit in service position.
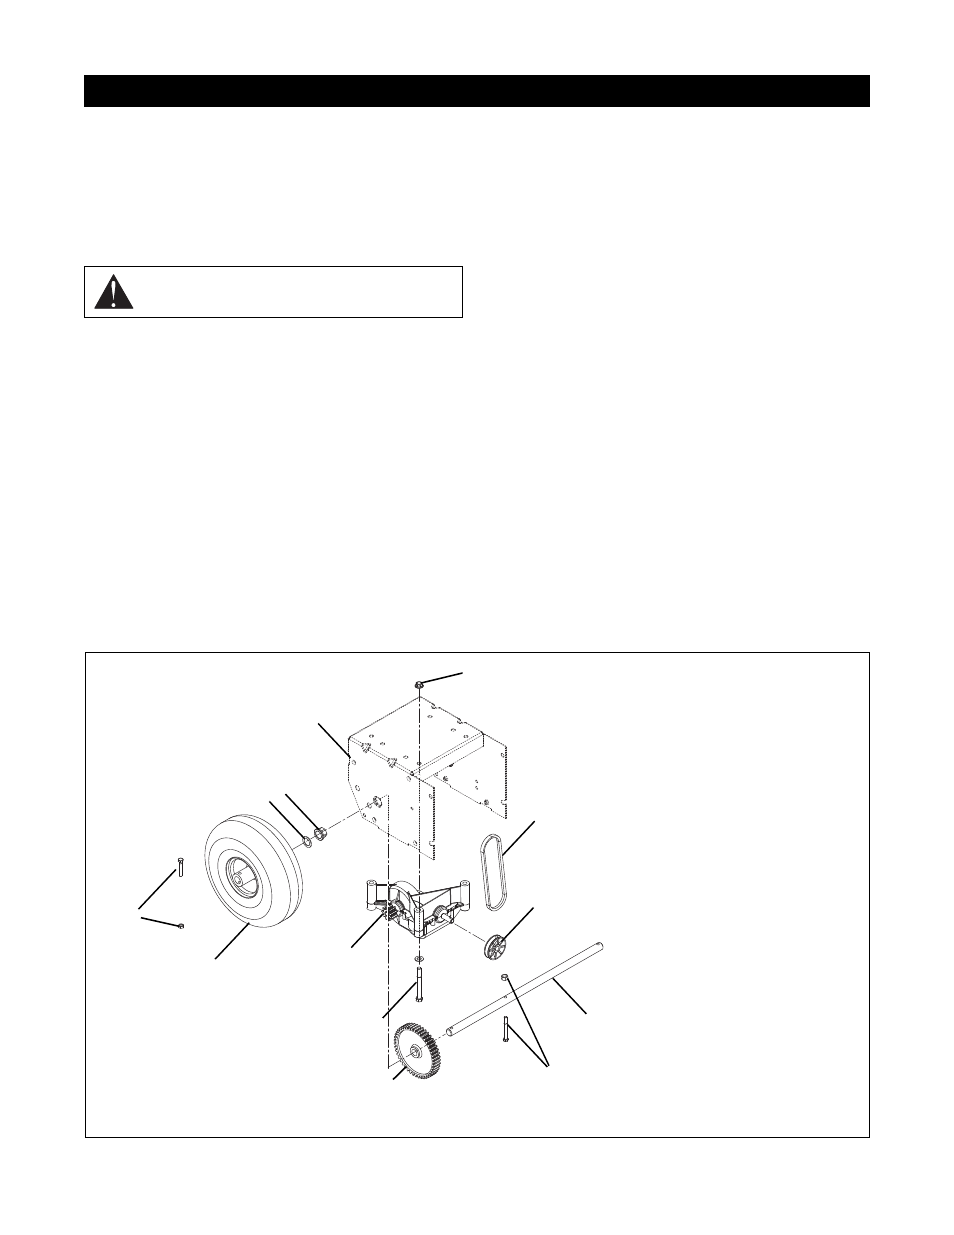
Figure 23
PS0330_2
1
2
3
4
5
6
7
8
9
11
12
13
1. Frame
2. Locking Nut (typical of 3)
3. V-Belt (stretch fit)
4. Transmission Pulley
5. Axle Shaft
6. Bolt and Nut
7. Gear
8. Transmission Mounting Bolt
and Flat Washer (typical of 3)
9. Transmission
10. Wheel
11. Bolt and Nut
12. Flat Washer
13. Axle Bushing (1 each side)
10