Brother Innov-is VM6200D User Manual
Page 2
2
f
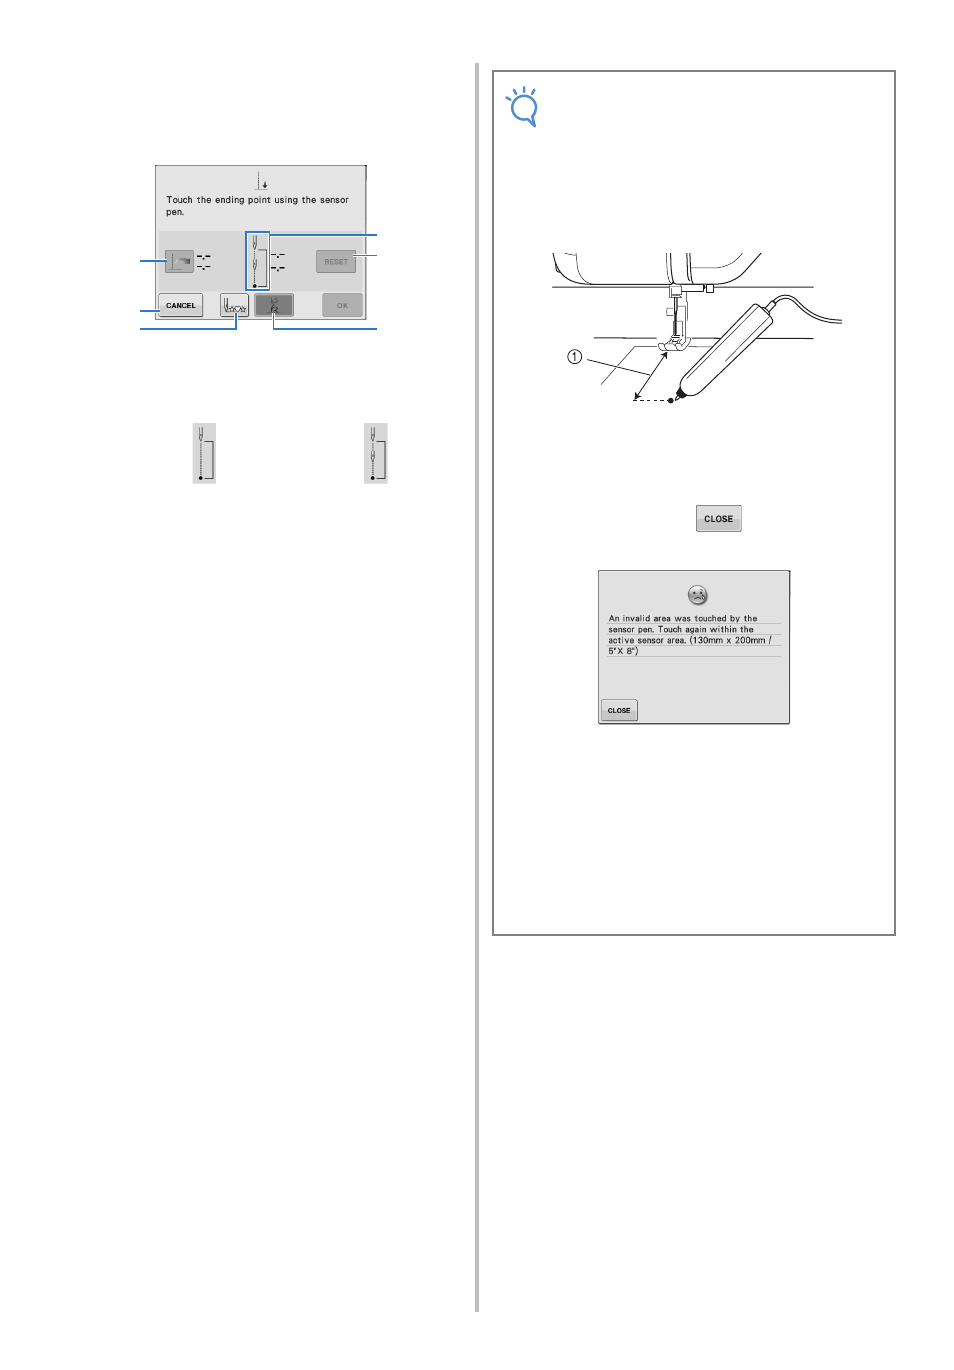
With the sensor pen, touch the location to
be specified as the sewing end point.
→ The distance from the current needle position to the
touched location appears.
a It shows how many times you need to touch the
sewing end point, once or twice.
b Press to erase the specified sewing end point.
c Press to select whether or not sewing is ended
with a complete pattern.
→ See “Stitch End Mode Key” on page 3.
d Press to begin sewing at the beginning of the
pattern.
e Press to stop specifying a setting with the sensor
pen.
f Press when sewing the same distance as the
previous time to recall the previous setting.
→ See “Reusing the Previous Setting” on page 4.
Touch once
Touch twice
b
e
c
a
d
f
Note
• The displayed distance is not the length of a
straight line connecting the current needle
position and the location touched with the
sensor pen. It is the length of a
perpendicular intersection for the location
touched with the sensor pen and the sewing
line.
a Displayed distance
• The following error message appears if the
area outside of the sensor pen touch range
is touched. Press
, and then touch
within the sensor pen touch range.
• When sewing with this setting, be sure to
gently hold the fabric and feed it straight.
• When using the sensor pen to specify the
sewing end point, be sure to hold the pen in
the same way as when it was calibrated,
otherwise the actual end point may be
different from the point that you specified.
• For best results, sew test stitching using the
same material and stitch pattern as those in
the actual project.