Brother PS-9000 User Manual
Page 2
2
US English
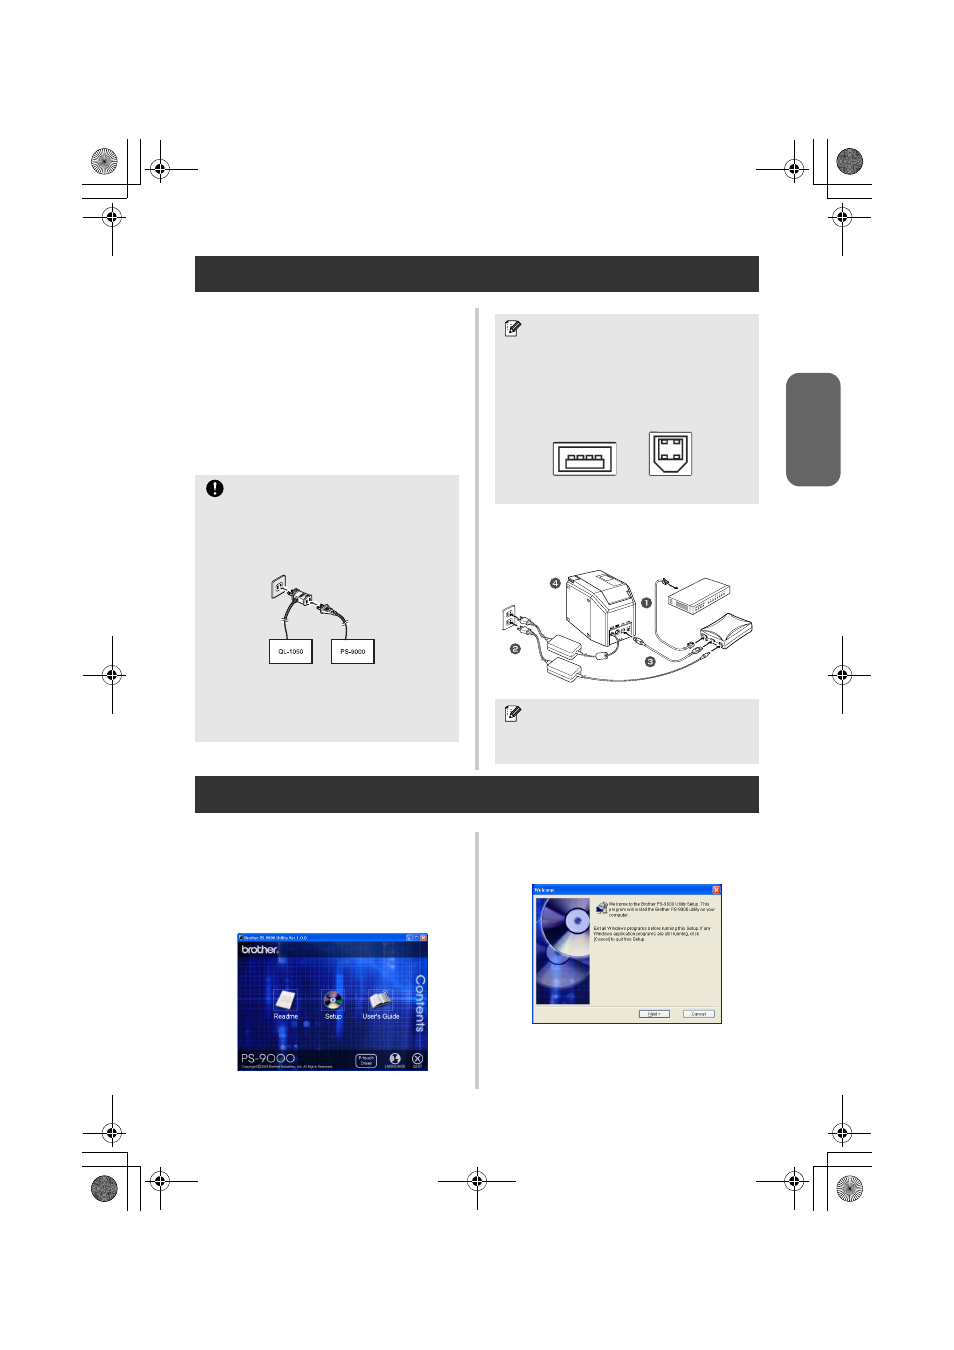
5 Connecting PS-9000
1
Use the network cable to connect
PS-9000 to the Ethernet hub.
2
Connect the AC adapter to PS-9000, and
then plug the power cable of the P-touch
and PS-9000 into the electrical outlet.
3
Use the USB cable to connect PS-9000 to
the P-touch. (PS-9000: Type A connector;
P-touch: Type B connector)
4
Turn on the P-touch.
6 Setting up PS-9000 and installing the printing software
1
After the CD-ROM is inserted into the
CD-ROM drive of the computer, the main
menu dialog box automatically appears.
●
If the main menu dialog box does not
appear, open My Computer, select the CD-
ROM drive, and then run “autorun.exe“.
2
In the main menu dialog box, click
[Setup]. The welcome message shown
below appears. Click [Next].
Caution
● The QL-1050N power cord is two
separate cords. After connecting to the PS-
9000 and the QL-1050N, plug the power
cord into the socket.
● The shape of the power cord depends on
your model.
● Don't connect the power cord to other
machines than the specified.
Note
● The USB cable has two different types of
connectors. Be sure to insert the correct
type of connector into the correct port.
■ USB Cable Connectors
Note
● The shape of the power cord depends on
your model.
Type A
Type B
P-touch
PS-9000
Ethernet HUB
PS9000_setup.book Page 2 Thursday, August 17, 2006 12:56 PM