Advanced – Acer 4530 User Manual
Page 38
28
Chapter 2
Advanced
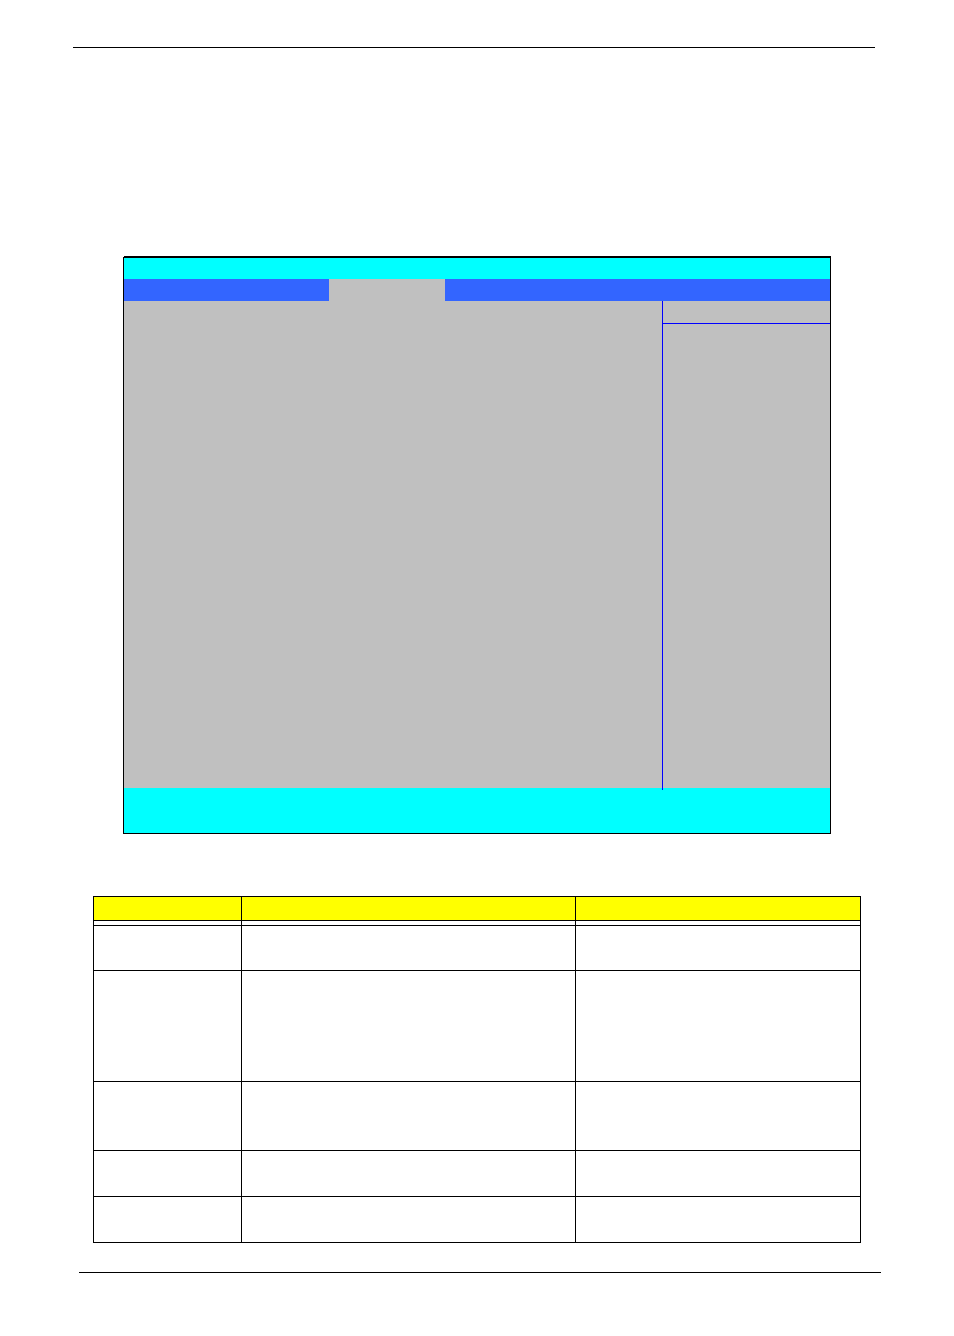
The Advanced screen allows the user to configure the various advanced BIOS options.
IMPORTANT:Making incorrect settings to items on these pages may cause the system to malfunction. Unless
you have experience adjusting these items, we recommend that you leave these settings at the
default values. If making settings to items on these pages causes your system to malfunction or
prevents the system from booting, open BIOS and choose Load Optimal Defaults in the Exit menu to
boot up normally.
The table below describes the items, menus, and submenus in this screen. Settings in boldface are the default
and suggested parameter settings.
Parameter
Description
Submenu Items
Advanced
Chipset Control
Enter the Advanced Chipset Control menu.
•
Advanced NB Options
•
Advanced SB Options
ASF
Configuration
Enter the ASF Configuration menu.
•
ASF OS Device Availability
•
Minimum Watchdog Timeout
•
BIOS Boot Timeout
•
OS Boot Timeout
•
Power-on wait time
PS/2 Mouse
Enable or Disable PS/2 Mouse port IRQ12.
Option: Auto Detect, Enabled, or
Disabled
IDE Controller
Configure the Integrated Local Bus IDE
Controller.
Option: Disabled, Both, or Primary
SB Power
Saving Feature
Enable SB Power Saving Feature.
Option: Enabled or Disabled
PhoenixBIOS Setup Utility
Information
Main
Advanced
Security
Power
Boot
AMD
Exit
Item Specific Help
XAdvanced Chipset Control
Select options for
XASF Configuration
Advanced Chipset
features.
PS/2 Mouse
[Auto Detec]
IDE Controller:
[Disabled]
SB Power Saving Feature:
[Enabled]
On chip SATA
[Enabled]
SATA Class ID
[IDE-ACHI C]
SATA IDE Combined mode
[Disabled]
PATA Channel Config
[SATA as pr]
ACHI ROM POST delay
[Disabled]
USB Host Controller:
[Enabled]
Legacy USB Support:
[Enabled]
Option ROM Placement
[Disabled]
Large Disk Access Mode:
[DOS]
Installed O/S:
[Other]
Reset Configuration Data
[No]
Processor Assisted Virtualization:
[Enabled]
F1
Help
↑↓
Select Item
F5/F6
Change Values
F9
Setup Defaults
ESC
Exit
←→
Select Menu
Enter
Select
XSub-Menu
F10
Save and Exit