Uick, Tart, Uide – UEi Test Instruments C157OILKIT User Manual
Page 5: Co/c
5
Q
uick
S
tart
G
uide
.
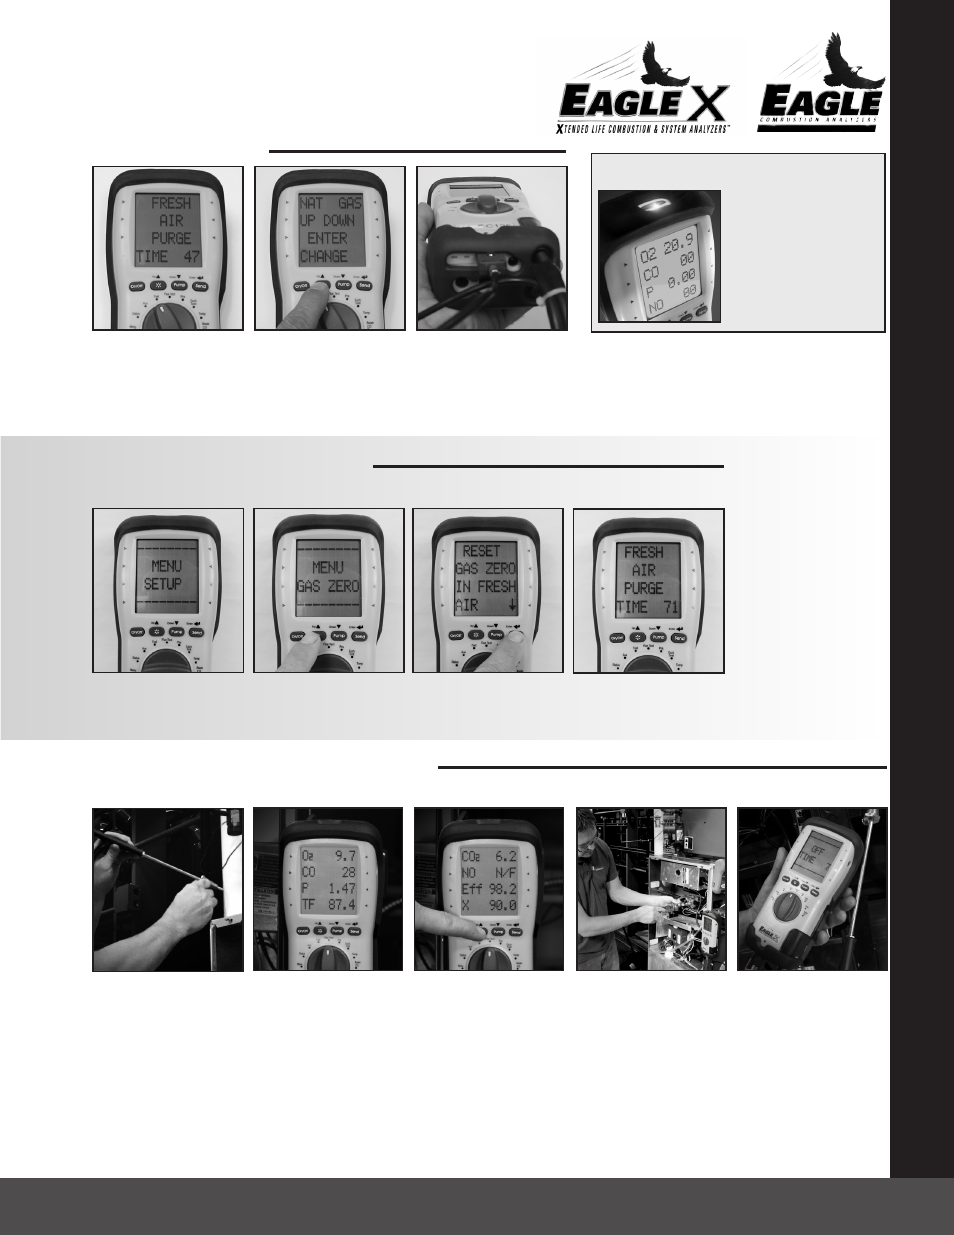
Turn Power on in area of
fresh air and allow to
countdown
Rotate test selector to Fuel.
Press “s“UP or “t“DOWN
to scroll and select desired
fuel. Top line is selected
fuel.
Rotate test selector to
“Flue Test” and begin test-
ing.
G
EttinG
s
tArtED
w
OrkLiGht
AnD
D
ispLAy
b
AsiC
CO/C
OmbUstiOn
A
nALysis
Press and Hold the “s“ UP
button to toggle between
fuel test screens 1 and 2.
Flue Test Pg.1: O2, CO, Draft
(P) and TF.
Flue Test Pg. 2: CO2, NO,
Efficiency and Excess Air.
(NO
1
upgrade available on
Eagle 2 and 2X.
NO
1
comes standard on
Eagle 3 and 3X.)
Make any adjustments as
needed for proper
combustion and wait for
analyzer to display any
change in the readings.
(repeat if necessary)
Once complete, remove
probe from the stack and
allow the analyzer to purge
in fresh air until CO sensor
readings return to ZERO and
O2 reads 20~21% (20.9%).
Continue to the next test
or turn off your analyzer if
finished.
NOTE: print and store func-
tions may be used at any
point during testing.
Connect flue probe
thermocouple connector to
T1, and connect flue probe to
water trap as shown above.
Use optional probe with T2 for
inlet temperature.
Insert Flue Probe in stack.
Adjust the cone so the end
of the probe is approxi-
mately. at the center of the
stack (4” stack adjust cone
to aprox 2” from end of
probe.)
G
As
z
ErO
(E
AGLE
X
sEriEs
OnLy
)
Rotate test selector to Menu.
Make sure Analyzer is in
fresh air and press ENTER.
Analyzer will then Zero This
takes 90 seconds.
Press “s“ UP Button to
GAS ZERO and press ENTER.
Re-Zero the analyzer in fresh air if needed for different fuel type or after large temperature rise.
NOTE: The Eagle X will automatically initiate Gas Zero if required for continued accurate results.
Best results are obtained at Steady State Efficiency (SSE). Allow equipment adequate warm-up time prior to testing.
After the Analyzer has
zeroed turn test selector
to appropriate test screen.
Press “s“UP at any point to
turn on the backlit display
and worklight.
NOTE: backlight does not
work in the fuel menu.or
during purge.
NOTE: you will have to drill a hole at least 3/8”.
Use a high temp silicone to seal after testing.
Q
uick
S
tart
G
uide
.