Metpar Polly Solid Plastic(HDPE) User Manual
Page 6
STEP 4C
STEP 4C -- Attach Stile FT700
Attach Stile FT700
A. Place expansion shields into floor holes.
B. Screw (hand tight) 3/8” studs into shields.
C. On each stud place these items in the following
order; one (1) shoe clip and one (1) washer.
D. Screw one (1) 3/8” nut onto each stud. Tighten
nuts to expand anchor. Place one (1) nut and one (1)
round washer onto each stud.
E. Lower the stile over the studs and place on each
stud these items in the following order; one (1)
clamp, one (1) round washer, screw on one (1) nut.
F. Top of stile and top of panel should align and be even. Push panel into “1-ear” or “2-ear” brackets
(previously installed onto the back of each stile) and push up to screw heads.
G. Plumb stile, place wedge at top rear between panel and wall. Do not remove panel support at floor.
STEP 5
STEP 5 -- Securing Stiles to Panels
Securing Stiles to Panels
A. Stiles must be both plumb and level. Headrail may be used as an aid in this process by temporarily setting
them in position (DO NOT
DO NOT fasten it at this time).
B. Plumb stile and adjust elevation. Fasten stile to panel using #14 x 5/8” sheet metal screws on both sides
of panel through bracket.
C. By adjusting L-brackets on the bottom of the FP500 stiles, the proper door opening and stile elevation can
be attained and set in position by tightening screws.
STEP 6
STEP 6 -- Headrail and Panel Fastening
Headrail and Panel Fastening
A. Place headrail onto top of stiles. Starting at one wall (preferably at hinge side) set gap between stile and
wall, plumb stile and anchor stile to bracket at wall. Headrail will extend beyond stile to wall. Fasten
headrail to pilaster and then to wall with headrail bracket.
B. Install one door (STEP 7). If you have the “no-peek” design,
then each door is prepared with a special rabbet on both sides
for the door hinge or door strike. The rabbet will change for
inswing or outswing. It is very important to review your Metpar
layout drawings to determine which door is used at each
location by matching the note (ie; PYD2). Set door gap and
plumb next stile and anchor headrail to top of that stile.
Proceed, ONE PILASTER AND DOOR AT A TIME, setting gaps,
plumbing, and anchoring headrail. Fasten headrail to stiles.
C. Fasten panel to wall brackets using #14 x 5/8" sheet metal
screws.
D. Tighten ¼-20 nuts and bolts at bottom of each stile. Slide
stainless steel plinth down to floor level firmly.
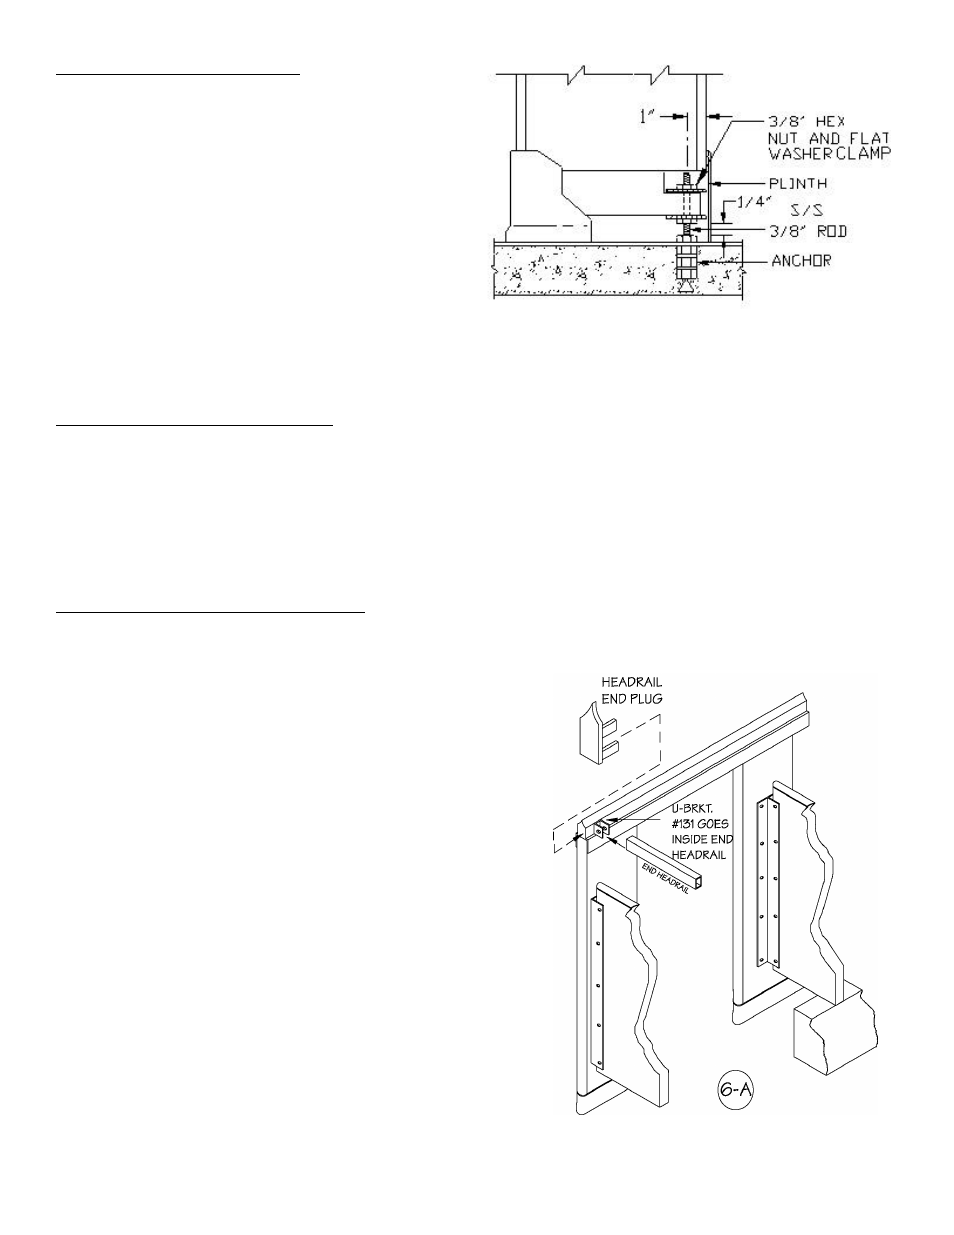
E. At the last corner pilaster (if not at a wall) cut excess
headrail even with radius of stile. Insert headrail end plug.
F. To insure rigidity, install rectangular end-headrail to depth of
last stall by securing with U-bracket at back of stile and also
with a 2-ear headrail bracket at the back wall. Align over the
end panel.
Metpar’s Polly
®
Installation Manual ~ February 2003