Dwyer 285 User Manual
Page 7
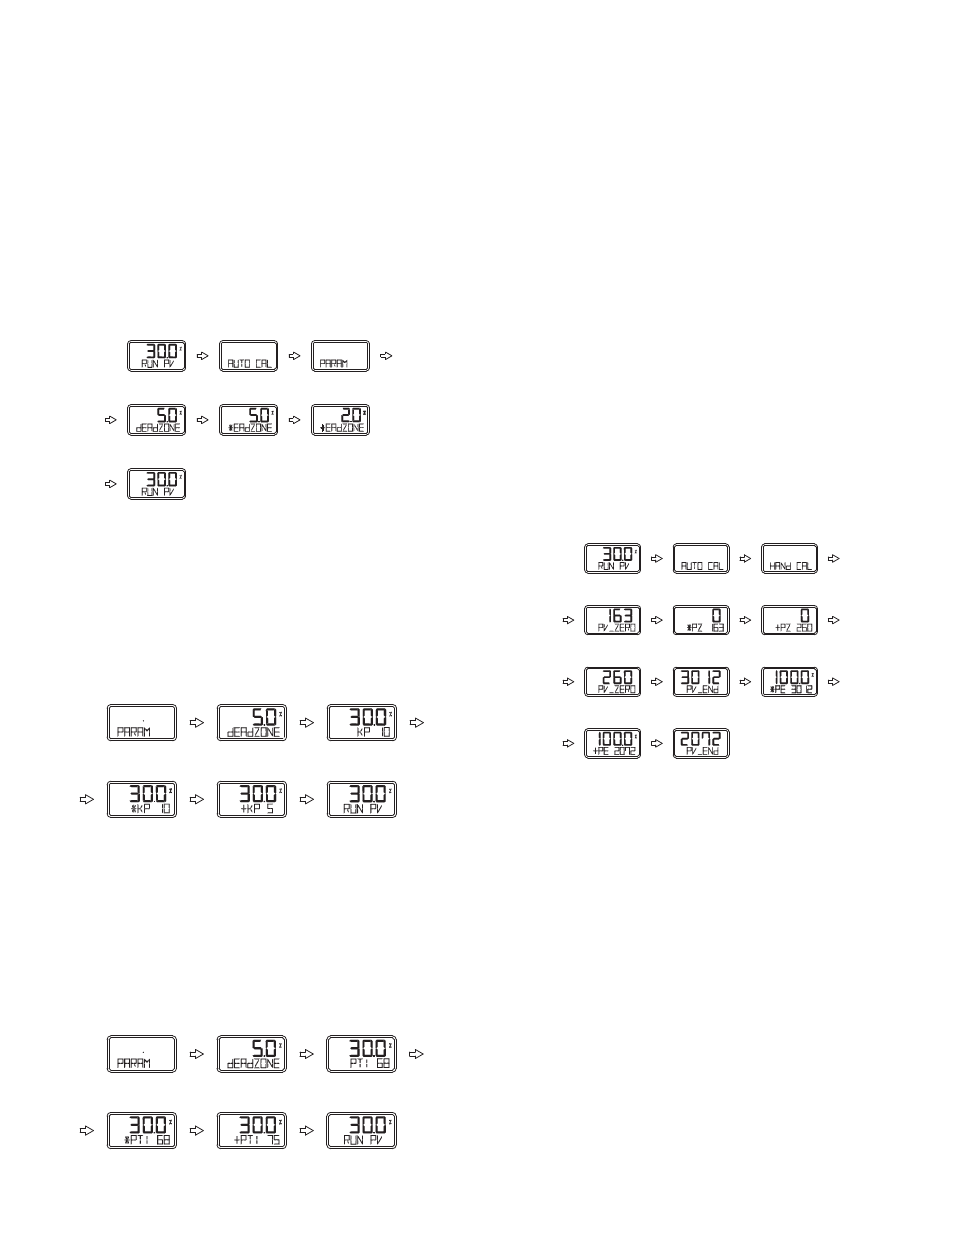
Parameter Mode (PARAM)
Parameter Types
There are four parameter modes: Dead Zone, KP, KI, and KD.
These values are reflected as soon as they are changed, therefore the appropriate
values are found by checking the valve’s motion in real time.
Adjustment of Dead Zone (dEAdZONE)
This is the range of error % that the positioner is not adjusted. Hunting or oscillation
due to friction between the stem and packing is prevented by this parameter.
1. Press and hold
message appears.
2. Scroll with
3. Push
4. Push
5. Adjust dEAdZONE value by pushing
applied immediately without additional operation. Users can easily check its
adjustment by changing the current input signal to the positioner. Optimum
control value is found by adjusting values during the valve operation.
6. Push
7. Push
KP
1. Press and hold
message appears.
2. Scroll with
3. Push
4. Scroll with
5. Push
6. Adjust KP value with
without additional operation. Users can easily check its adjustment by changing
the current input signal to the positioner. Optimum control value is found by
adjusting the values during valve operation.
7. Push
8. Push
PT
1. Press and hold
message appears.
2. Scroll with
3. Push
4. Scroll with
5. Push
6. Adjust PT value with
without additional operation. Users can easily check its adjustment by changing
the current input signal to the positioner. Optimum control value is found by
adjusting the values during valve operation.
7. Push
8. Push
HAND CAL
When auto calibration is started, Series 185 and 285 positioners set zero points
and end points based on full stroke. HAND CAL allows for user defined zero and
end points.
Hand Calibration Types
PV_ZERO: Edit mode to change the zero point of valve.
PV_END: Edit mode to change the end point of a valve.
TR_ZERO: Edit mode to change the zero point of transmitter.
TR_END: Edit mode to change the end point of transmitter.
Adjustment of valve zero point (1 to 5) and end point (6 to 10).
PV_ZERO
1. Press and hold
message appears.
2. Scroll with
3. Push
4. Push
will move automatically to the current zero point. On the LCD, the valve stroke
is displayed as 0%. *PZ indicates the zero point is ready to be set.
5. Adjust valve stem by pushing
desired zero point, save it by pushing
6. Push
PV_END
1. To change valve end point, scroll with
PV_END.
2. Push
will move automatically to the current end point. On the LCD, the valve stroke
is displayed as 100%. *PE indicates the end point is ready to be set.
3. Adjust valve stem by pushing
the desired end point, save it by pushing
4. Push
6 seconds
6 seconds
then
3 times
COMPLETED
3 times
then
3 times
COMPLETED
7 times
then
3 times
COMPLETED
6 seconds
3 times
then
then
COMPLETED