Dwyer DCAL 1000 User Manual
Page 2
SOFTWARE INSTALLATION
Install DCAL 1000 software before installing the driver. Follow the instructions below
to install the software.
1. Insert the included CD into the computer’s CD drive.
2. If the CD does not start automatically, open the computer’s CD/DVD Drive folder.
Double click on “setup.exe”, then follow the steps in the application.
3. When the software installation is complete, plug in the DCAL 1000 with the included
USB cable to install the driver.
4. Once the driver installation is complete, the calibration software is ready to use.
USING SOFTWARE
Plug the DCAL 1000 into the computer being used and plug the probe to be calibrated
into the DCAL 1000 if wired, or turn on the wireless probe to make it discoverable
when prompted. Double-click on the software icon to open it.
Upon first start-up, the software will request:
Configuration Application Properties: This asks for where the calibration
information will be stored and how it will be recorded.
Test Facility Information: This asks for the company information of the test facility
and will be displayed on any future certificates.
Test Equipment Information: This is information about any calibration references
that will be used. More than one reference can be added for each parameter being
measured.
Once the information has been entered, the software will go to the home menu. (If
necessary, this information can be edited at any time by going back to the software’s
Configuration section.)
At any time while using the DCAL 1000 software, the user can press the
question mark icon in the top right corner to get an explanation of each
option in the software.
Verify Calibration
This is used to check the current accuracy of the probe.
1. Click on the “Verify Calibration” icon.
2. Once open, the top of the screen will show the interface as DCAL 1000. Change
the port based on the type of probe being tested. On a wireless probe, the LED on the
handle will light up to show that a connection has been made. Click on the probe from
the list and press “Next” (Note: If the probe does not show up in the probe list within
1 minute, turn the probe off and then restart it).
3. Once the probe is connected and communicating with the software, the circle in the
upper left hand of the software will change from Red to Green. If you lose connection,
it will go back to red.
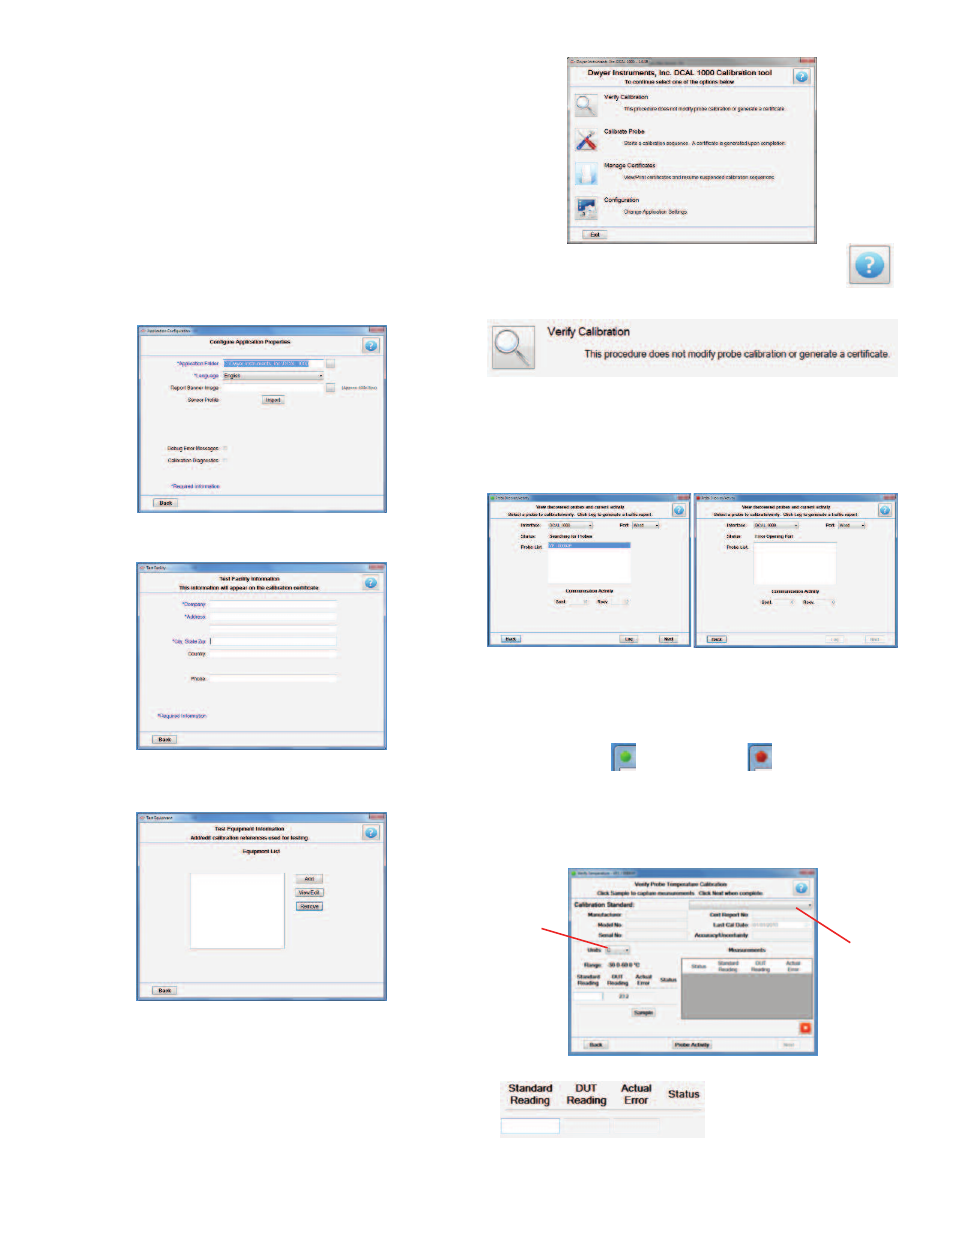
4. On the next screen, choose the reference instrument being used from the drop-
down bar in the top right of the screen. Based on the parameter being verified, the
software will have another drop-down bar of measurement units. Choose the one
which will be used in testing.
5. Begin measuring. Four units will be shown:
Probe Connected
Probe Not Connected
Probe Connected
Probe Not Connected
Choose
Units
Choose
Reference