Dwyer 610 User Manual
Dwyer instruments, inc, Series 610 low differential pressure transmitter

Series 610 Low Differential Pressure Transmitter
Specifications - Installation and Operating Instructions
Bulletin E-54
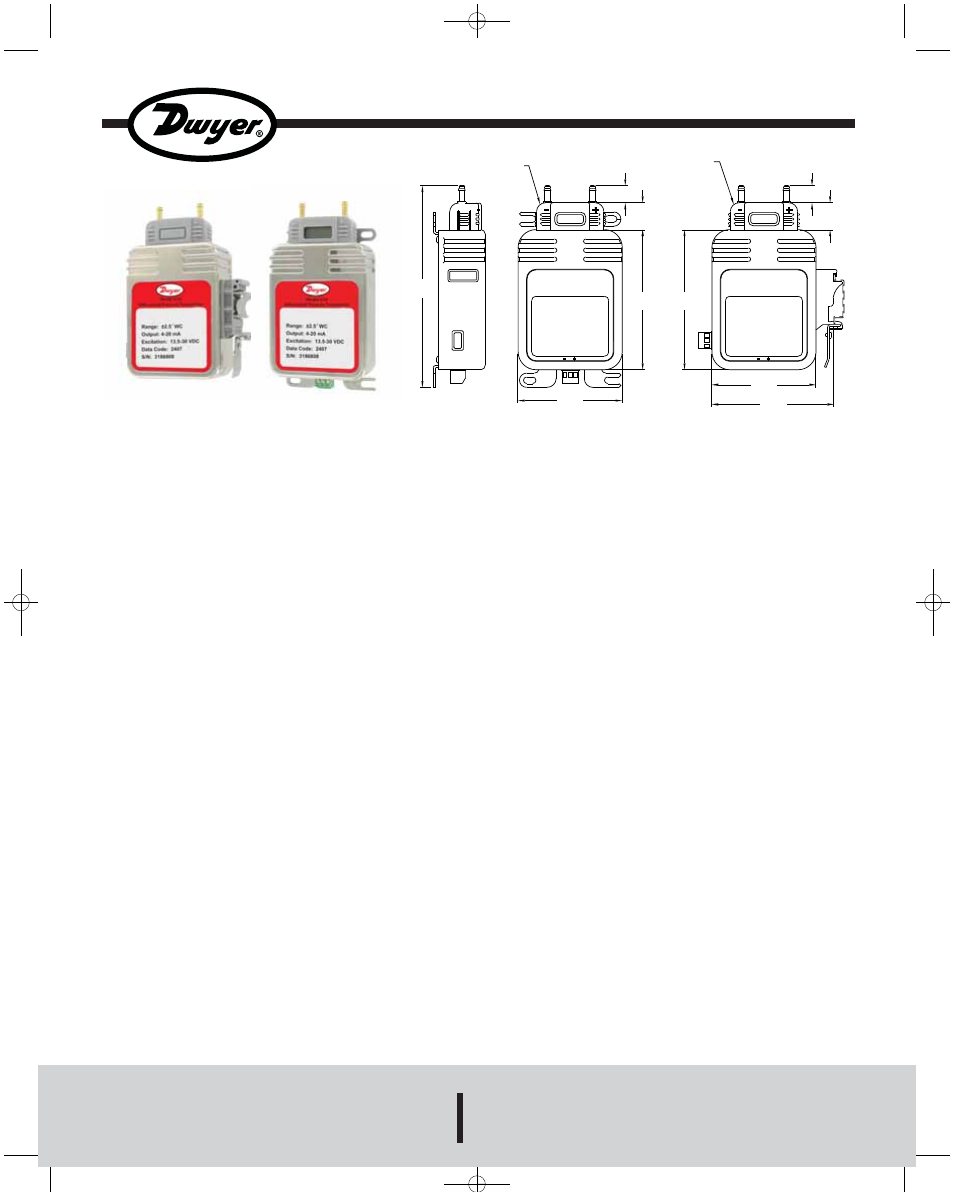
The Series 610 Low Differential Pressure Transmitter detects differential
pressure and converts the pressure difference to a proportional electrical
output for either unidirectional or bi-directional pressure. This product can be
used to accurately sense the pressures of air or any similar non-conducting
gases at great resolutions. Easy access pressure ports and electrical
connections, removable process heads, and detachable terminal blocks
makes for fast and easy installation. In addition, a calibration key can be
ordered that allows the user to set zero and span. One key will work on
multiple transmitters.
INSTALLATION
Location:
Select a clean dry mounting location where temperature will remain between
20 to 140˚F (-7 to 60˚C).
Pressure Connection:
The Series 610 is designed to be used with a 3/16˝ I.D. push on tubing on a
removable process head. To minimize response times a 1/4˝ I.D. is
suggested for tubing lengths above 100 ft and 3/8˝ I.D. for tubing lengths
exceeding 300 feet. The positive (high) pressure port and the reference (low)
pressure port can be found at the top of the unit. The high pressure port will
be labeled “+” and the low pressure port will be labeled “-”.
ELECTRICAL INSTALLATION
The Series 610 is a two-wire loop-powered 4 to 20 mA current output unit and
delivers rated current into any external load of 0 to 800 ohms. These
terminals have the designation of “+” and “-”.
The current flows into the “+” terminal and returns back to the power supply
through the “-” terminal. The Series 610 must be used with a DC power
supply source with a voltage range between 13.5 and 30 measured between
the “+” and “-” terminals. The unit is calibrated at the factor with a 24 VDC
loop supply voltage and a 250 ohm load.
CALIBRATION
The Series 610 transmitter is calibrated in the factory before it is shipped and
therefore should not require field adjustments when mounted in the vertical
position. When possible, any zero and/or span offsets should be corrected by
software adjustment in the user’s control system. Fine zero and span
adjustments can be made through a calibration secure access key. The
Series 610 transmitter zero offset is trimmed in the vertical position (pressure
ports pointing upward) prior to shipping.
1. Zero/Span Adjustments with Security Key: Remove detachable process
head by pressing and pulling on the side tabs. Then install the calibration
security key in-place of the process head.
2. Zero Adjustment: Zero may be adjusted while applying zero differential
pressure by pressing the cal button to tare zero. Depress cal button while
turning the encoder for fine adjustment if needed.
3. Span Adjustment: Span or full scale output adjustments should only be
performed by using an accurate pressure standard (electronic manometer,
digital pressure gage, etc.) with an accuracy that is at least comparable to
that of the Model 610 transmitter. The span may be adjusted while applying
full range pressure by pressing the cal button to set span. If fine adjustment
is needed on span, apply at least 75% of full pressure and turn encoder until
target output is achieved.
4. Restoring Factory Calibration: To restore factory set calibration, turn unit
off and press the cal button. Turn the power back on while cal button is
depressed and release the cal button.
MAINTENANCE
Upon final installation of the Series 610 Low Differential Pressure
Transmitter, no routine maintenance is required. A periodic check of system
calibration is recommended. The Series 610 is not field serviceable and
should be returned if repair is needed (field repair should not be attempted
and may void warranty). Be sure to include a brief description of the problem
plus any relevant application notes. Contact customer service to receive a
return goods authorization number before shipping.
DWYER INSTRUMENTS, INC.
Phone: 219/879-8000
www.dwyer-inst.com
P.O. BOX 373 • MICHIGAN CITY, INDIANA 46361, U.S.A.
Fax: 219/872-9057
e-mail: [email protected]
SPECIFICATIONS
Service: Air or similar non-conducting gases.
Accuracy: ±0.25% or ±0.5% F.S.
Stability: ±0.5%/yr.
Temperature Limits: -20 to 160°F (-29 to 71°C).
Pressure Limits: 2 PSI (0.137 bar).
Thermal Effect: 0.5% FS.
Power Requirements: 13.5 to 30 VDC.
Output: 4 to 20 mA.
Loop Resistance: 800 ohms max.
Current Consumption: 25 mA.
Zero and Span Adjustments: External security key pendant.
Response Time: 0.02 to 0.04 seconds.
Electrical Connections: Detachable screw terminal connector.
Process Connections: 3/16˝ O.D. barbed brass fittings on removable
process head.
Enclosure Rating: Fire retardant ABS.
Mounting Orientation: Vertical.
Weight: 9 oz (255 g).
Agency Approvals: CE.
©Copyright 2009 Dwyer Instruments, Inc.
Printed in U.S.A. 5/09
FR# R1-443428-00 Rev.1
DIN RAIL MOUNT
3-13/32
[86.52]
FOR 35mm DIN RAIL MOUNTING
2-29/32
[73.82]
CALIBRATION KEY
A-165
31/64
[12.3]
3/4
[19.05]
3-29/32
[99.22]
3-29/32
[99.22]
3/4
[19.05]
31/64
[12.3]
CALIBRATION KEY
A-165
5-41/64
[143.27]
2-29/32
[73.82]
BASE MOUNT VERSION
E-54:TEMPLATE 5/26/09 1:59 PM Page 1
