Dwyer DM-1200 User Manual
Page 5
KFAC (K Factor) SUB MENU:
1.00-KFAC: K Factor = 1.00
K factor becomes accessible if the instrument is set for Velocity or Flow. When the
DigiMag
®
is used with a Pitot tube, the manufacturer may specify a K factor. The
adjustment range is 0.01 to 2.00. The factory setting is 1.
ArEA (Area), DIA (Diameter), XDIM (X dimension) and YDIM (Y dimension)
SUB MENUS:
These SUB MENUS become accessible if the instrument is set for Flow. When
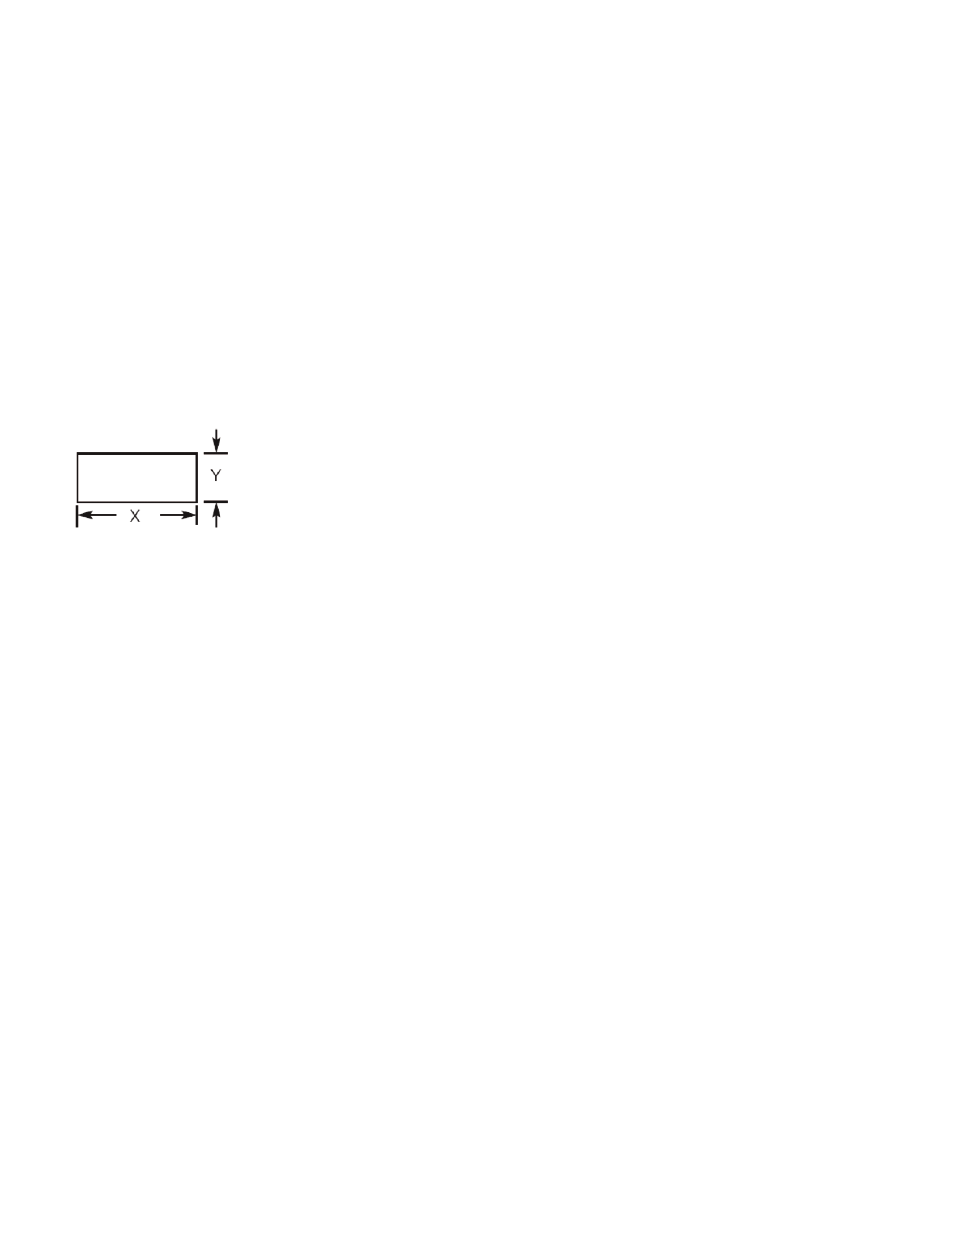
measuring flow, the area of the duct must be specified. Tables 1 to 6 show the input
range vs. maximum flow and duct size. For a rectangular duct the maximum size
is specified by the X, Y dimensions. For a circular duct the maximum size is
specified by the diameter. X, Y and circular dimensions are entered in feet with
0.001 foot resolution for FLOr = LO, 0.01 foot resolution for FLOr = MED and 0.1
foot resolution for FLOr = HI, or entered in millimeters with 1 millimeter resolution.
ArEA – Area, select CIR for a circular duct or RECT for a rectangular duct. If a
circular duct is selected the DIA SUB MENU will be activated. If a rectangular duct
is selected, the XDIM and YDIM SUB MENUS will be activated.
DIA – Diameter, enter the diameter of a duct
XDIM – Enter the “X” dimension of a duct
YDIM – Enter the “Y” dimension of a duct
DISPLAY MENU: diS – MENU
With the gage reading a numerical value (home position), press and hold the
MENU key until the SECr-MENU is displayed. Press the q key until the LCD
shows diS – MENU. Press the E key to show the Display SUB MENUS.
FILTER TYPE SETTING
With the LCD reading FILt – OFF, press the E key; the display will blink. Press the
q key to change the filter type then press the E key to save the desired filter type.
FILt – OFF: Filter type = OFF. The filter function is disabled.
FILt – HIGH: Filter type = HIGH. The display blinks when pressure is greater than
the filter point.
FILt – LOW: Filter type - LOW. The display blinks when pressure is less than the
filter point.
FILTER POINT SETTING
With the LCD reading 0.00 – SPPT, press the E key; the display will blink. Press
the p or q key to change the filter point then press the E key to save the desired
filter point.
0.00 – SPPT: Filter point = 0.00. The filter point may be set to anywhere within the
range of the instrument.
DAMPING SETTING
With the LCD reading 1 – DAMP, press the E key; the display will blink. Press the
p or q key to change the damping level then press the E key to save the desired
damping level.
1 – DAMP: Damping level = 1. The damping level can be adjusted from 1 to 15.
Damping stabilizes the display from instabilities due to things such as vibration and
excessive pressure fluctuations. The damping function adjusts the amount of
readings that are averaged for each display update.
DISPLAY UPDATE SETTING
With the LCD reading rAtE – NORM, press the E key; the display will blink. Press
the q key to change the display update rate then press the E key to save the
desired display update rate.
rAtE – NORM: Display update = Normal (1 second).
The gage reads the process pressure and updates the LCD every second.
rAtE – 10: Display update = 10 minutes.
The gage reads the process pressure and updates the LCD every 10 minutes.
rAtE – KEY (On-Touch mode): Display update is disabled.
The gage reads the process pressure and updates the LCD whenever the p key
is pressed. If the p key is released, the LCD will hold and display the last pressure
reading.
NOTES:
1. Depending on the Display Update setting, the battery life is shown below:
-150 hours (typical) if Display Update is set for “Normal” 1 second update. rAtE-
NORM
-1 year (typical) if Display Update is set for 10 minutes. rAtE-10
-2 years (typical) if Display Update is disabled. rAtE-KEY
2. If the Display Update is set for 10 minutes or disabled (On-Touch mode), the
process pressure value can be read instantly by pressing and holding the p key
on the front panel. Also the LCD will automatically show “ALAr” if the filter point has
been exceeded.
PEAK AND VALLEY SETTING
100.0 – PEAK: Peak value = 100.0
The peak feature stores the highest pressure reading the instrument has measured
since the last reset or power up. At power up PEAK is reset to the present pressure
reading. To manually reset the PEAK value, press the E key while in the PEAK
SUB MENU.
0.0 – VALY: Valley value = 0.0
The valley feature stores the lowest pressure reading the instrument has measured
since the last reset or power up. At power up VALY is reset to the present pressure
reading. To manually reset the VALY value, press the E key while in the VALY SUB
MENU.
ADVANCED MENU: AdU – MENU
With the gage reading pressure (home position), press and hold the MENU key
until the SECr-MENU is displayed. Press the q key until the display shows the
AdU – MENU. Press the E key to show the advanced function SUB MENUS.
Auto ZERO: auto-zero
NOTE: For accurate calibration, DO NOT apply any pressure when
performing this function.
With the display reading Auto ZERO, release pressure to Zero then press the E
key; the display will blink. Press the E key again to complete the Auto-zero.
CAL – SPAN: full-scale calibration
With the display reading CAL – SPAN, apply full-scale pressure then press the E
key; the display will blink. Press the E key again to save the full-scale calibration
or press the MENU key to cancel the calibration.
MAINTENANCE
Upon final installation of the Series DM-1200 DigiMag
®
Digital Differential Pressure
Gage, no routine maintenance is required. A periodic check of the system is recom-
mended. The Series DM-1200 is not field serviceable and should be returned if repair
is needed (field repair should not be attempted and may void warranty). Be sure to
include a brief description of the problem plus any relevant application notes. Contact
customer service to receive a return good authorization number before shipping.