Re-assembling the unit, Calibration certificates, Front panel keypad and connections – Time Electronics 1048 Voltage-Current-Loop Calibrator User Manual
Page 20
20
V1.2 30/12/10
P a g e
| 20
1048 Technical Manual
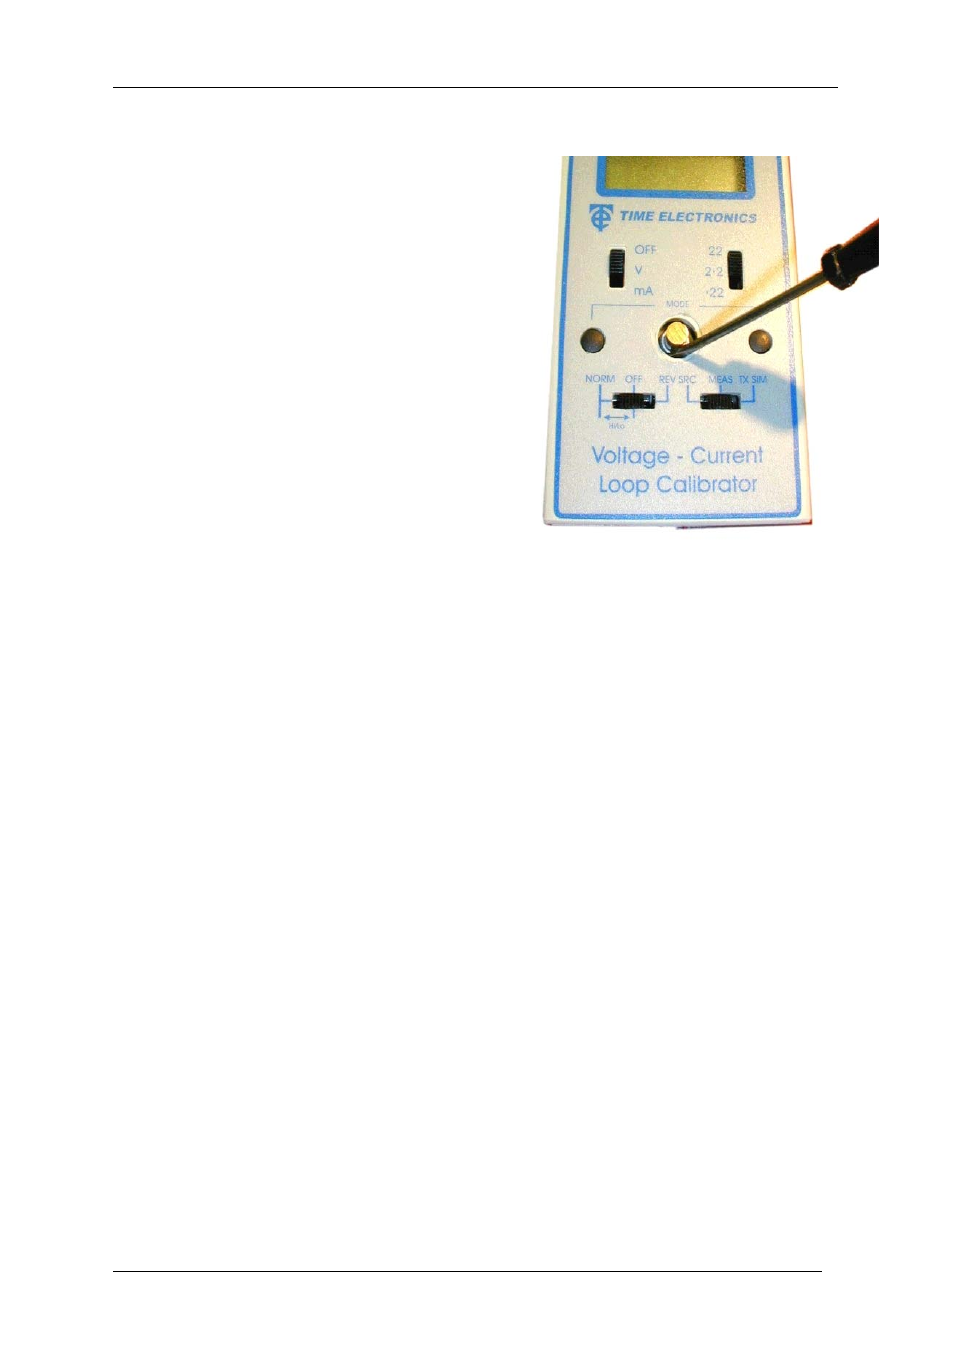
7.7. Re-Assembling the Unit
Re-assemble the unit in the reverse order as in
5) through to 1).
Please note that there is some difficulty in returning
the printed circuit board assembly to its correct
position in the case. It is important to initially
position it so that the external supply socket (the
terminal end) is adjacent to its hole in the case.
The whole assembly should then be lowered into
position as far as it will go - it is important to have
the ‘OFF/V/mA’ and range switches to the ‘OFF’ and
‘22’ positions and the ‘OUTPUT’ and ‘MODE’
switches in ‘OFF’ and ‘MEAS’ positions.
It is then necessary to lever the multi-turn shaft
(with a small screw driver) towards the terminals.
This will ease the output and mode switches forward
enough to allow them to spring into their slots. At
the same time the ‘INC/DEC’ buttons may need to
be re-positioned slightly to allow them to go back
into their holes.
7.8. Calibration Certificates
It should be noted that the previously listed procedures are used to set up the adjust
trimmers that ensure that the unit will be within the manufacturer’s specification.
To produce a full set of calibration results and a ‘Certificate of Calibration’, the unit must be
checked on all its ranges. Good practice requires a minimum of 5 calibration points per
range.
Time Electronics can supply calibration certificates for the unit either NPL (National Physical
Laboratories, UK) traceable, or to UKAS standard. Equivalent certificates will be available
from calibration houses throughout the world.
Time Electronics EasyCal Calibration System
It should be noted that users who have access to the above system can obtain on request,
free of charge, a copy of the manufacturers recommended calibration procedure. Please
specify either floppy disc or e-mail for the delivery media.
7.9. Front Panel Keypad and Connections
The Front Panel should be cleaned by wiping with a damp cloth. Solvents must not be used
as damage may result.
When connecting cables the screwed terminals should be hand tightened only.