Thermo Fisher Scientific CyberComm Pro for CyberScan pH 1100 & pH 2100 User Manual
Page 19
Instruction Manual
CyberComm pH 1100/ 2100
15
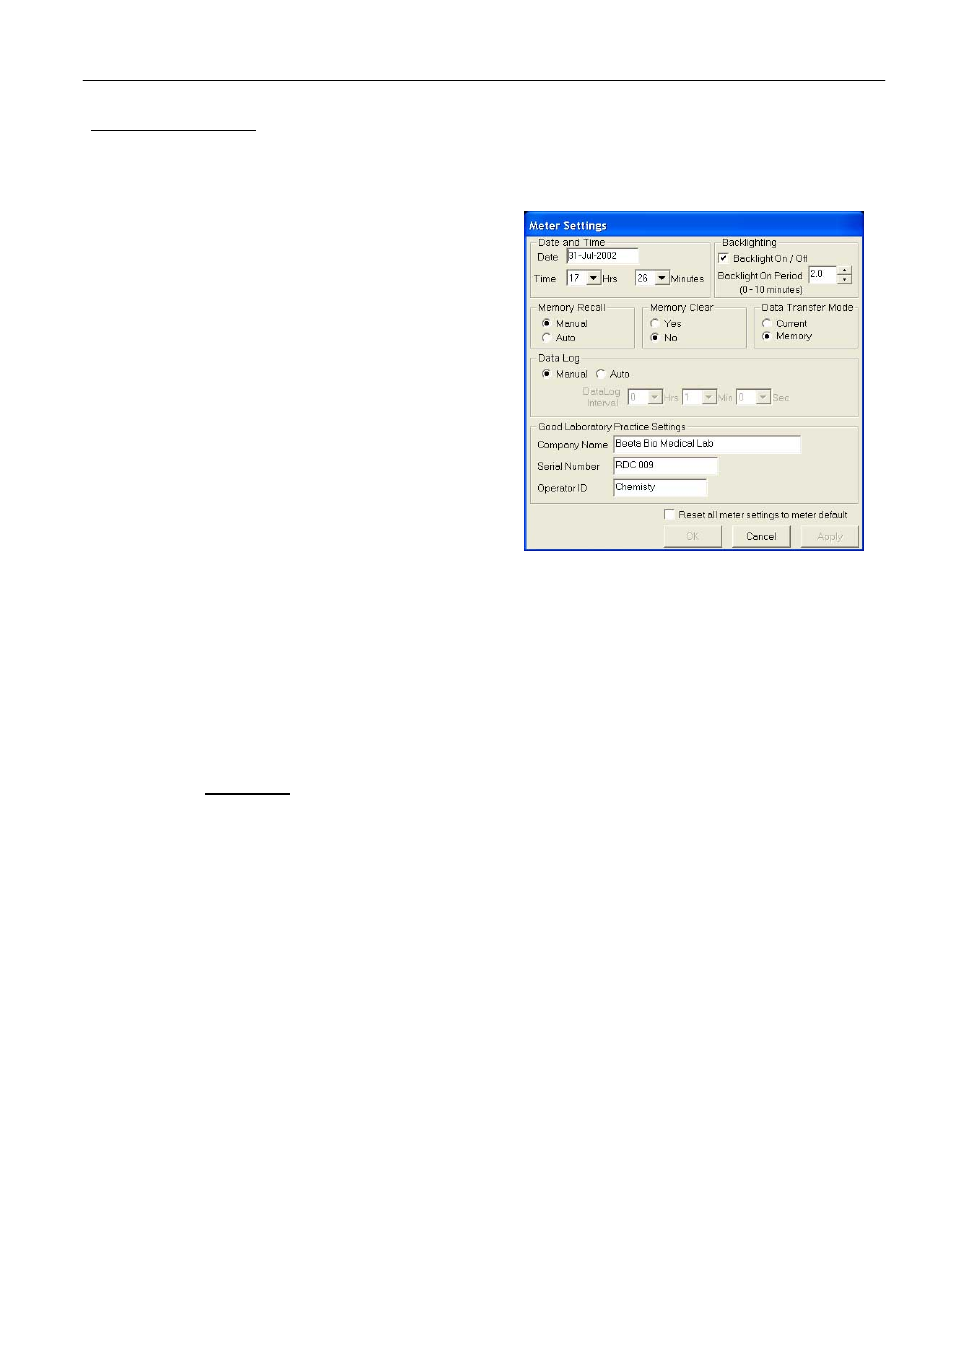
Icon 14. Meter Settings
See Figure 19.
Program your meter functions via this icon on CyberComm Program.
a) Date and Time
Click on the textbox then a calendar will appear for
you to set the date.
b) Backlighting
Enable or disable the backlight and choose the On
period from 0 to 10 minutes.
c) Data
Log
Select Manual for self recording of the readings at
different times or choose to have Auto Data logging at
the preferred interval timing.
d) Memory
Recall
Select Manual or Auto.
e) Memory
Clear
Select Yes or No.
f) Data Transfer Mode
Select Current or Memory.
g) Reset all meter settings to meter default
Check box & click apply to reset Meter calibration settings.
h) Good Laboratory Practice Settings
Enter the relevant information for useful future references.
Click on OK or Apply to save settings whenever there are changes.
Continue from Section 4.3
Refer back to Figure 12 on pg 13.
4.3.1 Measurement
Mode
This indicates the current mode of measurement of the meter, you can change the mode by selecting from
the drop down menu to choose between the various parameters; pH, mV and Ion. (Ion mode: available in pH
2100 only)
4.3.2 Show
Cursor
Use the ‘Show cursor’ function from the icon panel and a green guide line will show any point on the reading
curve having the exact measurement according to the mode chosen. Drag this guide along the horizontal
time axis and you can read the pH, mV or concentration values at any point in time.
4.3.3 Information
This information will always be on the graph, showing the Elapsed Time of the measurement being carried
out, the date and time which marks the start of the first data captured.
4.3.4 Data
Reading
The data captured from the meter is plotted on the graph while the measurement is being carried out.
Figure 19: Meter Settings