Performing a pressure switch test – Martel Electronics BetaGauge 301 User Manual
Page 16
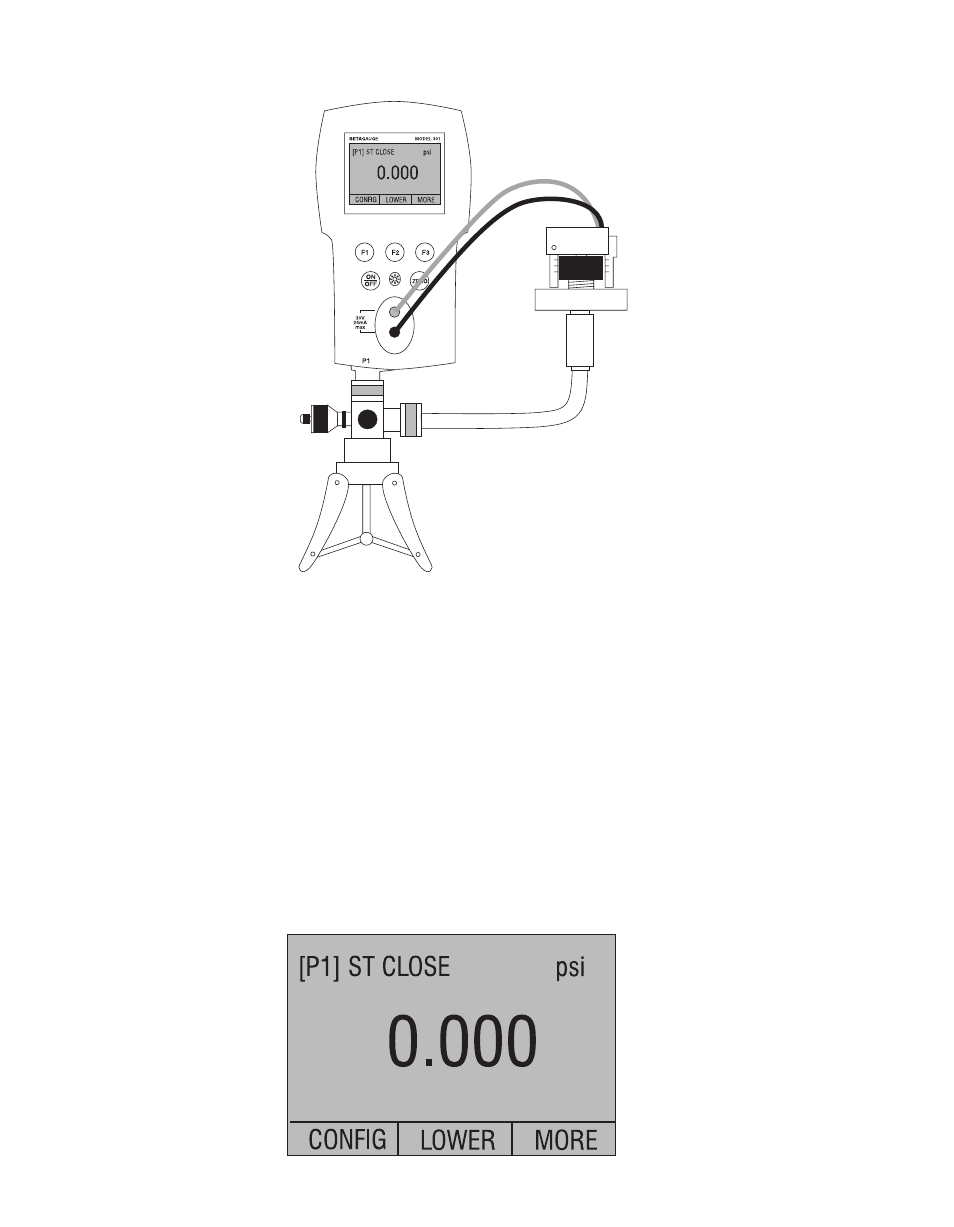
6. Performing a Pressure Switch Test
Figure 10
To perform a switch test, follow these steps:
1. Change the setup to Setup 4 (default switch test).
Setup 4: The upper display is set to [P1] ST, all other displays are off.
Important NOTE: The pressure Switch Test can be performed with the following
functions[P1] ST, or EXT ST.
2. Connect the calibrator to the switch using the pressure switch terminals. The polarity
of the terminals does not matter. Then connect the pump to the calibrator and the
pressure switch.
3. Make sure the vent on the pump is open. Zero the calibrator if necessary. Close the
vent after zeroing the calibrator.
4. The top of the display will read “CLOSE”.
14
Pressure switch
under test
See also other documents in the category Martel Electronics Equipment:
- 3001 (94 pages)
- BetaGauge 311A-Ex (32 pages)
- BetaGauge 311A (48 pages)
- BetaGauge 330 (48 pages)
- BetaGauge 3II (197 pages)
- BetaGauge PI (20 pages)
- BetaGauge PIR (24 pages)
- BetaLOG-PI (28 pages)
- BetaLOG-TI (16 pages)
- BetaProbe TI/TI+ (9 pages)
- DPC-30 (12 pages)
- DPC300A (48 pages)
- DMC1410 (108 pages)
- IVC-222HPII (12 pages)
- LC-110/H (50 pages)
- BETA LDT-500 (2 pages)
- M2000 (28 pages)
- MC1010 (46 pages)
- MC1210 (56 pages)
- TC100 (16 pages)
- T150 (8 pages)
- T140 Series (12 pages)
- PTC8010 (36 pages)
- PSC4010 (36 pages)
- MS-420 (1 page)
- MECP500 (2 pages)
- MECP2000 (2 pages)
- MECP10K (4 pages)
- MECP100 (2 pages)
- T130 (2 pages)
- T120 (2 pages)
- MC1200 (50 pages)
- MC1000 (28 pages)
- MasterCAL (140 pages)
- LC100 (20 pages)
- DMC1400 (106 pages)
- 320 (60 pages)
- 230 (106 pages)
- 130 (85 pages)
- QM100V (1 page)
- QM100V-40 (1 page)
- QM110T (2 pages)
- QM120ET (2 pages)
- QM130M (2 pages)