Step 6, Step 7 – Catskill Craftsmen 51537 User Manual
Page 8
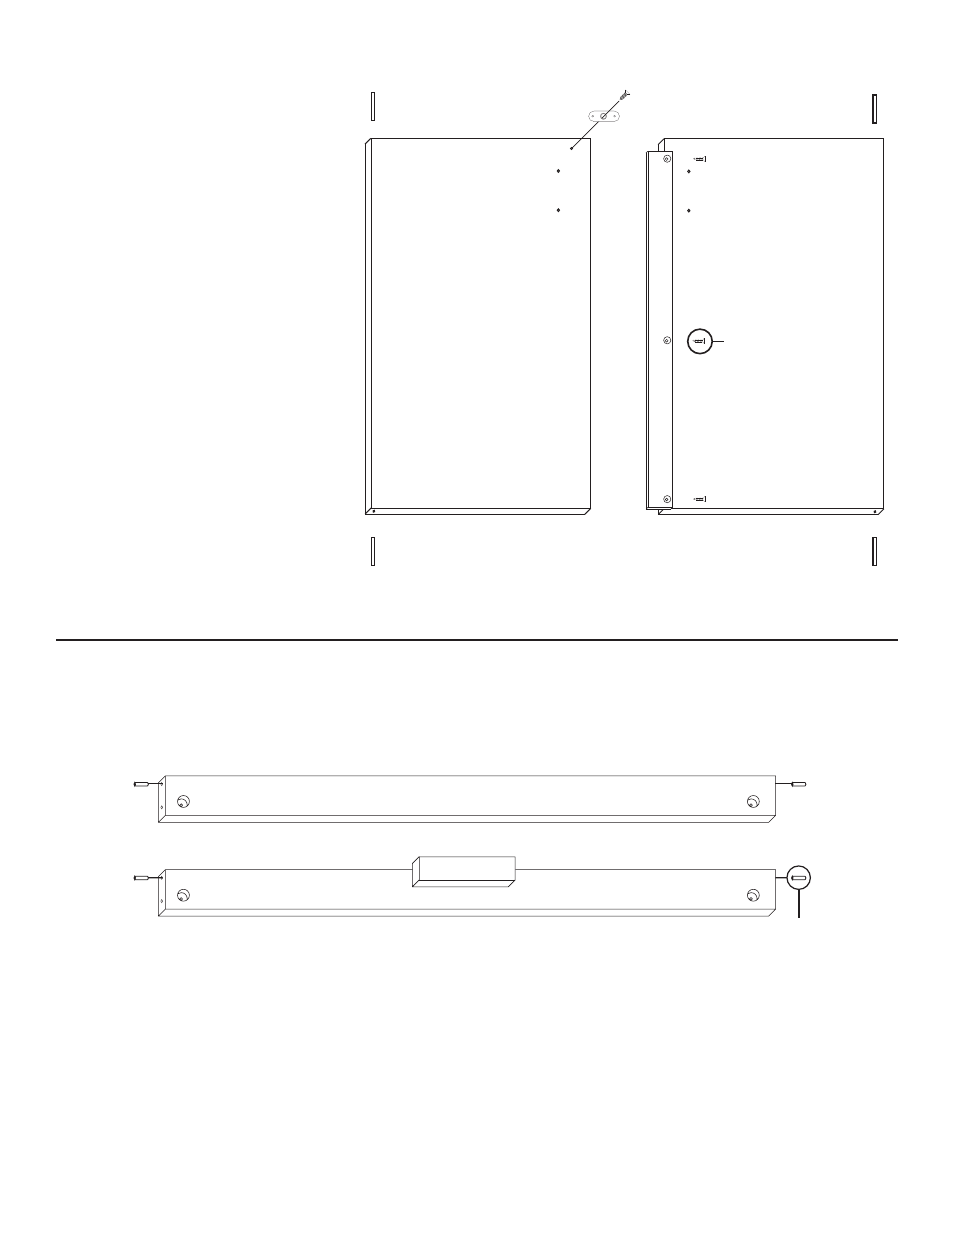
STEP 6
Door Assembly
STEP 7
Brace Prep
3/4” Pin
Install 3/4” pins in brace ends
1 1/2” Long 3/16” DIA. Steel Pin
4 used in
this step
5/8” Phillips Flat Head #8 Screw
3 used in this step
Magnet Plate
7/8” Truss Head Machine Screw
2 used
in this step
1/2” Phillips Flat Head #4 Screw
1 used in this step
5/8” #8
A. Tap/insert ONE 1 1/2” pin into
each end of both doors. DON’T
OVERDRIVE PINS! Pins should
stick up about 1/2” when seated.
B. Attach the door spacer to the
left door with 5/8” #8 screws.
The spacer has a space at the
top to allow magnet clearance
and is almost flush with the
bottom of the door. Countersunk
holes out.
C. Attach the magnet plate
(may be stuck to magnet!)
with the 1/2” #4 screw to the
top of the right door. Bumps go
toward the wood.
D. Attach door handles with
7/8” truss head machine screws.
- 1426 (13 pages)
- 1447 (5 pages)
- 1429 (14 pages)
- 1481 (16 pages)
- 1533 (12 pages)
- 1521 (16 pages)
- 1448 (14 pages)
- 1536 (12 pages)
- 1537 (13 pages)
- 1538 (14 pages)
- 1544 (14 pages)
- 1563 (12 pages)
- 1569 (12 pages)
- 1575 (13 pages)
- 1576 (14 pages)
- 1580 (14 pages)
- 1582 (17 pages)
- 1622 (7 pages)
- 1842 (18 pages)
- 1925 (6 pages)
- 2005 (11 pages)
- 2007 (11 pages)
- 2008 (11 pages)
- 1531 (13 pages)
- 1529 (14 pages)
- 1527 (12 pages)
- 1526 (13 pages)
- 1480DOR (17 pages)
- 1476 (13 pages)
- 1470 (12 pages)
- 1461 (8 pages)
- 1428 (15 pages)
- 3314 (6 pages)
- 3310 (6 pages)
- 7237 (12 pages)
- 14485 (14 pages)
- 15445 (14 pages)
- 43017 (13 pages)
- 51524 (12 pages)
- 51526 (13 pages)
- 51527 (11 pages)
- 51531 (12 pages)
- 51533 (11 pages)
- 51536 (11 pages)