Step 4, Step 3, 1” long 3/16” dia. steel pin – Catskill Craftsmen 51537 User Manual
Page 6: 5/8” phillips head #7 screw
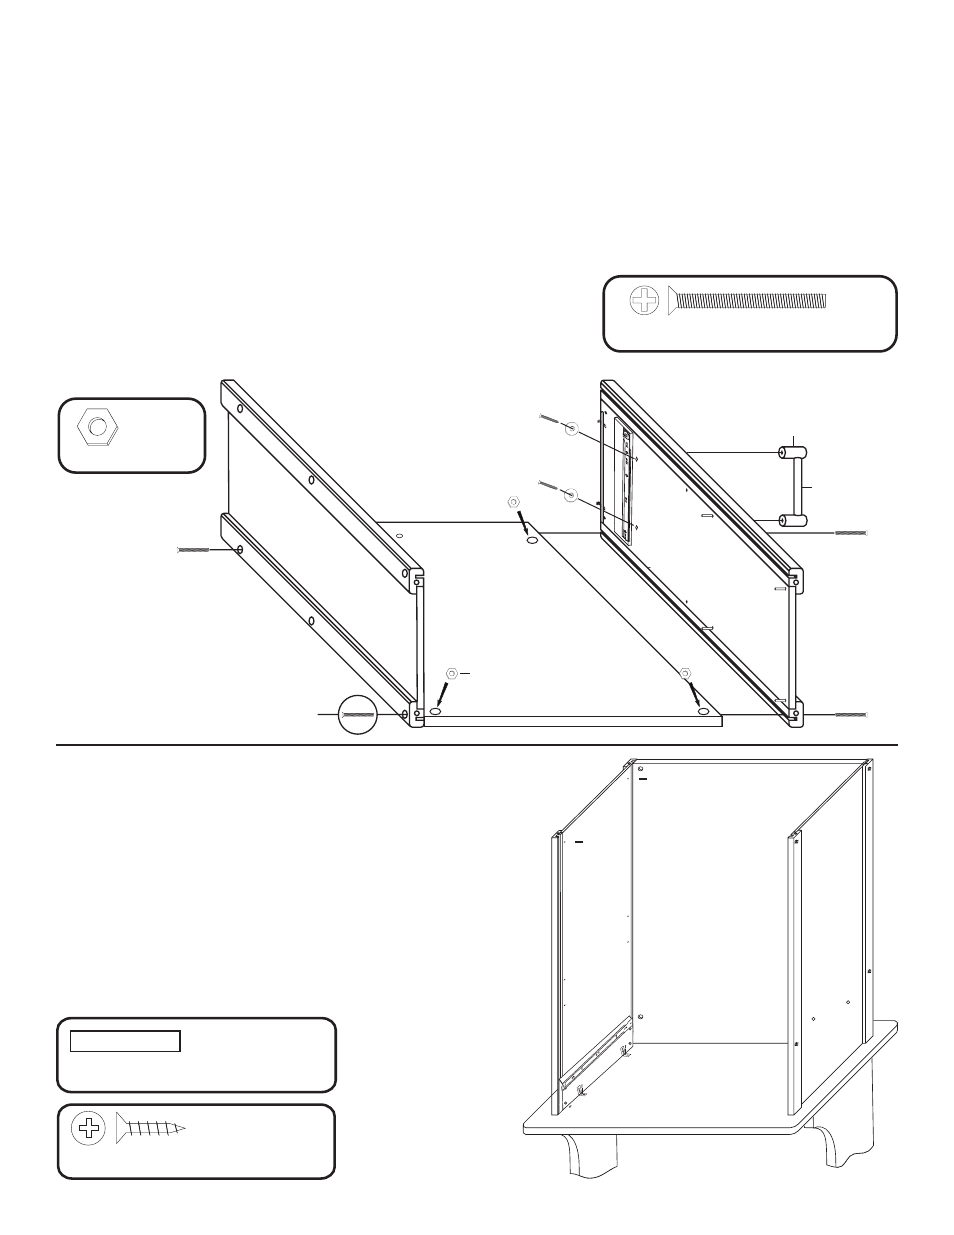
STEP 4
A. Turn the side/back assembly (from step 2) upside
down (invert) on top of the inverted table top.
B. Align the “L” brackets with the 4 inside pilot holes in
the table top and secure with 5/8” #7 screws.
C. Tap two 1” pins into each side panel. These pins
will hold the bottom shelf.
STEP 3
A. Lay back panel flat on a smooth surface with holes up.
B. We placed the handle/towel bar on the right for these instructions.
C. Attach side panels with 1 3/4” bolts and hex nuts. After inserting bolt(s) through the holes in the
side panels and through the holes in the long edges of the back panel, place a hex nut on the tip of
your finger, align nut with bolt and tighten.
D. Look ahead to step 3 which shows side panels
attached to back panel.
E. Attach towel bar with 1” Phillips Flat head screws/washer.
Use a washer to prevent the screw from pulling through the
side panel.
NOTE: Back panel is flush with bottom of side panels.
1 3/4” Machine Screw
Nut
1” Screw
Towel Bar
Towel Bar Post
1 3/4” Phillips Flat Head Bolt (8)
4 Used
in this step
10-24 Hex Nut (8)
4 Used
in this step
4 Used in this step
1” Long 3/16” DIA. Steel Pin
PIN
PIN
5/8” Phillips Head #7 Screw
4 Used in this step
1 3/4” Phillips Flat Head Bolt (8)
4 Used
in this step
10-24 Hex Nut (8)
4 Used
in this step
4 Used in this step
1” Long 3/16” DIA. Steel Pin
PIN
PIN
5/8” Phillips Flat Head #7 Screw
(Used to attach
“L” brackets)