Catskill Craftsmen 51524 User Manual
Page 5
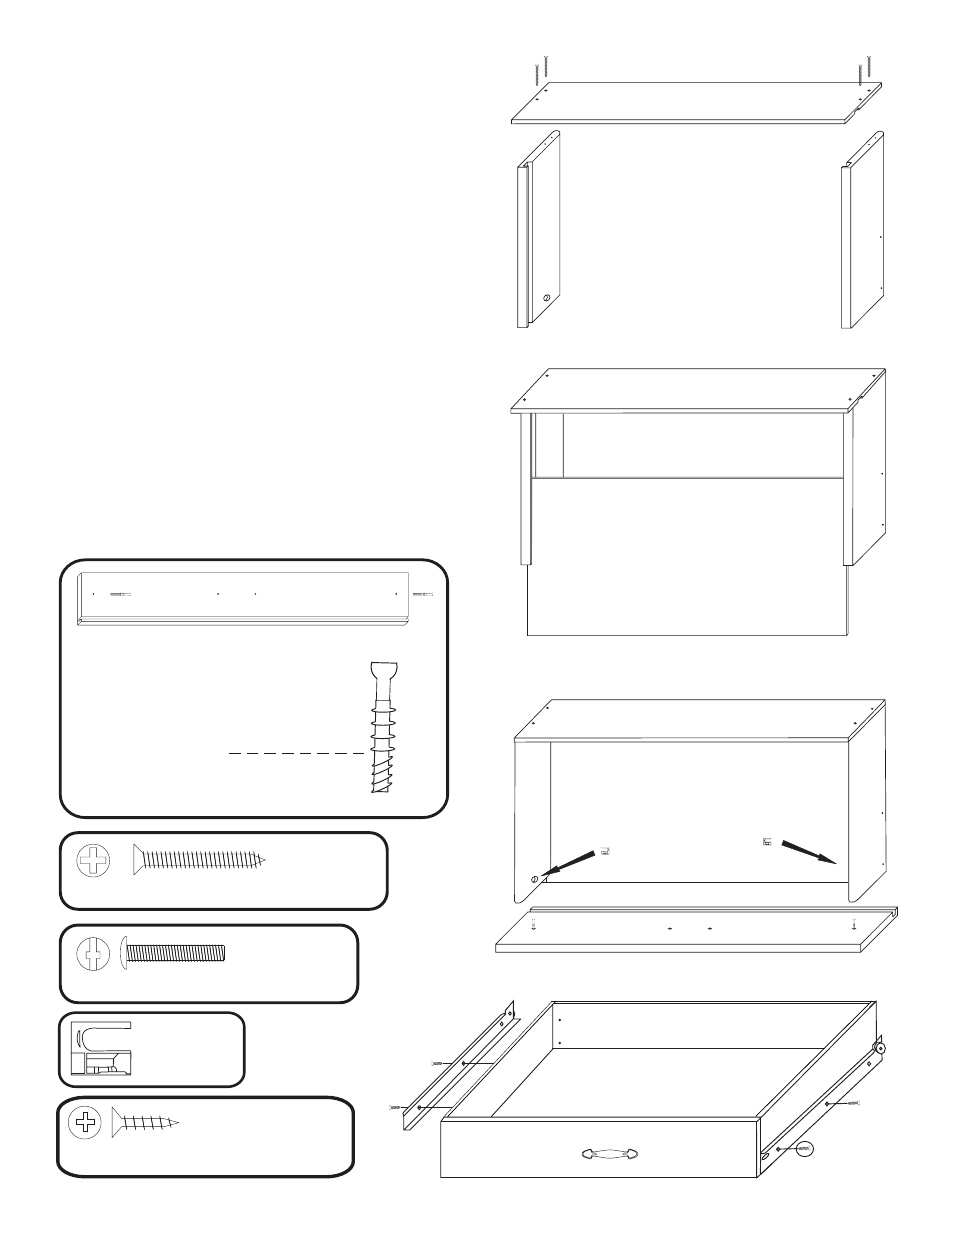
STEP 4
A. Attach the drawer back to the drawer sides with four 1 1/4”
#8 screws. Make sure parts are aligned as in illustration 4A.
B. Insert drawer bottom into the slots in the drawer sides,
best side to inside of drawer. Slide down until seated in the
slot in the drawer back. See illustration 4B.
C. Screw the cam posts into the two outside holes on the
inside face of the drawer front until seated. Only 3/8” of the
post goes into the wood, leaving the 4 larger guide rings/
head exposed. See illustration 4C. Visit our website to view
our video on cams.
D. Insert the posts into holes in the drawer sides until seated
against the front ends of the drawer sides. Insert cams so
that the arrow on the outside face of the cam points to the
post. The slot in the cam fits over the post. Turn with Phillips
screwdriver until seated. Don’t over-torque!! See Illustration
4D. See our video online at www.catskillcraftsmen.com
E. Attach drawer handle with the two handle screws
(no illustration).
F. Attach drawer glides to drawer sides using 5/8”
#5 screws. See illustration 4F. Drawer glides are flush with
front of drawer sides.
ILLUSTRATION 4A
ILLUSTRATION 4B
ILLUSTRATION 4D
ILLUSTRATION 4F
ILLUSTRATION 4C
Below line in wood
Cam Posts (2)
4 used
in this step
1 1/4” Phillips Flat Head #8 Screw
2 used
in this step
7/8” Truss Head Machine Screw
2 used
in this step
Cam
4 used
in this step
5/8” Phillips Flat Head #5 Screw