Step 4, Step 5, Step 6 – Catskill Craftsmen 1531 User Manual
Page 6
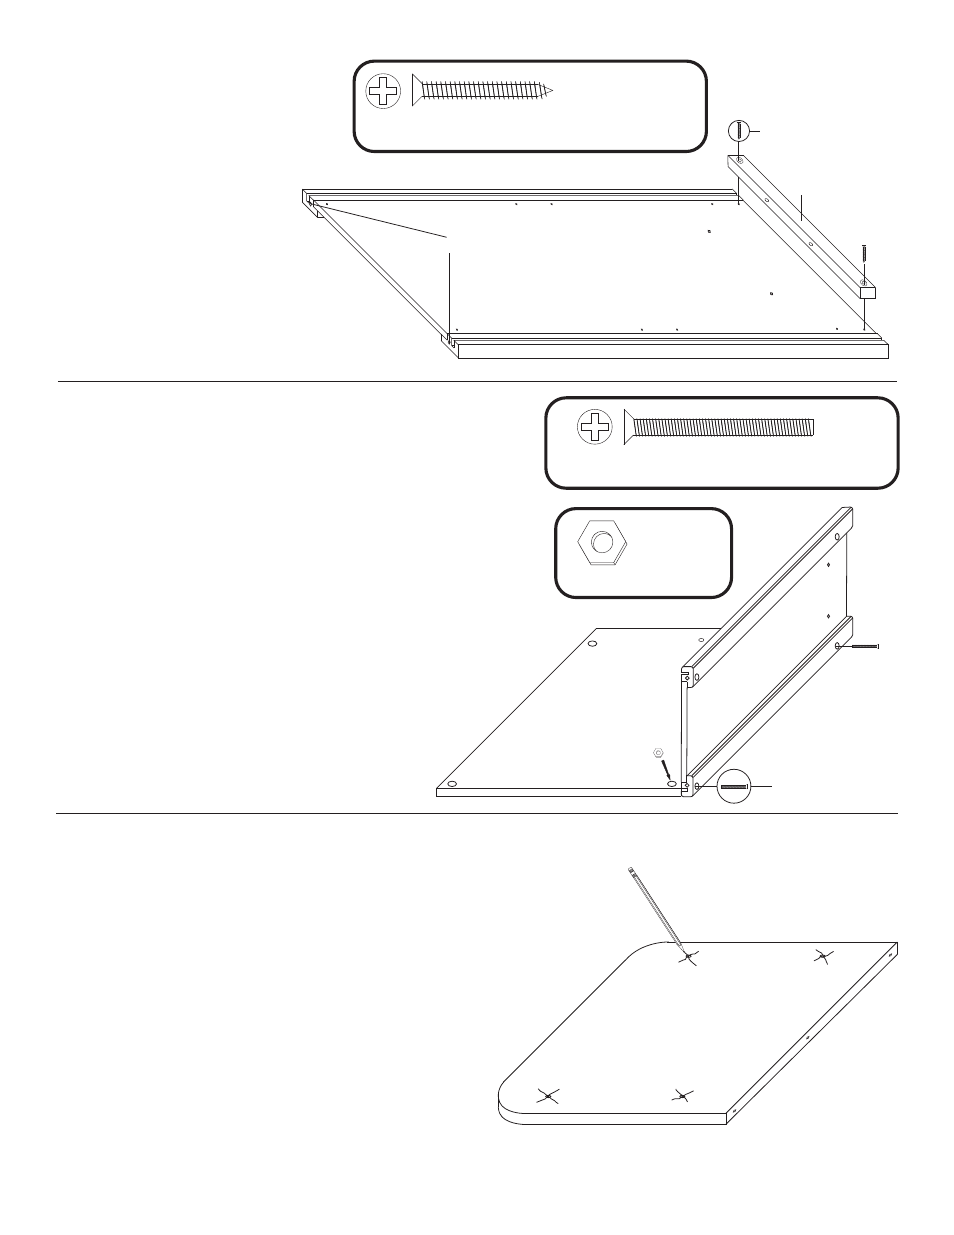
1 1/4 Phillips Flat Head #8 Screw (27)
4 Used in this step
Attach a table top stick to the
top of each side panel using
1 1/4 #8screws. The countersunk
holes (reamed out) in the
stick are positioned as in
illustration 4. Sticks should
be flush with top of panel.
STEP 4
ILLUSTRATION 4
STEP 5
A. Lay back panel flat on a smooth surface with holes up.
B. Attach side panels with 1 3/4 machine screws (bolts)
and hex nuts. After inserting bolts(s) thru the holes in the
side panels, thru the holes in the long edges of the back
panel, place a hex nut on the tip of your finger, align nut
with bolt and tighten.
C. Look ahead to step 7 which shows side panels
attached to back panel.
1 3/4 Phillips Flat Head Bolt (8)
4 Used
in this step
10-24 Hex Nut (8)
4 Used
in this step
ILLUSTRATION 5
STEP 6
ILLUSTRATION 6
STEPS 6 - 14 WILL BE ACCOMPLISHED WITH THE UNIT TOP
UPSIDE DOWN ( INVERTED ), BUILDING UPWARD TOWARD
THE BOTTOM/CASTER END! BE CAREFUL AS PART
DESCRIPTIONS ARE BASED ON AN UPRIGHT,
COMPLETED UNIT!
A. Invert Table Top on a smooth flat surface and make
a large ( X ) mark over each of the 4 pilot holes in the
bottom. Make marks about 1 1/2 long. These marks
will help you align the cabinet with the pilot holes.
P1
TTS
P1
P2
TT
Holes for caster wheels
1 1/4 #8 Screw
1 3/4 Machine Screw
Nut