Step 1b – Catskill Craftsmen 1582 User Manual
Page 5
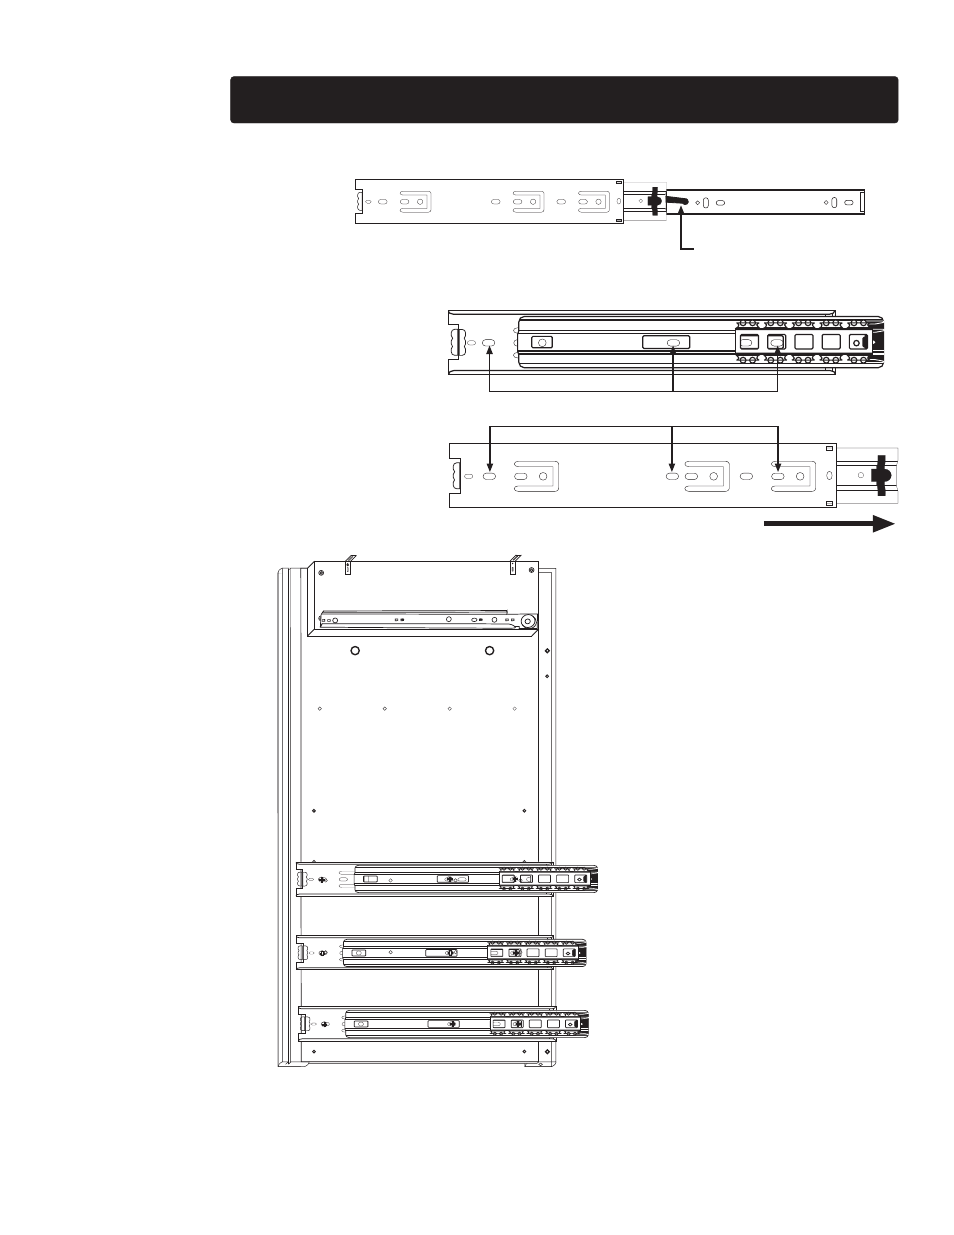
2. Next, identify the holes to be used for
attaching each glide to the side panel.
IMPORTANT as shown below, the full
extention glides are only attached to the
right side panel and the center divider
as seen in step 6.
Attach glides using 3/8 #6 pan head
screws. But do not tighten down the
screws. You must attach the back
panel in the next step, then shift the
glides all the way back so they are
flush with the back panel before
tightening into place. This will insure
that they are all even.
1. Remove the drawer side section of
the glide by pressing the black lever and
sliding the steel inner glide section all
the way out of the glide assembly. Set
this inner section aside as it will be used
later on the wine rack braces.
Press this lever then slide the
inner glide section out of the
glide assembly.
FRONT OF CART
Face of
Glide
Backside
of Glide
Use these three (3) holes to attach the glide to the side panel.
This edge will att
ach to
back panel in S
tep
7.
STEP 1B
IMPORTANT - Please read these instructions carefully!
TOP
ILLUSTRATION 1B