Step 7, Step 8 – Catskill Craftsmen 1582 User Manual
Page 11
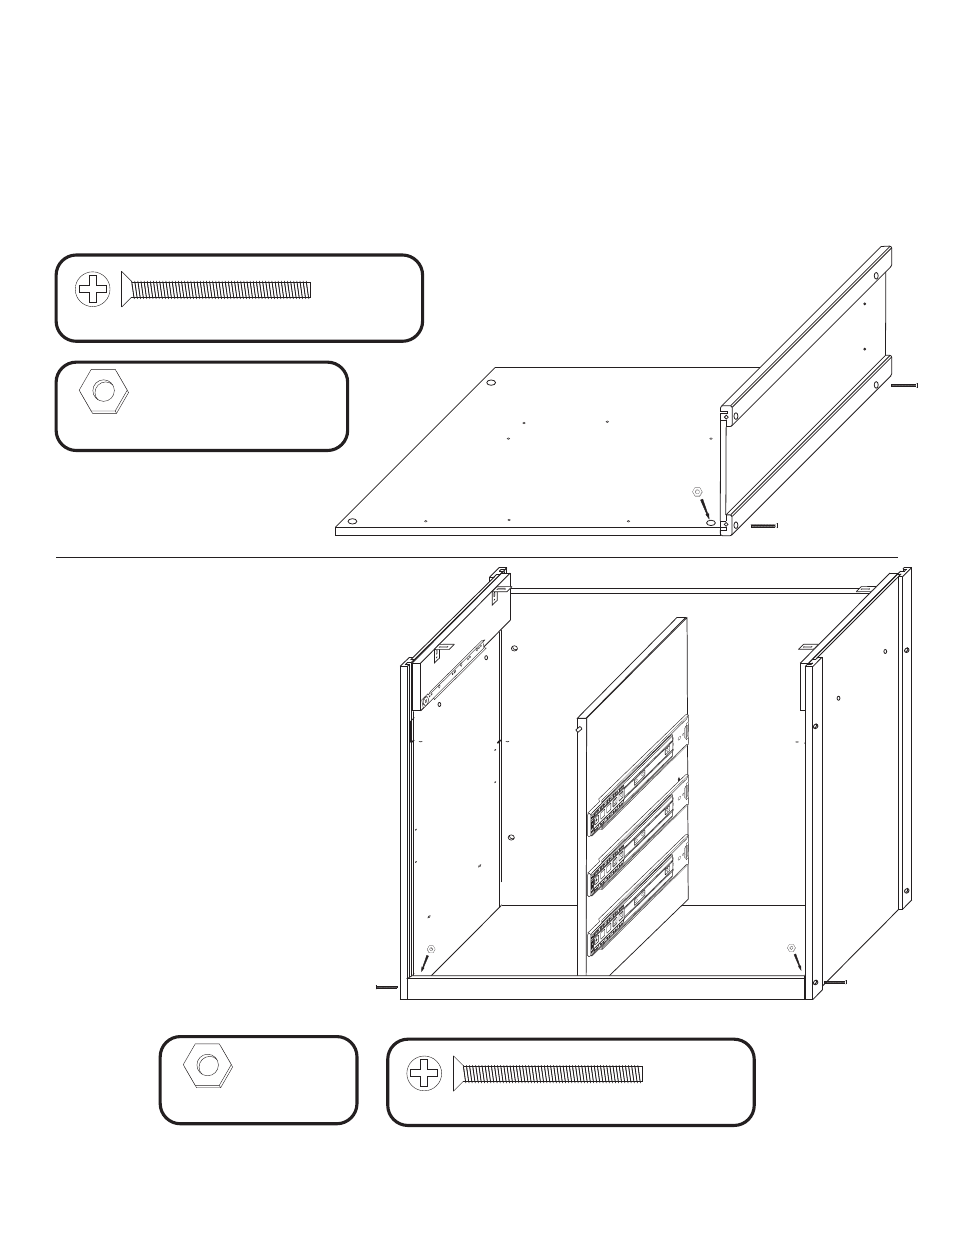
STEP 7
A. Lay Back Panel flat on a smooth surface with holes up.
B. Attach Side Panels with 1 3/4 machine screws (bolts) and hex nuts. After inserting bolts(s) thru the
holes in the Side Panels, thru the holes in the edges of the Back Panel, place a hex nut on the tip
of your finger, align nut with bolt and tighten.
C. Look ahead to step 8 which shows side panels attached to back panel.
NOTE: Make sure you position the side panels according to Drawer Glides (left or right).
And that the Back Panel is 1 1/4 shorter than the Side Panel at the top.
STEP 8
A. Place the center divider pins into the
holes on the back panel.
B. Attach the front brace using 1-3/4 flat
head bolts and hex nuts.
C. Push the glides back flush against the
backpanel and tighten the screws on
both the side panel and the center divider.
ILLUSTRATION 8
ILLUSTRATION 7
10-24 Hex Nut
4 Used
in this step
1 3/4 Phillips Flat Head Bolt
4 Used
in this step
2 Used
in this step
1 3/4 Phillips Flat Head Bolt
10-24 Hex Nut
2 Used
in this step