WEN 70711 10 inch Sliding Compound Miter Saw Manual User Manual
Page 20
20
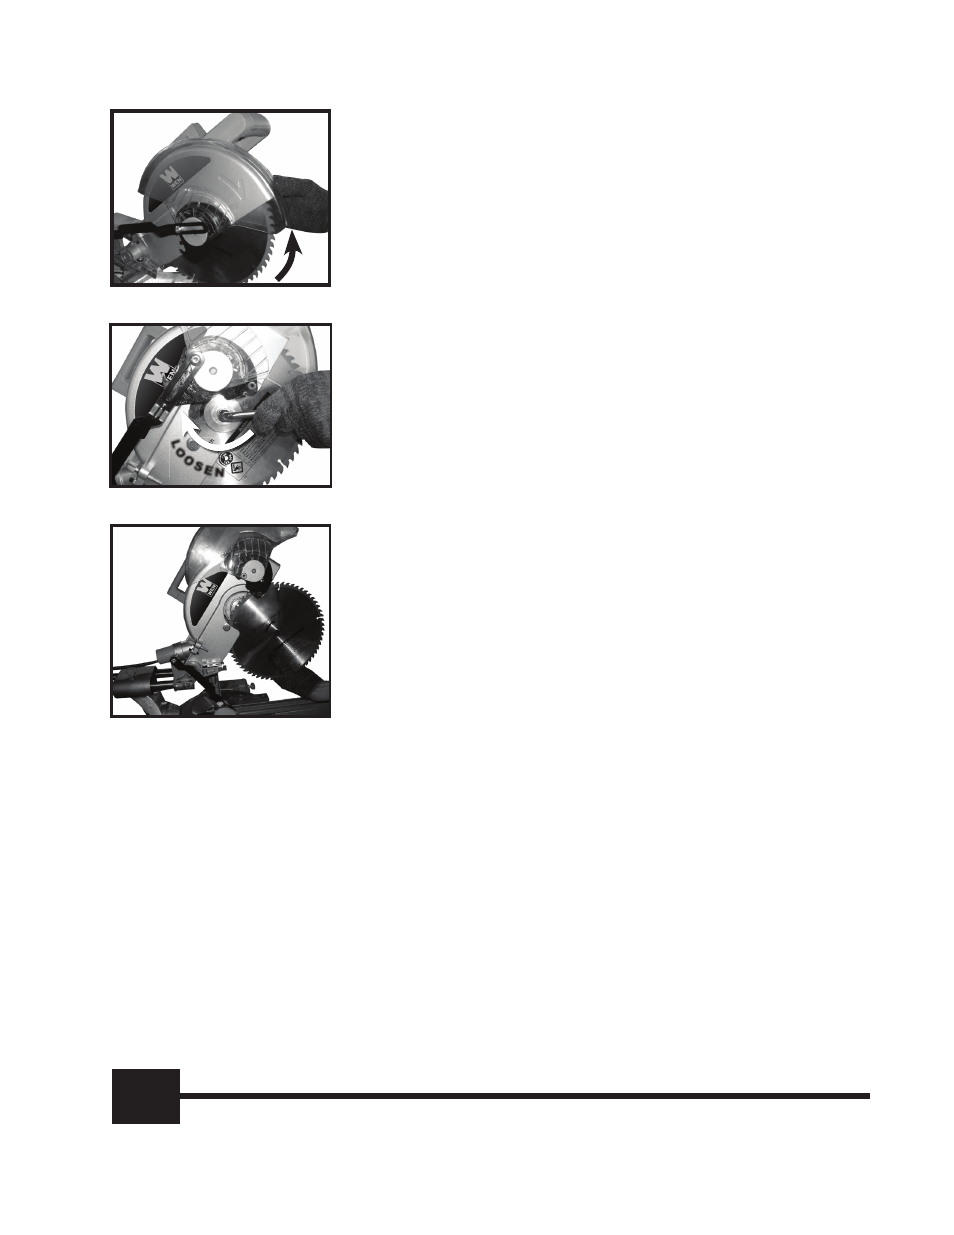
5 . Raise the Blade Guard and Center Cover . (See Figure 4 .)
6 . while holding in the arbor lock Button, use the wrench to
loosen the arbor Bolt by turning it clockwise . (See Figure 5 .)
note: The arbor Bolt has a left hand thread, so it loosens by
turning clockwise .
7 . Remove the arbor Bolt, outer Flange and Saw Blade by
pulling them straight off the arbor .
8 . Reinstall a new Blade on the arbor . (See Figure 6 .) Be sure to
match the direction marked on the new blade with the direction
marked on the saw Blade Housing .
9 . Replace the outer Flange and arbor Bolt . Tighten the arbor Bolt
securely using the wrench by turning it counterclockwise .
10 . Rotate the Center Cover back into place and tighten the
Center Cover Fixing Bolt using the wrench by turning it
clockwise .
11 . Release the locking pin .
ADJUSTING THE FENCE
1 . The Fence holds the work piece in a fi xed position while the
Table and or the blade assembly are adjusted in a miter or
bevel angle .
2 . To make accurate cuts, the Fence must be perpendicular
(at a 90º angle) to the Saw Blade .
3 . Before beginning work, make a test cut on scrap material with
the Table set at 90º .
4 . Check the cut with an accurate square . You can also reverse the
two pieces, hold the cut ends together, and hold a good straight
edge along the side of the pieces .
5 . if either test reveals that the cut is not a true 90º angle, you must
adjust the Fence before
beginning work .
6 . To adjust the Fence, fi rst unplug the tool .
7 . lower the blade assembly and lock it in place using the locking pin .
8 . lay a reliable carpenter’s square on the table with one edge along the blade and the other along
the Fence . any inaccuracy should be visible . noTe: The square must contact the surface of the
blade, not the teeth, for an accurate reading .
9 . The Fence is held in place with bolts at each end . loosen the bolts slightly, and gently tap the
Fence into position using a soft mallet . Retighten the bolts and make another test cut . Repeat the
process until the Fence is adjusted accurately .
10 . once the Fence is accurately adjusted, tighten the bolts fi rmly in place . Recheck one last time,
then proceed to work .
Figure 4
Figure 6
Figure 5
L
O
O S
E N