WEN 3914 14 inch band saw User Manual
Page 13
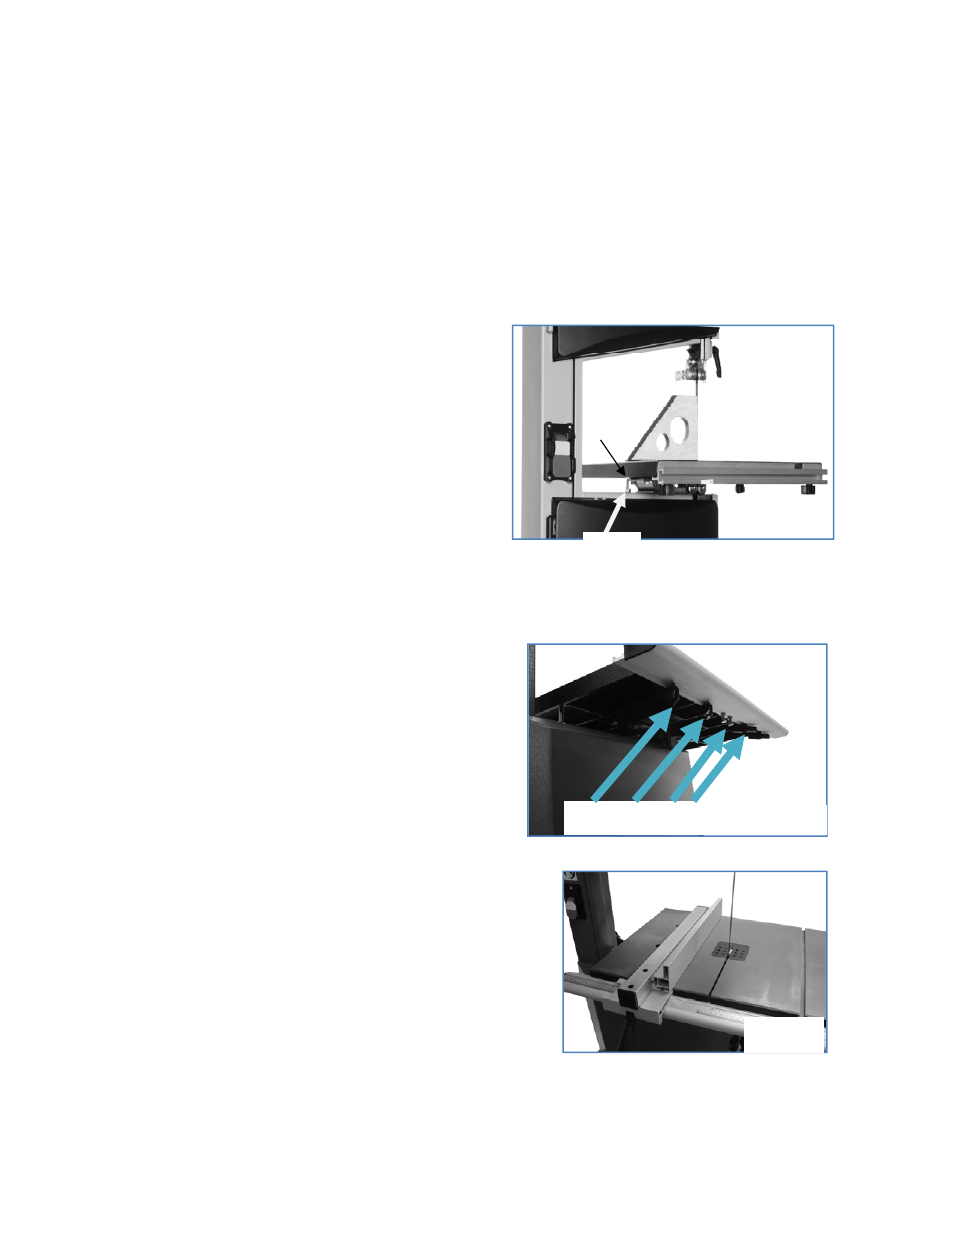
Centering the table
1. Loosen the hex bolts mounting the trunnion to the saw frame (see Figure 1).
2. Move the table sideways as required, until the saw blade runs through the center of the table
insert.
3. Re-tighten hex bolts for trunnion and recheck the saw blade position.
Setting table square to saw blade
Refer to Figures 1 and 2.
Loosen the handle on the table trunnion and place
asuitably sized square against the saw blade. If the
tablerequires adjustment, proceed as follows:
1. Using a wrench, loosen the hex nut (See Figure
2).
2. Place the wrench on the hex bolt and adjust
until thetable is square to the saw blade.
3. Tighten the hex nut and recheck the saw blade
andthe table for squareness.
4. Lock the table into position and check that the
indicatorreads zero degrees on the scale of the trunnion.
If necessary, loosen the screw securing the indicator and reset it to give zero degree reading (See
Figure 1).
Figure 2
Nut
Bolt
Attach guide rail
Wing knob screws
Figure 3
Fasten the guide rail to the table with four wing knob
screws andM8 washers (See Figure 3).
Install rip fence
Figure 4
Lay the rip fence onto the guide rail. Adjust the ripfence
parallel to the saw blade. Tighten rip fence handleby
pressing downward (See Figure 4).
13