Adjustments, Fence adjustments – RIKON Power Tools 34-250 User Manual
Page 11
Adjustments
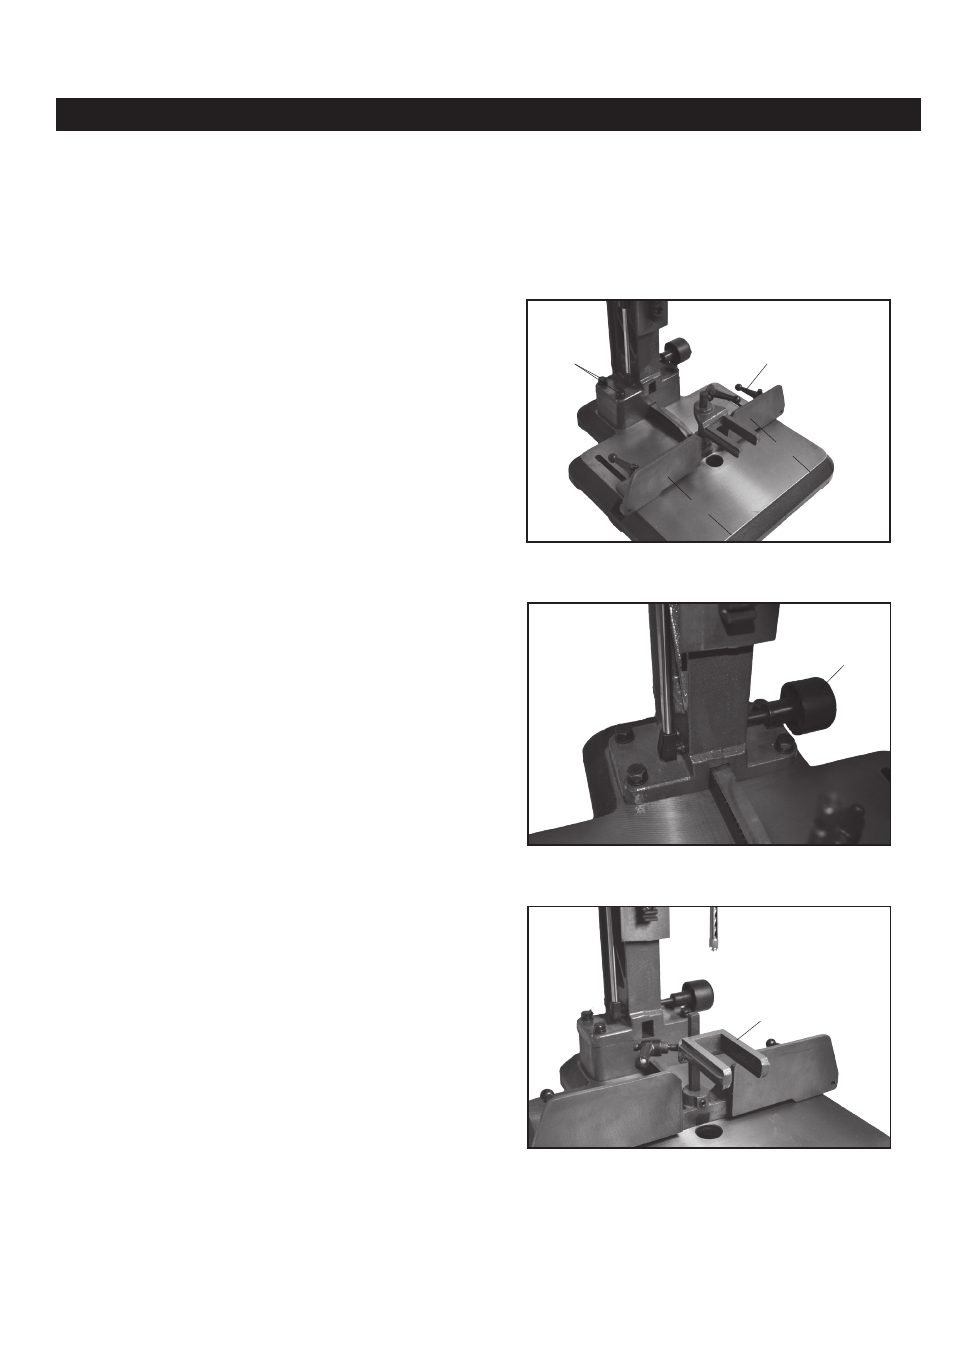
1. Take a measurement from each fence side to
the milled edge of the base casting (A-Fig.12).
if the measurements do not match, loosen
the four bolts holding the column to the base
casting (B-Fig.12). Rotate the fence and
column assembly until both measurements
match.
Fig.12
A
B
Fence Adjustments
The fence should travel square in the adjustment slots in the base casting. It will also adjust
back and forth on a rack gear with the use of the fence adjustment knob. See steps below.
NOTE: The fence adjustment knob will be inoperable with the riser block installed.
A
(x4)
2. To adjust the fence, first loosen the two lock
levers shown in figure 12. Next, turn the fence
adjustment knob (A-Fig.13) and position the
fence as necessary. Tighten the two lock
levers to hold the fence into position.
NOTE: The fence adjustment knob will be
inoperable with the riser block installed.
Fig.13
A
Lock Lever
(x2)
3. The hold down is a clamp that pressures the
workpiece against the table surface. It will
stop the workpiece from lifting as the
mortising chisel is removed from the cut.
The hold down can accomodate taller
worpieces but turning upside down. (A-Fig.14)
Fig.14
A
11