Assembly – RIKON Power Tools 30-240 User Manual
Page 7
7
Base and Column Assembly
1. Place the base (A-Fig. 1) on a level floor where
the machine will be used.
2. Attach the column (B-Fig.1) to the base
(A-Fig. 1) using four M10x40 hex bolts.
Tighten all four bolts.
Figure 1
Assembly
B
A
Assistance is needed for this next
step.
NOTE:
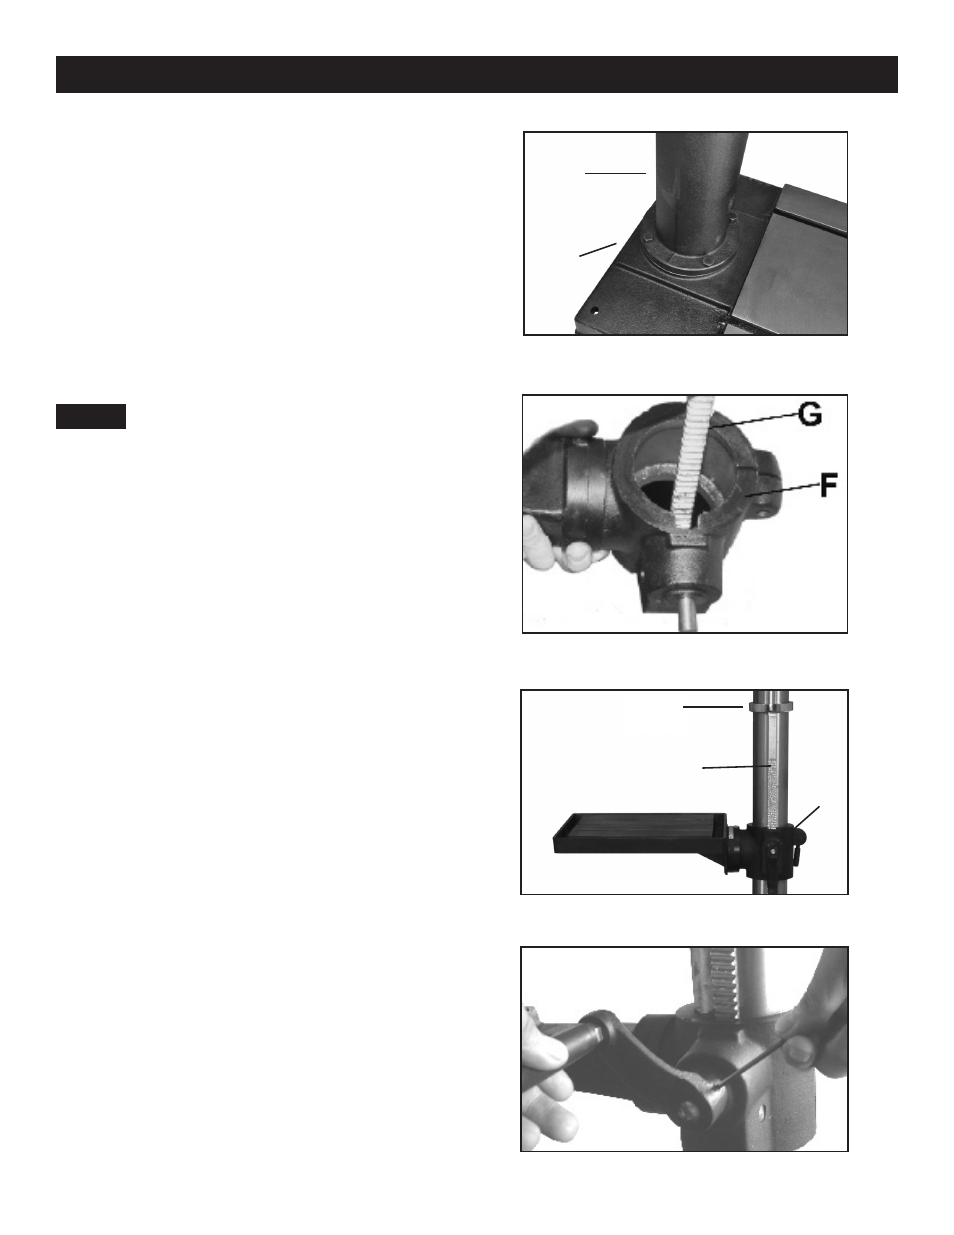
INSTALLING THE TABLE
1. Using a hex wrench, remove the Collar and
Rack from the column.
2. Place rack (G-Fig. 2) inside the table support
bracket (F-Fig. 2), lining up the rack’s teeth with
the worm gear that is inside of the table bracket.
3. Lift up and slide the table assembly with the
rack together onto the column, and slide them
down the column until the rack fits back into the
column support base.
4. Replace the column collar on top of the rack,
and secure it in place with a hex wrench.
5. Install the raising/lowering handle with a hex
wrench (Figure 4). The handle's set screw must
line up and be secured on the flat section of the
table support's worm ger shaft.
Figure 3
Figure 2
Figure 4
Continued on page 8
Rack
Collar
Table
Bracket