Assembly – RIKON Power Tools 10-370 User Manual
Page 10
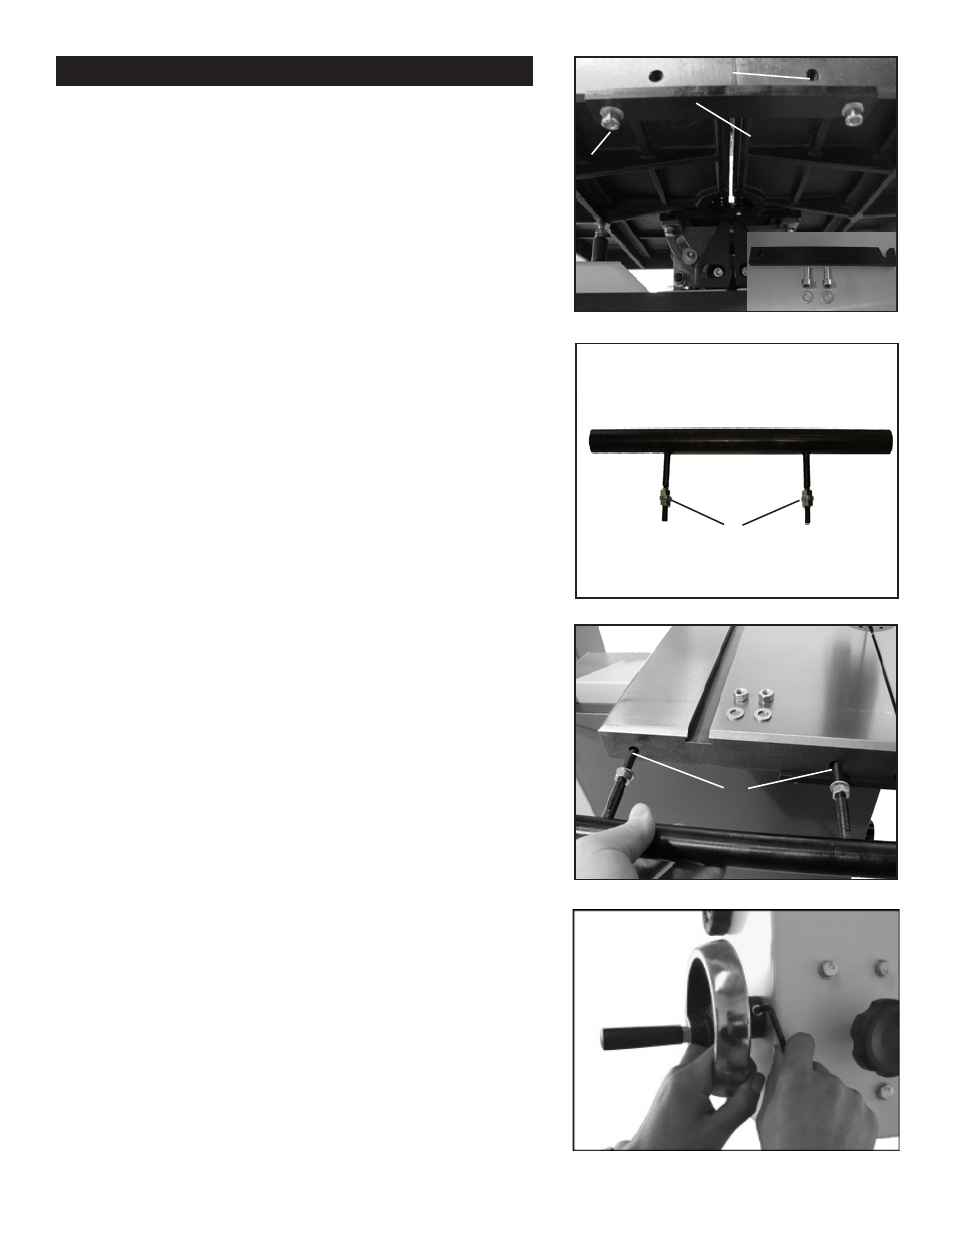
Figure 9
10
Figure 10
Figure 11
Work Table Assembly
Installing Table Leveling Bar:
Locate the table leveling bar, two hex socket screws
and two washers (A-Fig.9 Inset).
Insert a hex socket screw and washer through the left
hole of the table leveling bar and into the threaded hole
on the left side of the blade slot (B-Fig.9). Make sure
that the opening of the slot on the right side of the table
leveling bar faces toward the table trunnion. This will
allow the table leveling bar to open outward from the
bandsaw.
Rip Fence Assembly
With a 13mm wrench, remove one 13mm hex nut and
one washer from each stud on the fence bar (A-Fig.10).
Leave one each of 13mm hex nut and washer on each
stud on the fence bar. The remaining nut and washer
will be used for drift adjustments that will be described
later in this manual.
Next, install the fence bar studs into the table as shown
(Fig.11). Locate the 13mm hex nuts and washers
removed in Fig.10 and install on the opposite ends of
each fence bar stud. NOTE: It may be necessary to
open the table leveling bar to gain access to the right
side fence bar stud.
Hand Wheel Installation
There are two hand wheels used on the 10-370 Wood/
Metal bandsaw. The first controls the height of the upper
guide post, the second adds/removes tension on the
drive belt.
Attach the first hand wheel (Fig.12) to the rack and
pinion shaft on the upper part of the bandsaw, using the
5mm “L” wrench provided.
Attach the second crank handle to the belt and speed
control rod located below the 4” dust port, using the
5mm “L” wrench provided.
Assembly
Figure 12
Underside of Table
Table Leveling Bar
A
Blade Slot
B
A
A