Johnson Level & Tool Mfg. 40-6582 User Manual
Page 23

©2012 Johnson Level & Tool
23
3. Rotate the instrument 90°, and after self-level completes, mark a
line and label as ‘B’. Repeat two more times, labeling lines as ‘C’,
and ‘D’.
4. Measure the vertical distance ‘h’ between the highest and the
lowest points among A, B, C, and D.
5. If h=2mm or less, accuracy is qualified. If h>2mm but <10mm,
adjust the calibration. If h>10mm, please contact an authorized
service center or dealer for repair.
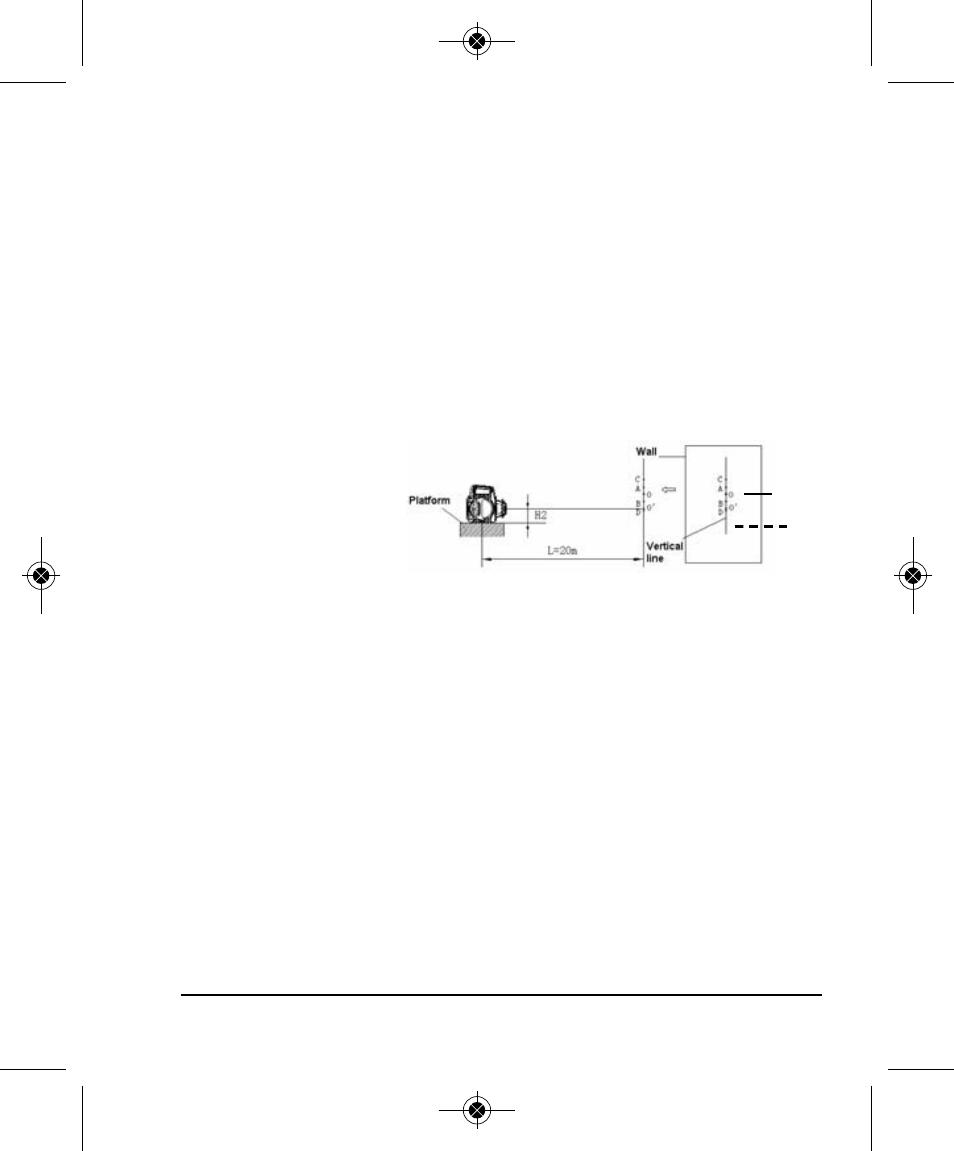
Z-Axis Accuracy Check:
1. Place the instrument
into the vertical
position, using
vertical mount
bracket included.
Power on the unit
and allow to auto level. Measure the height of H2 between the
horizontal laser line and the platform.
2. Mark a point ‘0’ under point 0, which is (H1-H2). Point ‘0’ is a
reference point for the Z-axis.
3. Project the laser to the vertical line on the wall and measure the
distance “h” between the projected point and the point ‘0’.
4. If h< 2mm, the accuracy is qualified. If h> 2mm but < 10mm, the
accuracy is beyond tolerance and calibration is required.
If h > 10mm, please contact an authorized service center or
dealer for repair.
h’
Projected
Point
6274H-1_Manuals 9/26/12 10:44 AM Page 23
