Self-check & fine calibration – Johnson Level & Tool Mfg. 40-6582 User Manual
Page 22

22
©2012 Johnson Level & Tool
8. Self-Check & Fine Calibration
IMPORTANT: It is the responsibility of the user to verify the
calibration of the instrument before each use.
The instrument must
be self-checked for
accuracy periodically,
specifically before a
large project, where
accuracy is critical.
If the accuracy is found to be beyond tolerance, some adjustment
may be made as follows.
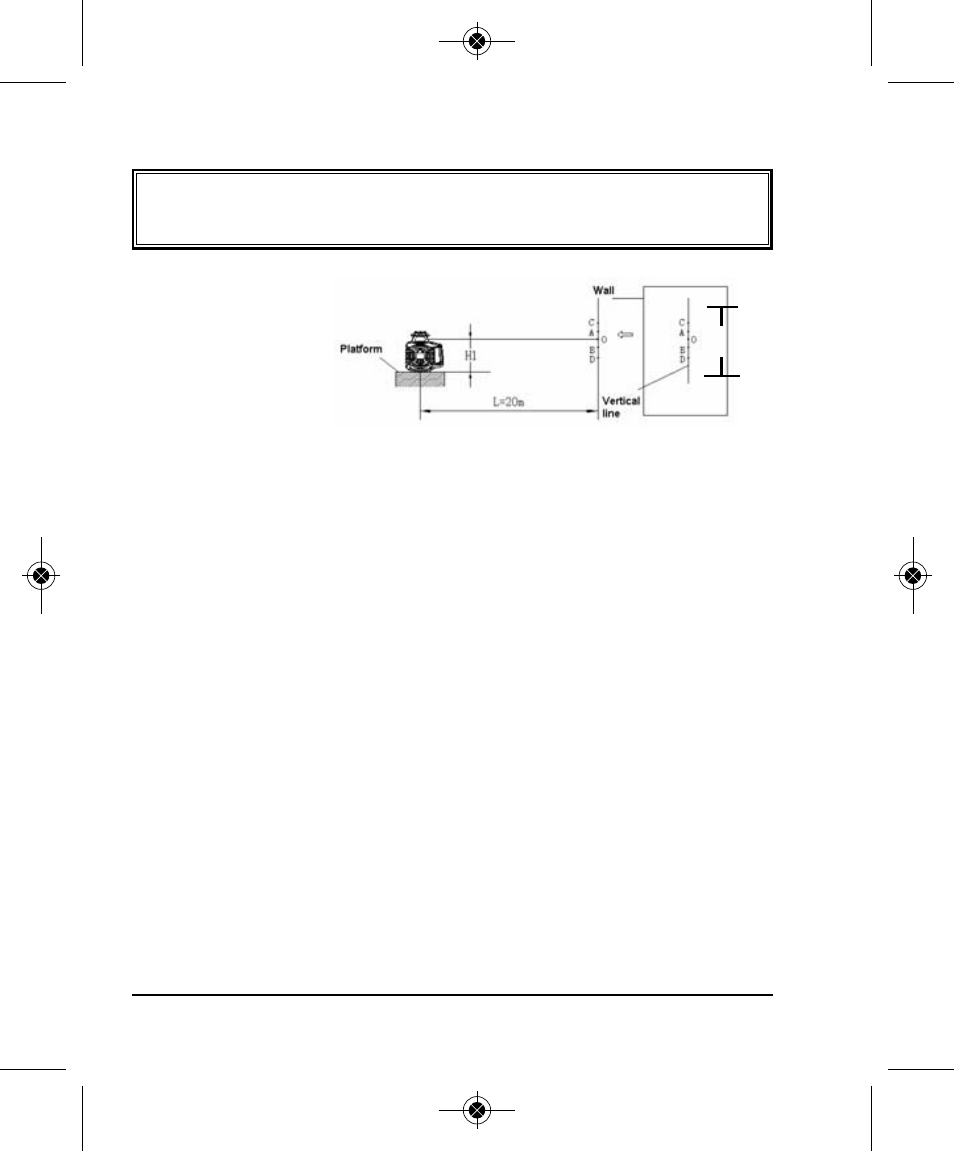
X-Axis and Y-Axis Accuracy Check:
1. Place a table indoors, approximately 20m from a wall. Place the
instrument on the table with the X-axis facing the wall.
2. Power the instrument on and allow it to self-level. Adjust the
rotating speed to make the output laser line clear and visible.
Mark a vertical line on the wall that intersects the laser line from
the instrument. Mark a line where the laser line hits the vertical
line, and label as ‘A’.
(Turning in a clockwise direction):
A = X+
B = Y+
C = X-
D = Y-
h
6274H-1_Manuals 9/26/12 10:44 AM Page 22
- 1750-1000 (2 pages)
- 40-6900 (16 pages)
- 40-6926 (12 pages)
- 40-6926 (12 pages)
- 40-6910 (16 pages)
- 40-6936 (38 pages)
- 40-6250 (12 pages)
- 40-6065 (16 pages)
- 1455-0000 (42 pages)
- 1457-1000 (12 pages)
- 40-6060 (12 pages)
- 1880-2400 (12 pages)
- 40-6028 (12 pages)
- 40-6500 (24 pages)
- 40-6080 (16 pages)
- 40-6515 (84 pages)
- 40-6527 (24 pages)
- 40-6580 (30 pages)
- 40-6529 (30 pages)
- 40-6530 (21 pages)
- 40-6502 (22 pages)
- 40-6537 (18 pages)
- 40-6525 (21 pages)
- 40-6522 (26 pages)
- 40-6535 (20 pages)
- 40-0917 (8 pages)
- 40-0922 (14 pages)
- 40-6064 (2 pages)
- 40-6932 (36 pages)
- 40-6004 (24 pages)
- 40-6001 (32 pages)
- 40-6430 (2 pages)
- RAS-1 (67 pages)
- 40-6620 (16 pages)
- 40-6640 (20 pages)
- 40-6662 (20 pages)
- GL100 MX (3 pages)
- L100M MX (4 pages)
- 40-6602 (18 pages)
- 40-6230 (1 page)
- 40-6616 (12 pages)
- 40-6210 (5 pages)
- 40-6200 (5 pages)
- 9100 (3 pages)
- 40-6540 (24 pages)
