Installing the motherboard, Cpu installation procedure – Elitegroup A990FXM-A Deluxe (V1.0) User Manual
Page 17
13
Installing the Motherboard
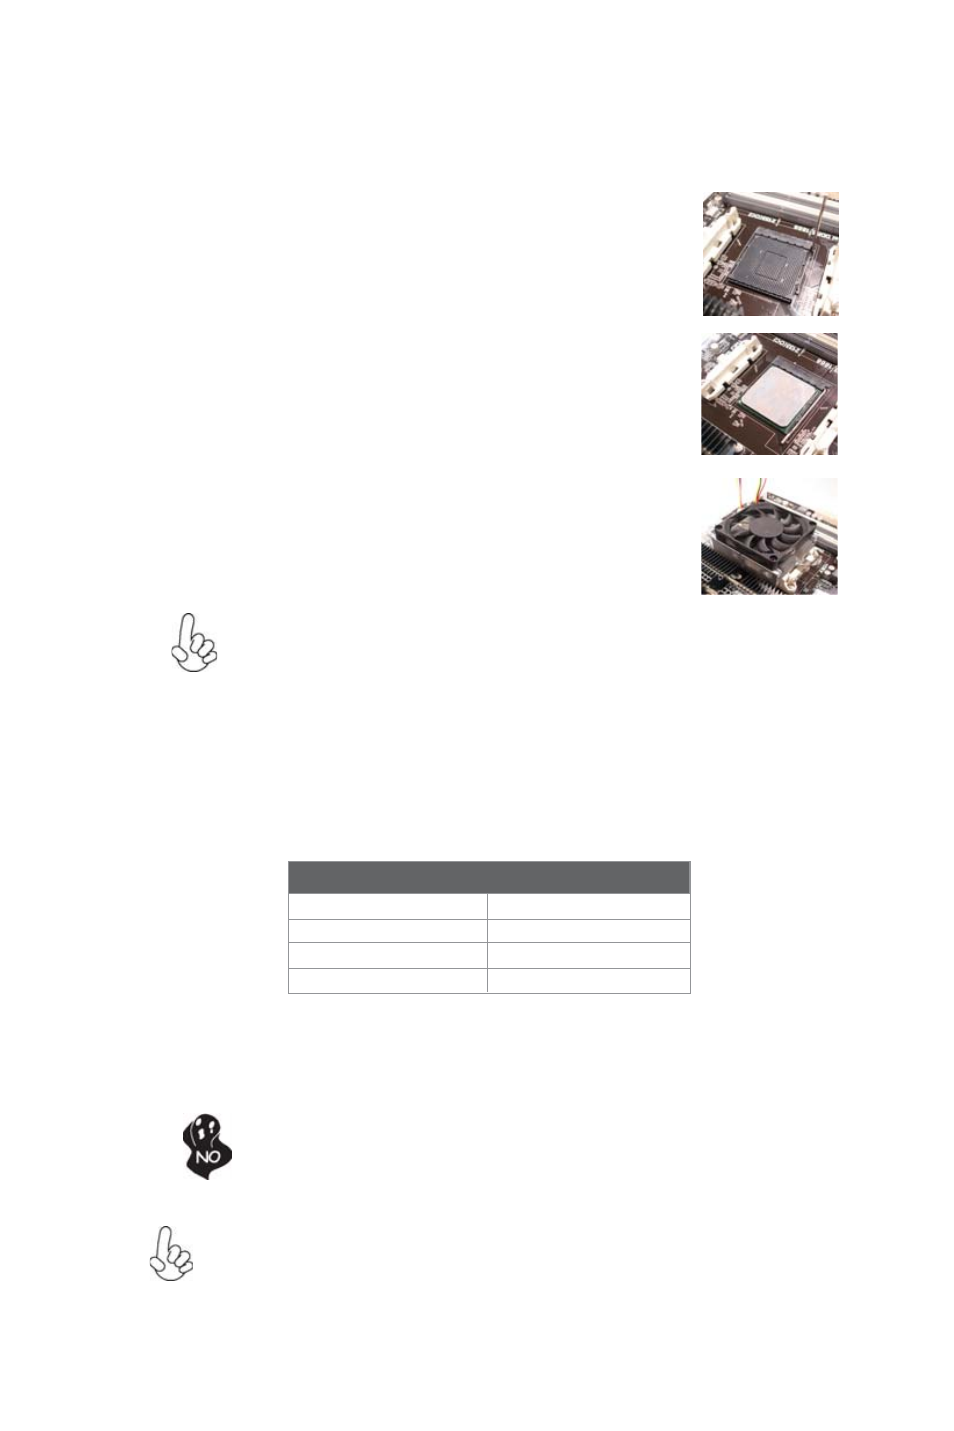
1
Install your CPU. Pull up the lever away from
the socket and lift up to 90-degree angle.
2
Locate the CPU cut edge (the corner with
the pin hold noticeably missing). Align and
insert the CPU correctly.
3
Press the lever down and apply thermal
grease on top of the CPU.
4
Put the CPU Fan down on the retention mod-
ule and snap the four retention legs of the
cooling fan into place.
5
Flip the levers over to lock the heat sink in
place and connect the CPU cooling Fan power
cable to the CPU FAN connector. This com-
pletes the installation.
CPU Installation Procedure
The following illustration shows CPU installation components.
To achieve better airflow rates and heat dissipation, we suggest that you
use a high quality fan with 4800 rpm at least. CPU fan and heatsink
installation procedures may vary with the type of CPU fan/heatsink sup-
plied. The form and size of fan/heatsink may also vary.
Installing Memory Modules
This motherboard accommodates four memory modules. It can support four 240-pin
DDR3
2133 (OC)/1866/1600/1333*
. The total memory capacity is 128 GB*.
DDR3 SDRAM memory module table
Do not remove any memory module from its antistatic packaging until
you are ready to install it on the motherboard. Handle the modules only
by their edges. Do not touch the components or metal parts. Always
wear a grounding strap when you handle the modules.
You must install at least one module in any of the four slots. Each module can be
installed with 32 GB of memory.
Memory module
Memory Bus
DDR3
1333
667 MHz
Due to the limitation of AMD CPU spec, please refer to Memory QVL for
more information.
*
DDR3
1600
800 MHz
DDR3
1866
933 MHz
DDR3
2133 1067 MHz
* For reference only