11 recommended mounting patterns – Condec MPV-10K User Manual
Page 11
Maintenance
9
7. Mark a radial line at the 12 o’clock position on the knob.
8. Turn the knob (15) clockwise to move the mark to the 6 o’clock position.
9. Turn the locknut (12) counter-clockwise until it contacts the bottom of the stop washer (14).
10. Remove the MPV-10K knob (15) using the .061" hex wrench.
11. Tighten the set screw (13) on the locknut with the .050" hex wrench.
12. Align the set screws (16) with the indentations on the valve needle (3 or 6). Install the knob (15) using
the .061" hex wrench. The output valve is now adjusted.
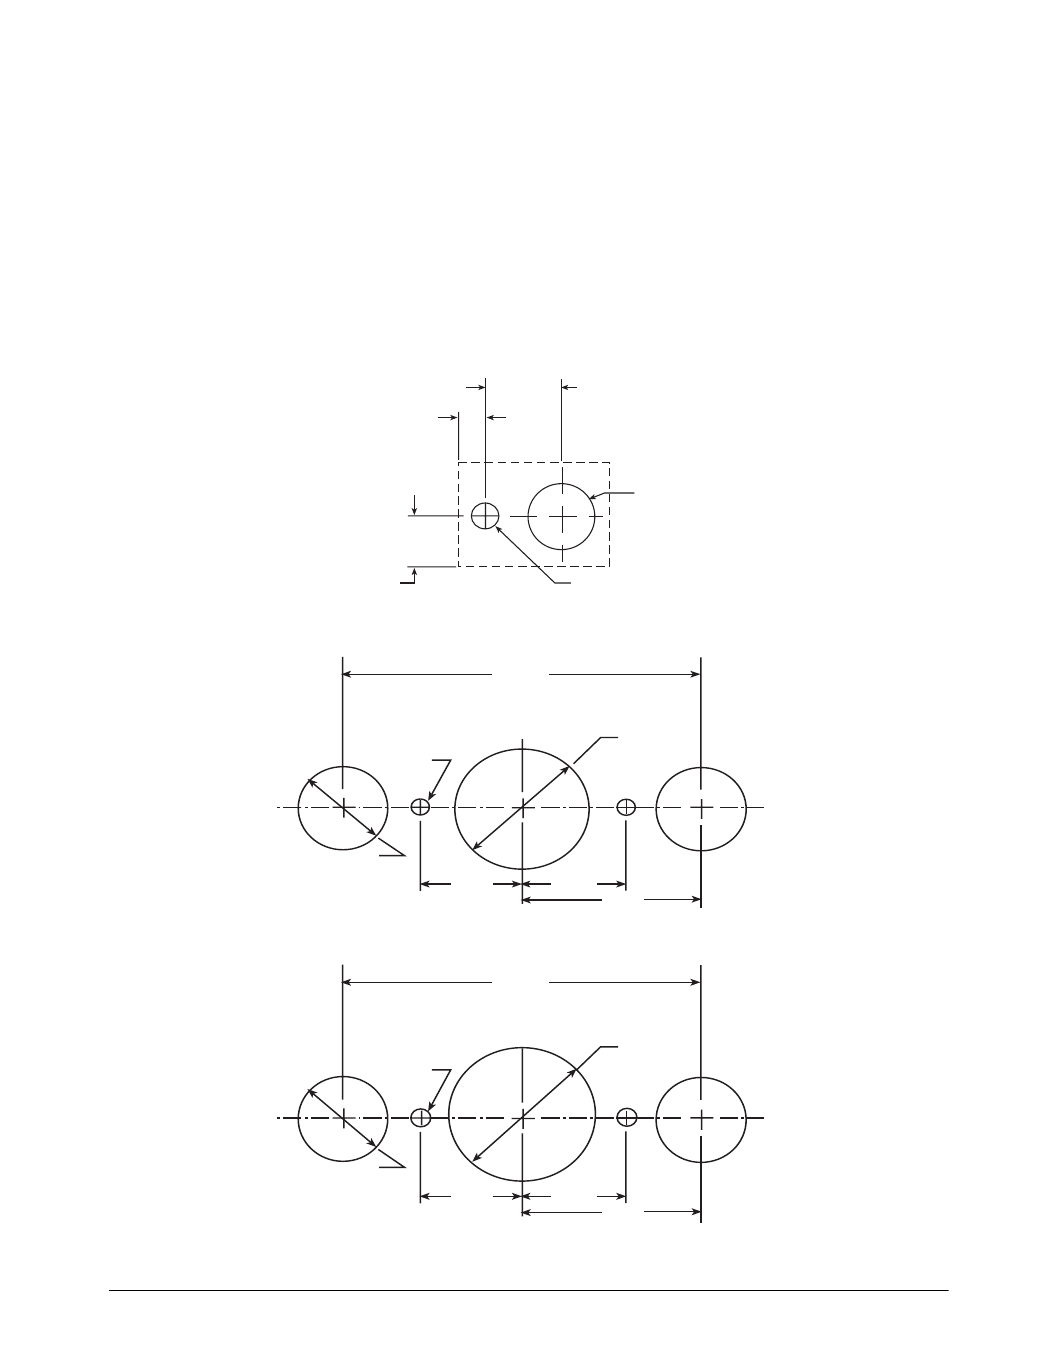
2.11 Recommended Mounting Patterns
The following figures show recommended mounting patterns.
Figure 2-2. Recommended Hole Pattern for MPV-10K
Figure 2-3. Recommended Hole Pattern for ORION-2C and ORION-2D
Figure 2-4. Recommended Hole Pattern for ORION-3A
.201" Diameter
.593" Diameter
.650"
.48"
.2D
5.80"
1.53"
1.450"
1.450"
2.900"
1.350"
(2) places
(2) places
.213" Diameter
5.80"
1.75"
1.450"
1.450"
2.900"
1.350"
(2) places
(2) places
.213" Diameter