Set up – MAHLE RTI MCX-2F (Rev D) User Manual
Page 5
Page 4
New Coolant Tank
Coupler
Quick
Green Hose
OFF
OFF
OFF
TES
T
SYS
TEM
VA
CUU
M
SYS
TEM
PR
ESS
URE
FILL
RA
DIA
TOR
& O
VER
FLO
W
EXC
HAN
GE C
OO
LAN
T
EMP
TY W
AST
E T
ANK
LOW
ER R
ADIA
TOR
& O
VER
FLO
W
& O
VER
FLO
W
LO
WER
RA
DIA
TOR
EXC
HAN
GE C
OO
LAN
T O
R
FILL
RA
DIAT
OR &
OV
ERF
LOW
EM
PTY
WA
STE
TAN
K
Black Hose
Green Hose
Tank Cap & Plug
(Small)
New Coolant
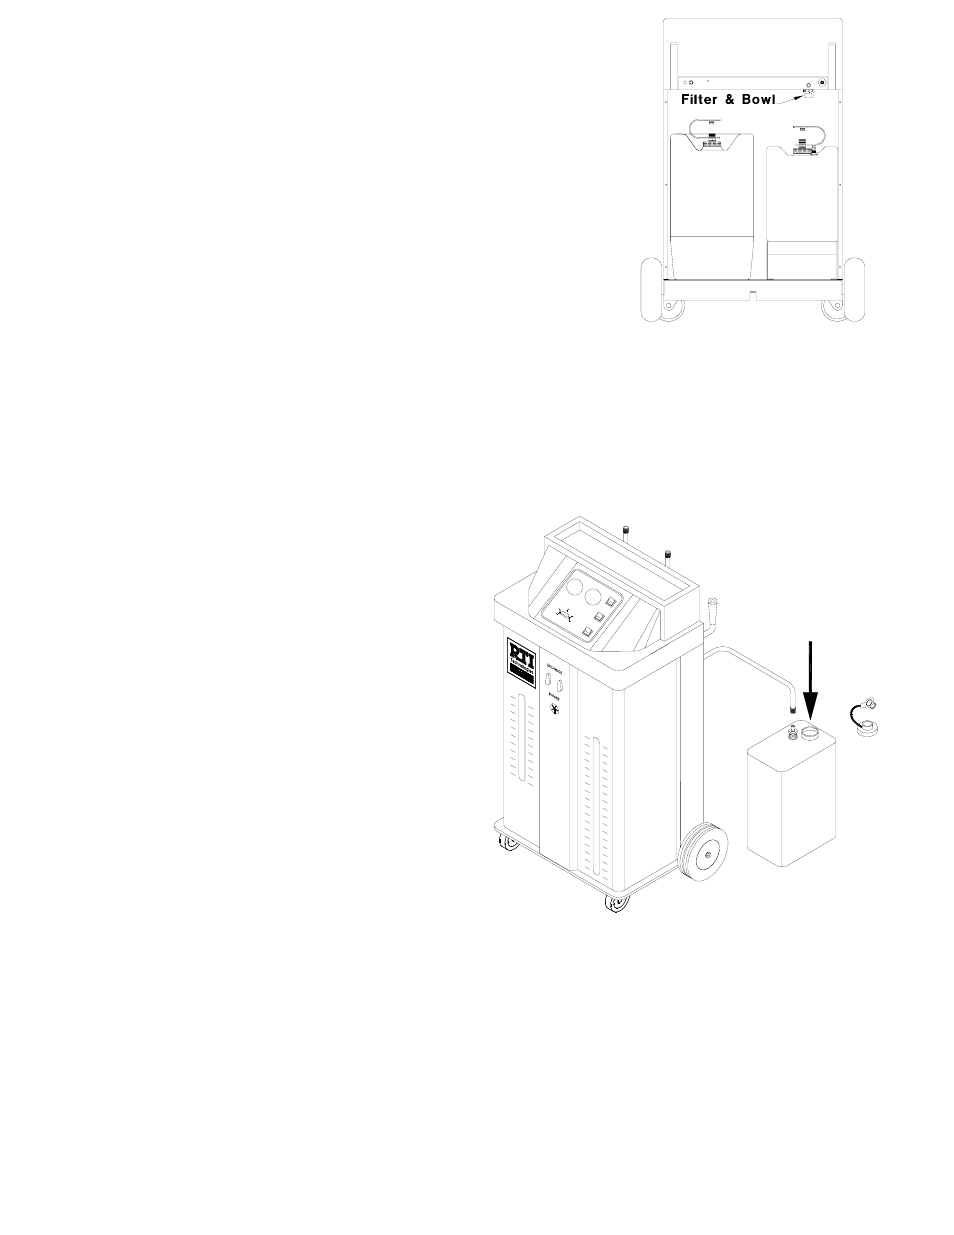
SET UP
The MCX-2F has two tanks (plus an extra New Coolant Tank) which are installed and
connected from the rear. Quick connect couplers are mounted on the hoses which
connect these tanks to the MCX-2F. A green hose connects to the New Coolant Tank
(right side) and a black hose connects to the Waste Tank (left side). The small diameter
black drain hose must be inserted into the hole in the cap of the Waste Tank.
1. Slide the New Coolant Tank to the
rear and sit it on the floor.
2. Remove the tank cap and fill the
tank with new coolant and water in
the proportions specified by the
coolant supplier. The tank can be
disconnected and moved to a bulk
coolant storage area for filling if
desired. A plug is provided on the
cap to prevent spillage during
transport.
3. Replace the tank cap and position
the tank in the MCX-2F. Make sure
the green hose is securely
connected. Slide the tank to the
front so the liquid level can be
seen through the front panel slot.
4. Make sure the plugs are removed from the caps on the Waste Tank and
the New Coolant Tank. This is required for venting the tanks during
operation. The small diameter black drain hose must be inserted into the
hole in the cap of the Waste Tank.
5. Fasten the clips on the tank strap to secure the tanks in the MCX-2F.
Install Filter and Bowl on rear of MCX-2F as shown.
These items are shipped in the carton with the
adapters and adapter hoses.