Axfa14 – Yokogawa AXFA14G/C User Manual
Page 19
IM 1E6K2-E
4-19-11
4. OPERATION
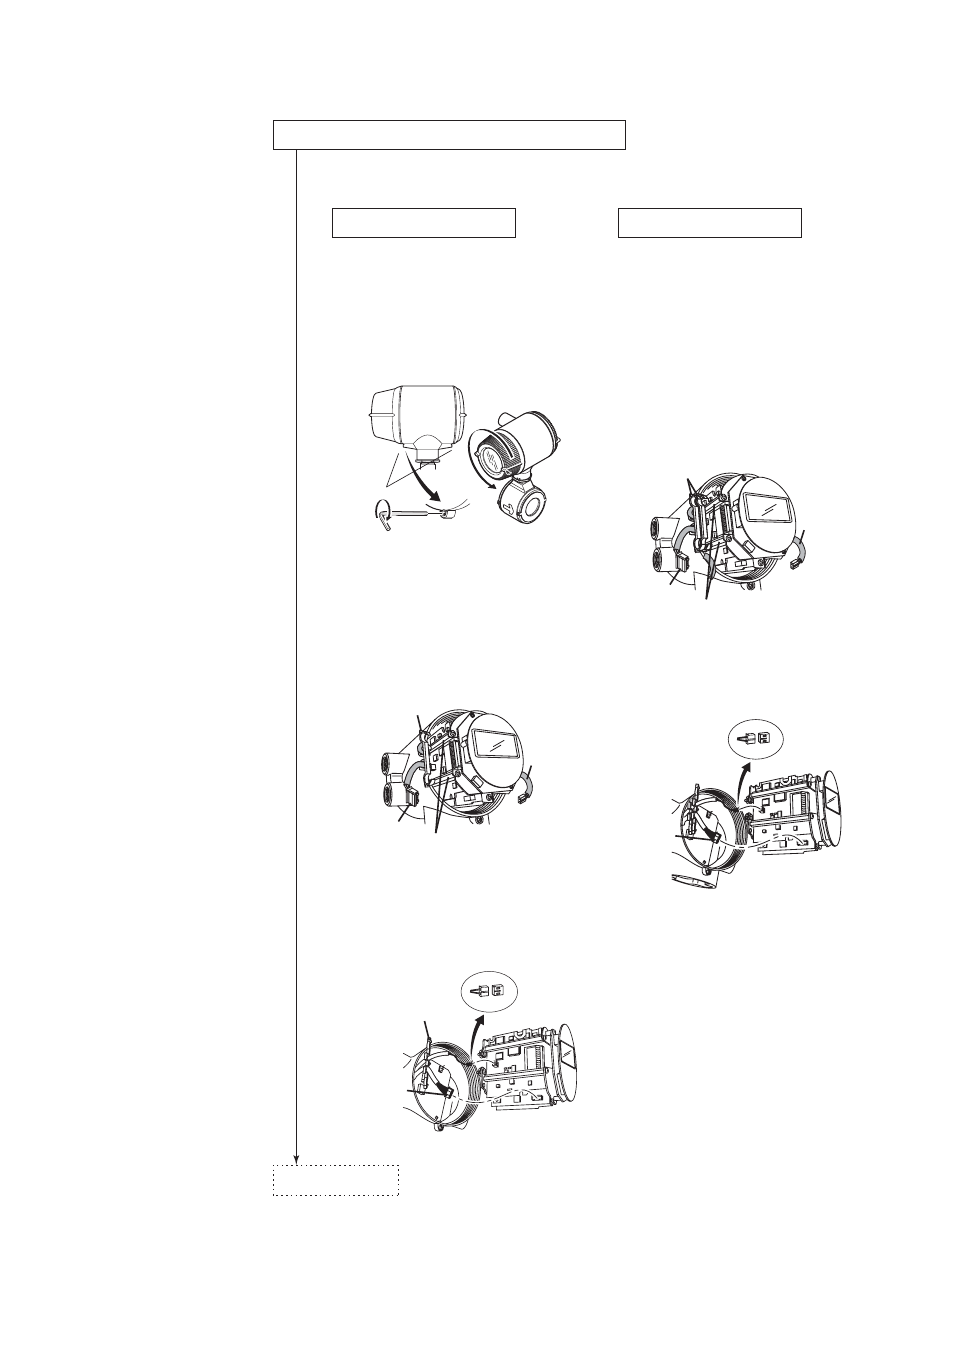
Remove the amplifier unit from the converter.
AXF integral flowmeter
• How to remove the amplifier unit (AXFA14 and AXF integral flowmeter are same procedure).
See IM 01E20F02-01E regarding the procedure of removing amplifier unit.
(1) Turn off the power
(2) Remove the cover
Loosen cover locking screw 1 clockwise
using a hexagonal wrench (nominal size 3)
to unlock the cover. (Upon shipment from
the manufacturing plant, the cover is
locked.) Hold the flowmeter with your
hand and remove the cover by turning it in
the direction of the arrow as shown below.
AXFA14
(1) Turn off the power
(2) Remove the cover referring to integral
flowmeter explanation in item (2).
(3) Remove wiring connectors 1 and 2 (for
exact connector locations, please refer to
IM01E20C02-01E Figure 11.1.6) from the
amplifier assembly. Remove them
carefully, without applying excessive force.
(4) Pulling up wire together with connector 1
and two lead wire fasteners be moved
along the rods upwards letting two
fasteners close by together.
(5) Detach two lead wire fasteners from the
rods to be able to see mounting screws.
(Figure 4.9.5)
(6) Loosen the three mounting screws while
holding the assembly with your hand.
(7) Pull the assembly straight out.
(8) Remove wiring connector31.(Figure 4.9.6)
(3) Remove wiring connectors 1 and 2 (for
exact connector locations, please refer to
IM01E20D01-01E Chapter 5 Figure 5.4.6)
from the amplifier assembly. Remove
them carefully, without applying excessive
force.
(4) Detach a lead wire fastener from the rods
to be able to see mounting screws.(Figure
4.9.3)
(5) Loosen the three mounting screws while
holding the assembly with your hand (refer
to IM01E20D01-01E Figure 5.4.6).
(6) Pull the assembly straight out.
(7) Remove the wiring connector31. (Figure
4.9.4)
Figure 4.9.2 Removing the Display Cover
Figure 4.9.5 Detach Two Lead Wire Fasteners
Figure 4.9.6 Remove the Wiring Connector 31
Figure 4.9.3 Detach a Lead Wire Fastener
Figure 4.9.4 Remove the Wiring Connector 31
Cover locking screws
᭺
1
᭺
2
Wiring
connector 2
Wiring
connector 1
Fastener
Rod
Wiring connector 31
Wiring
connector 1
Fastener
Wiring
connector 2
Wiring
connector 1
Fasteners
Rod
Wiring connector 31
Wiring
connector 1
To next page