Pfister 023-CNFC/023-CNFCA User Manual
Page 5
5
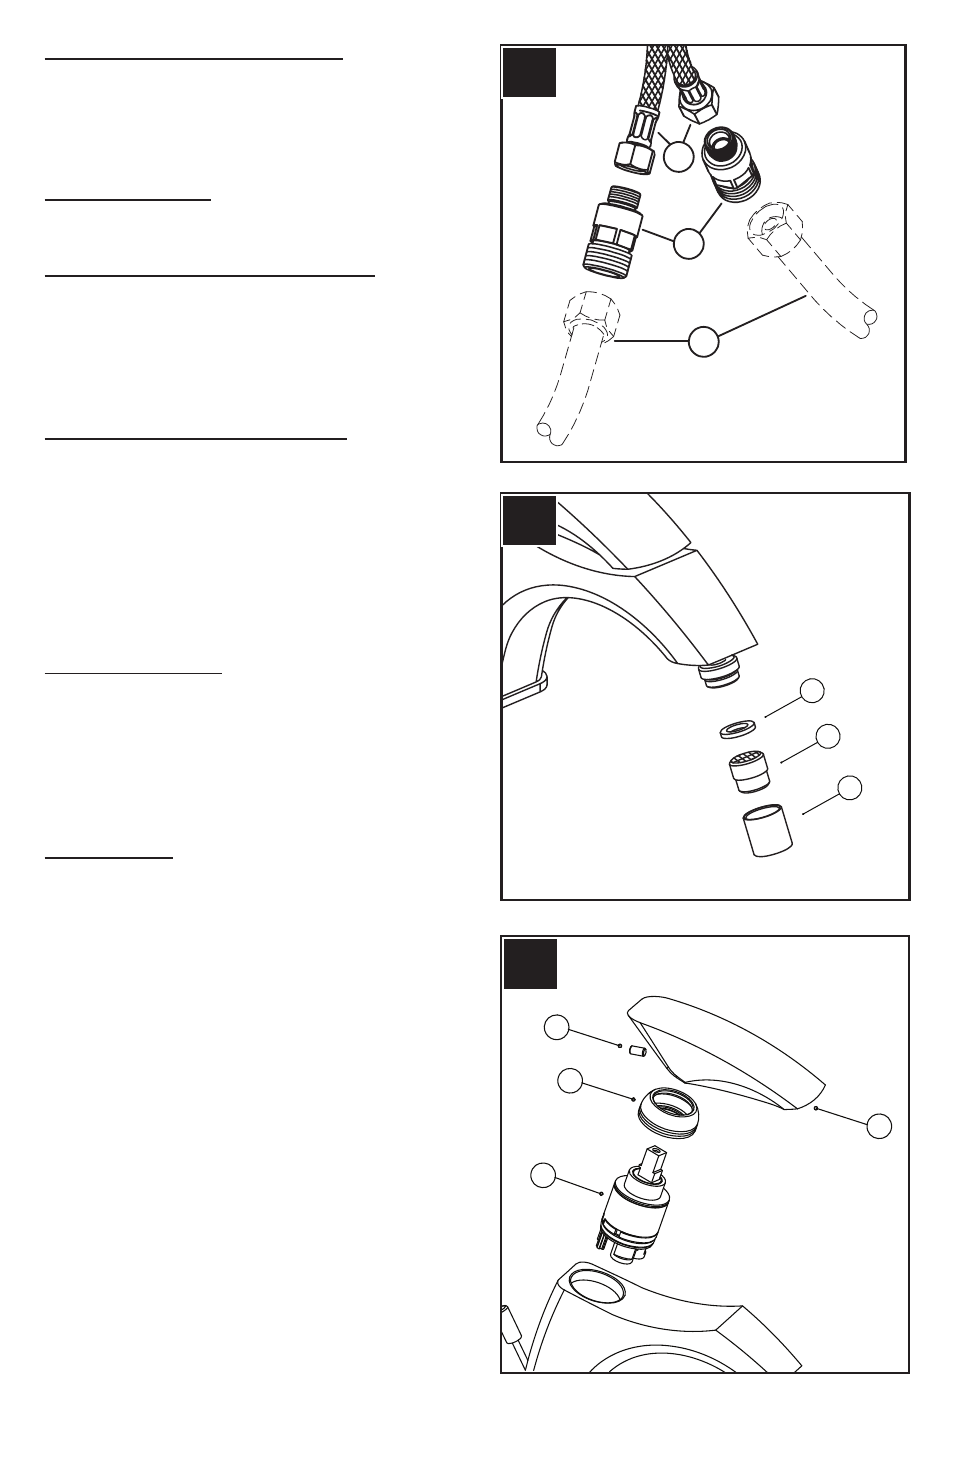
6 WATER SUPPLY LINES (Fig.B)
If necessary thread Adapter (2) into Bidet Inlets (1). Connect
water Supply Lines (3) to Bidet Inlets (8). Hot water supply
line goes to hot inlet fitting. (Supply lines not included).
Follow manufacturer’s instructions when installing supply
lines.
7 UNIT START UP
Turn on hot and cold water supplies, and check for leaks
above and below the sink.
8 CLEANING THE AERATOR (Fig.C)
It is advisable to periodically clean the aerator, in order to
avoid build-up of dirt and limestone, which in time could
gradually limit the water flow. To disassemble the Aerator
(1), unscrew it and clean the Filter (2) from all impurities,
reassemble by proceeding in the reverse order making
sure the Gasket (3) is correctly placed.
9 CARTRIDGE REMOVAL (Fig.D)
Turn off water supplies and relieve pressure before
working on your Bidet! Loosen Set Screw (1) and remove
Handle (2). Remove the Dome Cap (3) by unscrewing
counterclockwise. Carefully remove the Cartridge (4)
by pulling it straight up and out. Reassemble valve by
reversing steps.
CAUTION: Maintenance
DISASSEMBLY
1. Replacement parts may be available at the store where
you purchased your Bidet.
2. When replacement parts are not available, please write or
call Price Pfister Consumer Service.
3. Always turn off water and relieve pressure before
working on your Bidet.
NOTE: Trim Care
Cleaning Instructions:
For all handles and decorative finishes, use only a soft damp
cloth to clean and shine. Use of polish, detergents, abrasive
cleaners, organic solvents or acid may cause damage. Use
of other than a soft damp cloth will nullify our warranty!
Special Trim:
Trim products which contain porcelain or other similar
substance are not acceptable for public areas or Commercial
use. Installation of Said Trim is at Users Risk!
D
1
3
2
4
2
1
3
C
3
2
HOT
COLD
1
B