Reelcraft Series WC80000 Welding Cable Reels User Manual
Page 2
Series WC80000 Welding Cable Reels
Page 2
www.reelcraft.com
INSTALLATION INSTRUCTIONS
Ensure that only a qualified electrician installs/service this equiment.
Observe applicable NEC, OSHA, and local codes when installing this
equipment.
MOUNTING
Caution: Unless reel was specified differently when ordering, maxi-
mum installation height is 16 feet. Do not exceed this distance.
1. Unpack and inspect reel for damage. Turn by hand to check for
smooth operation. Check for completeness.
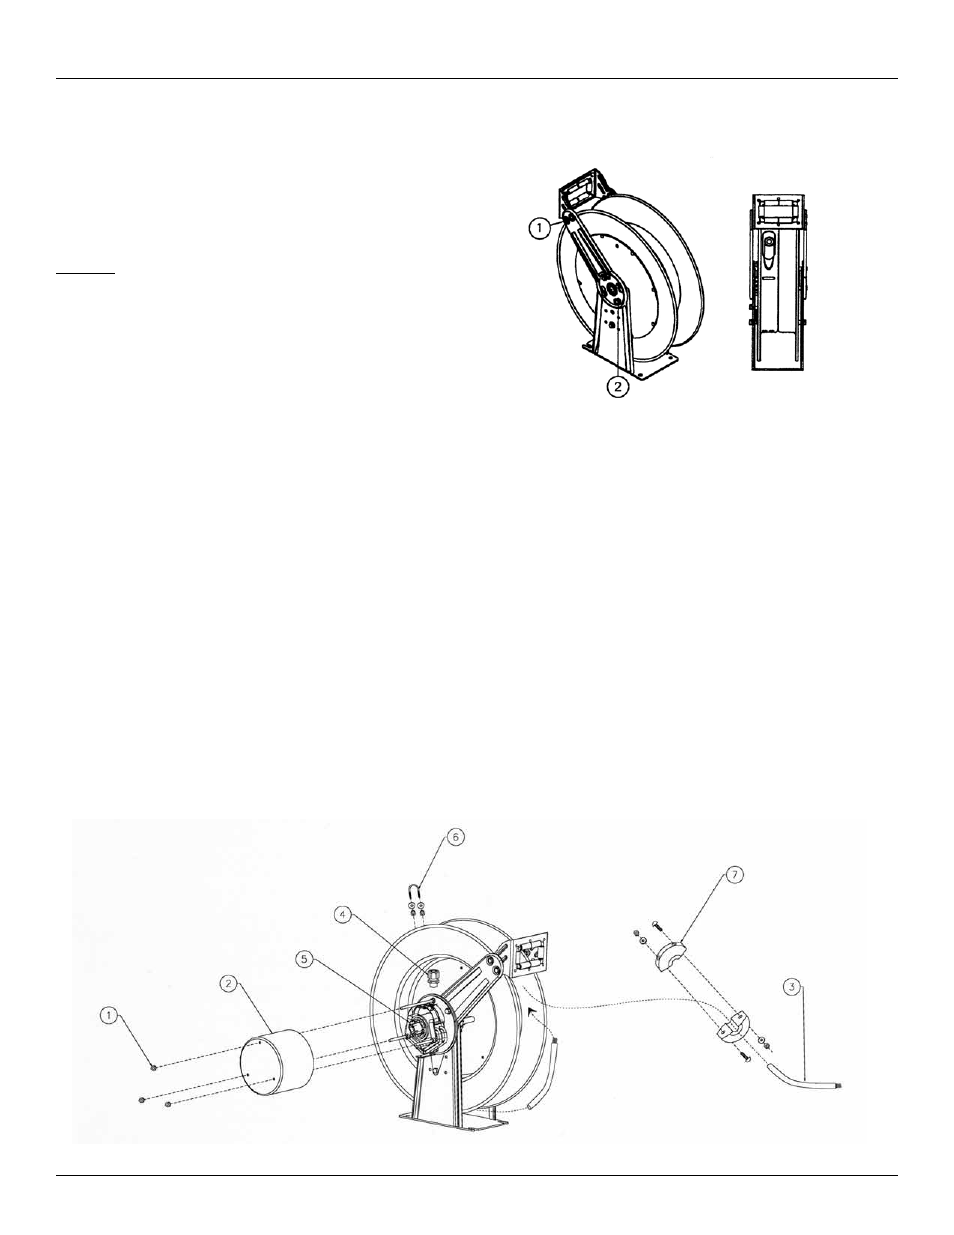
2. Configure reel for top, side or bottom hose dispensing by remov-
ing the bolts (1) from one side of the guide roller bracket and
loosening the four guide arm bolts (2) on each side of the cable
reel. Rotate and remove each guide arm then reinstall in the
desired configuration.
3. Position reel on floor, wall, or ceiling. Secure into place using four
(customer supplied) bolts.
INSTALLING THE OUTPUT CABLE
1. Remove the three outer nuts (1) on the collector ring cover, and remove the cover (2).
2. Strip 1 1/8” of installation from the output cable (3), and insert the cable around the reel spool (not through the guide arm open-
ing).
3. Add protective tubing around opening in spool. Next route the output cable through the opening in the spool, through the strain
relief (4), through the mainshaft, and then capture cable at end of collector ring with set-screw (5). Fasten the strain relief to the
mainshaft and then tighten the cable with the strain relief.
4. Replace the collector ring cover (2) and secure with three outer nuts (1).
5. Fasten cable to spool by capturing with u-bolt (6) and then tightening to spool with washers and nuts.
6. Wrap all of the output cable around the spool.
7. Once cable is wound on the spool add additional turns (2-3 should be sufficient) to add tension to cable.
8. Add bumper (7) to cable at desired location.
9. Using an ohmmeter, check for ground faults.