Installation steps, Unpack, Remove chassis cover and hdd bracket – IEI Integration EBC-3100 User Manual
Page 4: Install i/o bracket, Install single board computer (sbc)
EBC-3100 IEI Technology Corp. Page 4
INSTALLATION STEPS
To install the EBC-3100 chassis, the following installation steps must be
completed:
1.
Remove Chassis Cover
2.
Install I/O Bracket
3. Install
SBC
4. Install
HDD
5. Install
ODD
6.
Front Panel Connections
7.
Reinstall Chassis Cover
8.
Wall Mounting (optional)
The installation steps outlined above are described in detail below. Please
refer to the relevant section.
UNPACK
The RACK-4000B is shipped in a plastic bag that is placed inside a
cardboard box. The accessories are also shipped with the chassis. When
unpacking the chassis:
Make sure all the accessories and components mentioned in the
PACKING LIST section are present.
Make sure the chassis has not been damaged in any way
REMOVE CHASSIS COVER AND HDD
BRACKET
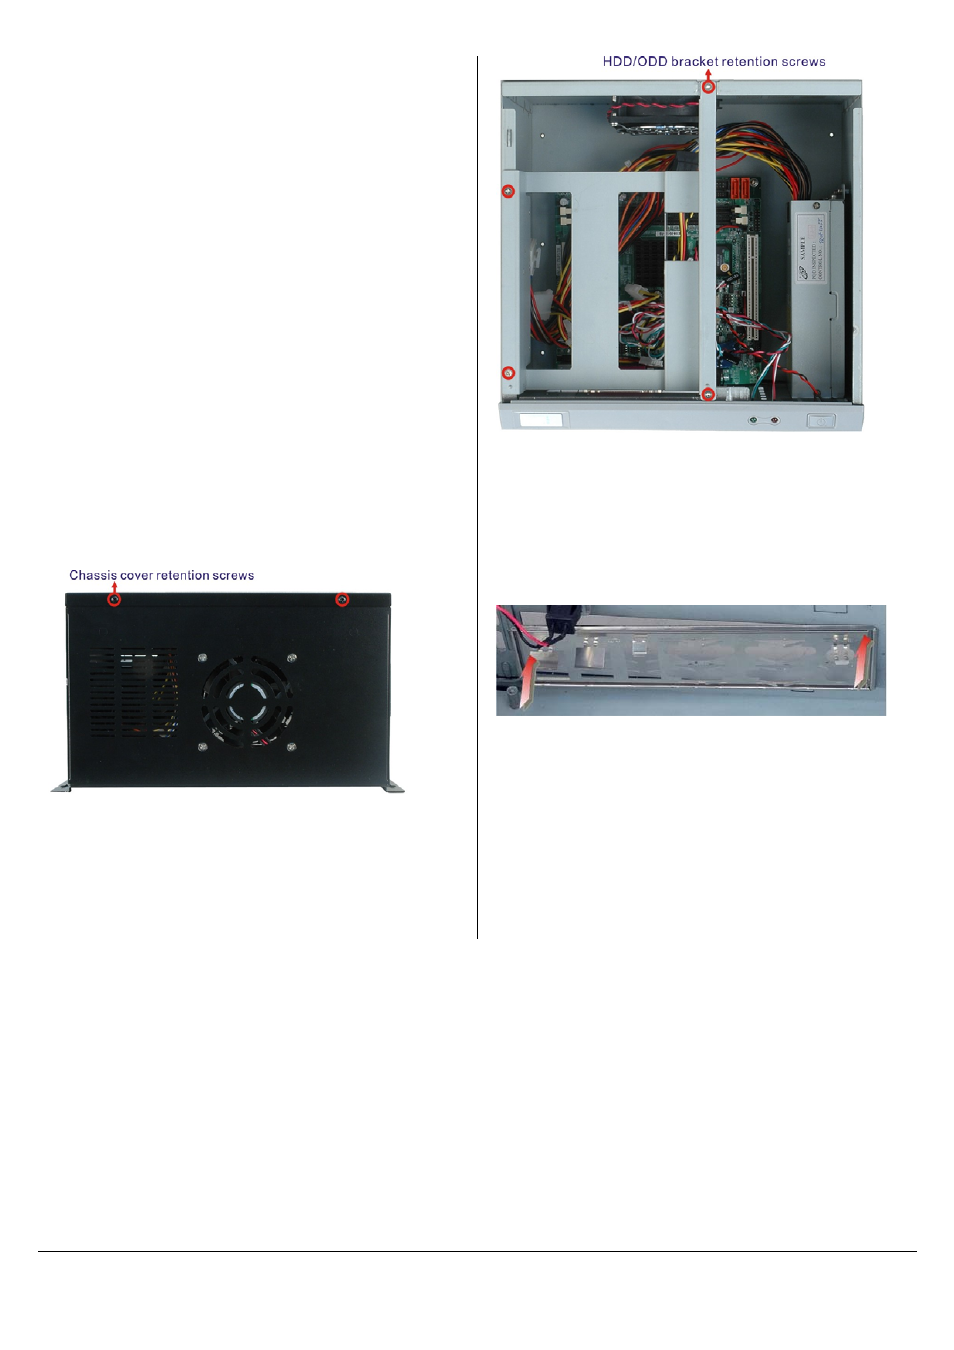
Step 1:
Remove the chassis cover retention screw on the
rear panel (Figure 3).
Figure 3: Chassis Cover Retention Screws
Step 2:
Push the cover back to separate it from the chassis
until the cover case can be lifted from the chassis
Step 3:
Remove HDD bracket. The bracket is attached to
the chassis by four retention screws (Figure 4).
Remove the retention screws.
Figure 4: HDD/ODD Bracket Retention Screws
INSTALL I/O BRACKET
Note: I/O brackets differ in appearance depending on the SBC model to be
installed in the EBC-3000.
Step 1:
Snap the I/O bracket into place from the inside of
the chassis.
Figure 5: I/O Bracket Installation
INSTALL SINGLE BOARD COMPUTER (SBC)
To install a Single Board Computer (SBC) with cooling kit into the chassis,
please follow these steps:
Step 1:
Mount the SBC on the four metal posts on the
bottom of the chassis. Make sure the SBC I/O
interface panel is aligned with the I/O bracket.