3 dimm installation, Figure 4-6: dimm installation – IEI Integration IMBA-C2160 User Manual
Page 73
IMBA-C2160 ATX Motherboard
Page 57
Step 2:
Place the cooling kit onto the socket LGA1155 CPU. Make sure the CPU
cable can be properly routed when the cooling kit is installed.
Step 3:
Mount the cooling kit. Gently place the cooling kit on top of the CPU. Make
sure the four threaded screws on the corners of the cooling kit properly pass
through the holes of the cooling kit bracket.
Step 4:
Secure the cooling kit by fastening the four retention screws of the cooling kit.
Step 5:
Connect the fan cable. Connect the cooling kit fan cable to the fan connector
on the IMBA-C2160. Carefully route the cable and avoid heat generating chips
and fan blades.
Step 0:
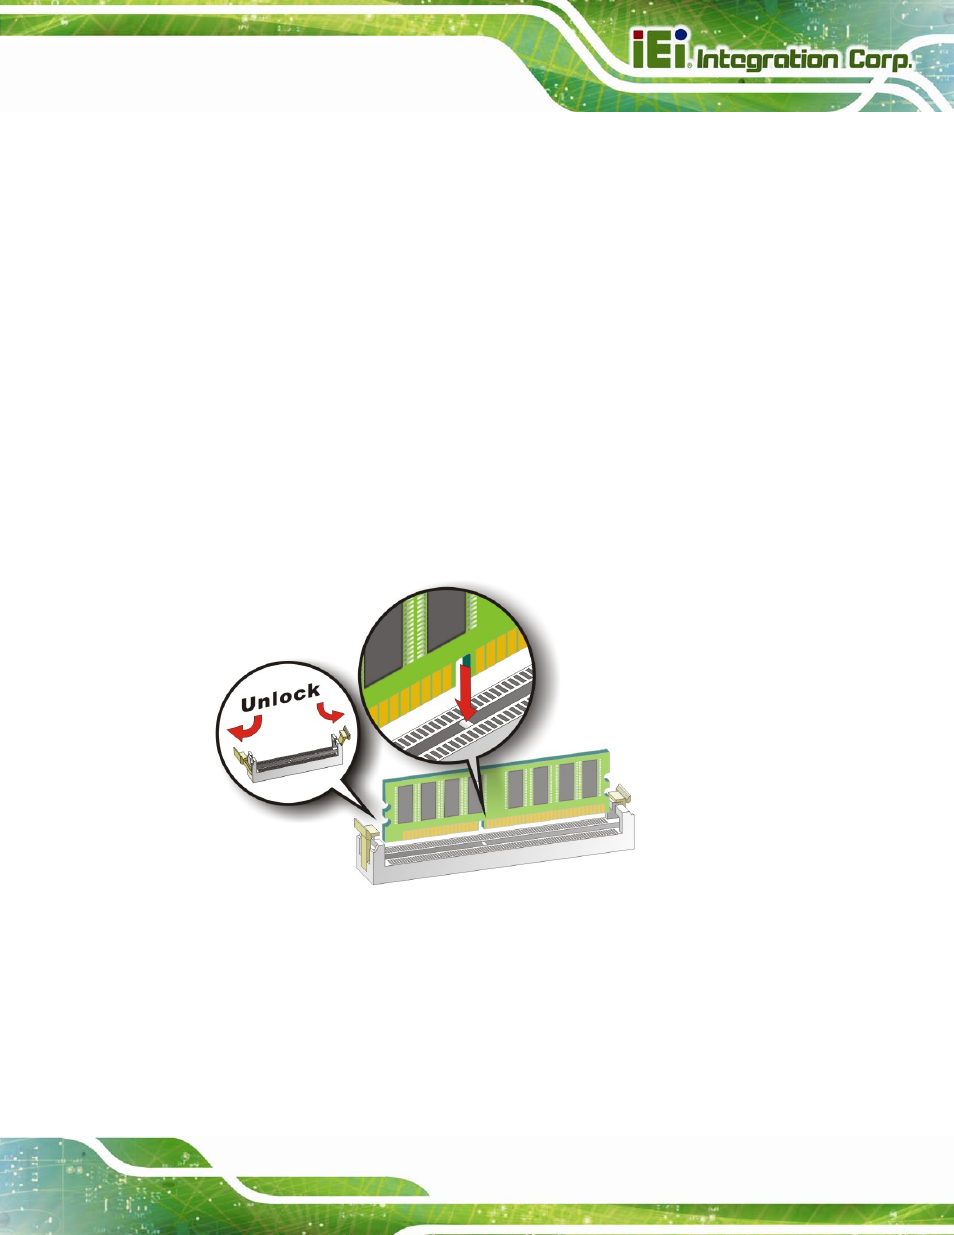
4.2.3 DIMM Installation
To install a DIMM, please follow the steps below and refer to Figure 4-6.
Figure 4-6: DIMM Installation
Step 1:
Open the DIMM socket handles. Open the two handles outwards as far as
they can. See Figure 4-6.
Step 2:
Align the DIMM with the socket. Align the DIMM so the notch on the memory
lines up with the notch on the memory socket. See Figure 4-6.