Dds-4 dat 72 – Avaya Sun Fire V880 User Manual
Page 129
Maintaining tape drives
Issue 2.0 June 2004
129
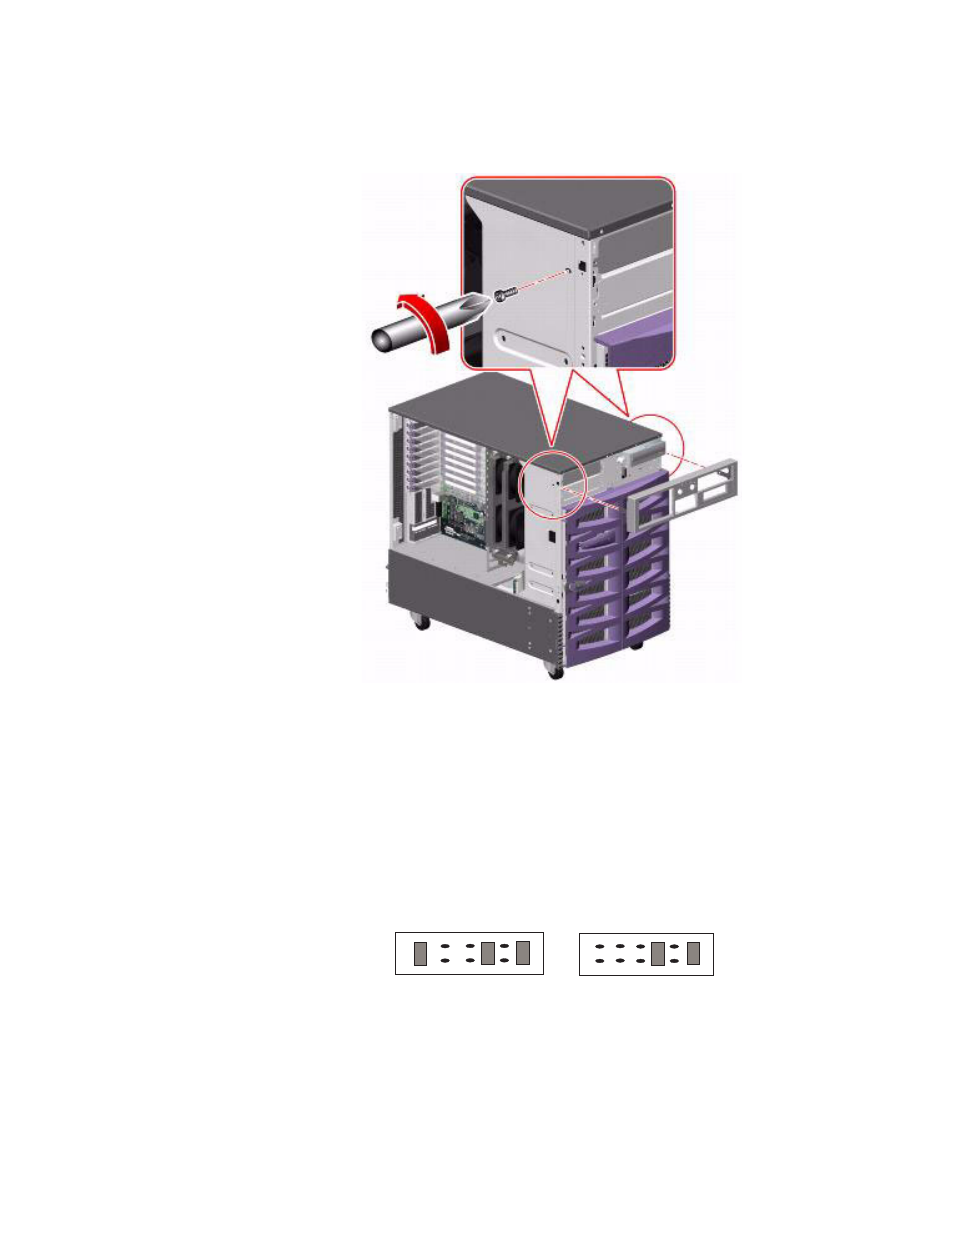
8. Remove the two screws securing the front cover to the front of the system. See the
following figure.
9. Remove the front cover.
10. Disconnect the data and power cables from the back of the drive.
11. Remove the two screws that secure the drive to the chassis.
12. Slide the drive out through the front of the chassis.
13. Set the SCSI address on the new drive using the jumpers on the back of the drive. Set
the tape drive to 5. See the following figure.
14. Slide the replacement drive into the chassis and secure it with the screws that you
removed earlier.
8 4 2 1
tape_jumpers.cdr
TP NC 8 4 2 1
DDS-4
DAT 72